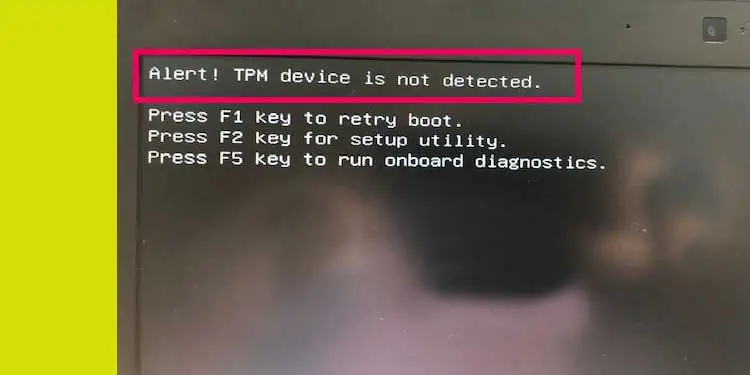
The TPM (Trusted Platform Module) is a chip that is soldered or attached to the motherboard which stores personal data. So, when we get the error message “TPM device not detected“, the system cannot detect this chip during boot.
What Causes TPM Device not Detected Error?
Before we start with the fixes, let us see why a computer cannot detect the TPM chip.
- Outdated BIOS
- TPM chip damaged
- Network connection issues
- Problem with TPM keys
How to Fix TPM Device not Detected Error?
Here are some solutions you can try if the system cannot detect Trusted Platform Module.
Remove the Power Supply
Sometimes, there may be a power usage issue that can cause the Trusted Platform Module to malfunction due to unknown reasons. A simple restart may solve this issue, but there is always some charge left in the motherboard capacitor, resulting in the same problem even after a restart.
So, it is ideal to remove the power source completely and discharge all the capacitors. Once you remove the power supply from the wall outlet, press the Power button five to six times to discharge the capacitors.
If you are on a laptop, we recommend removing the battery and pressing the power button multiple times to discharge its capacitors.
Once you complete the process, plug the computer back in and turn it on. The system should detect the TPM chip. If not, our solutions mentioned below may work for you.
Enable TPM
If the computer does not detect the Trusted Platform Module, it is most probable that the TPM settings in the computer are disabled. If so, we need to enable it. There are two versions of TPM, TPM 1.2 and TPM 2.0. We can follow the same process to enable both versions of TPM.
You can follow these steps to Enable TPM.
- Enter your motherboard’s BIOS by pressing Delt, F2, or F9 during startup, depending on the manufacturer.
- Look for the option named Security.
- Then, locate TPM, Intel Platform Trust Technology (IPTT), or AMD CPU fTPM. Enable TPM visibility. This step may be different as there may be a checkbox or a toggle bar to enable or disable the TPM utility,
- Now, select Save and exit.
Once the computer starts, the system should detect the TPM chip. Try other solutions mentioned below if the TPM setting is not seen in the BIOS.
Udpate/Rollback BIOS
As the BIOS(Basic Input/Output System) controls all computer’s internal and external hardware components, this component may start to malfunction if we do not perform a BIOS update every now and then. It is the same case for the TPM chip, i.e., there may be an error while detecting this component if we do not update the BIOS.
When performing a BIOS update, we should not interfere as power loss during a BIOS update may result in a corrupted motherboard.
Mostly, updating the BIOS will work perfectly on solving this issue. However, if you notice this error after a BIOS update, we may have to downgrade the motherboard BIOS.
To roll back a BIOS update, first, we need to download the desired version of motherboard BIOS from the official manufacturer’s website.
Reset BIOS
In the above solution, Enable TPM, if the BIOS does not include the option to enable the TPM settings, we need to perform a BIOS reset. Doing so will revert all its settings to default which will make the system detect all hardware along with their configurations.
Here are a few ways you can reset BIOS.
- Reset option in BIOS itself.
- Remove the CMOS
- Reset using a jumper
Update TPM Driver
Another reason the system is not detecting the Trusted Platform Module device is an outdated TPM driver. As the TPM chip is a physical chip, it does require a driver for the OS to communicate with it.
To update the TPM driver, open the Device Manager by pressing the Windows key and X simultaneously. Now, expand Security Devices and right-click on Trusted Platform Module 2.0 (or Trusted Platform Module 1.2, depending on the computer’s TPM version). Click on Update driver. Then, click on Search automatically for drivers. 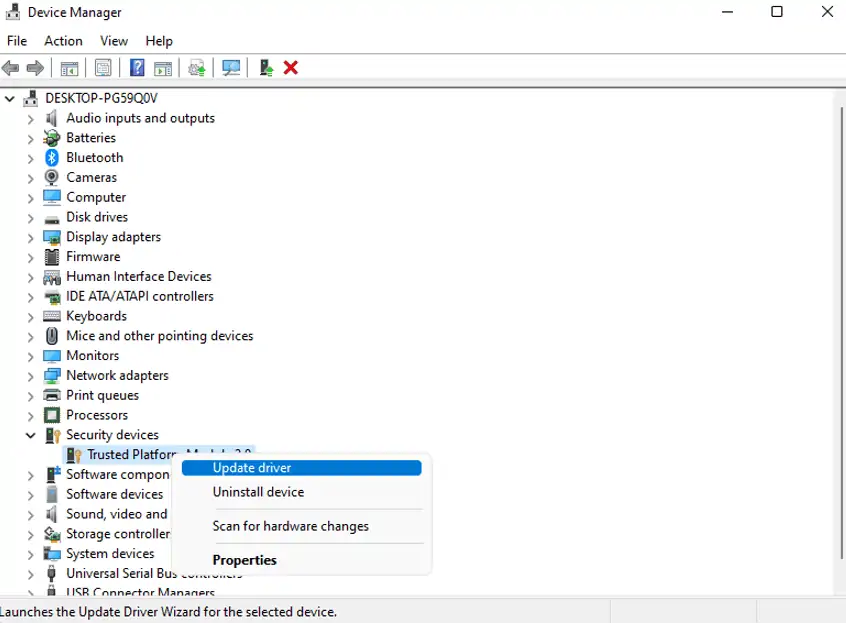
Once the update is complete, restart your computer to check if the issue still persists.
Troubleshoot Network Connection
According to official Microsoft documentation, if the system uses Windows 10, version 1507 or 1511, or Windows 11, the computer will have a hard time detecting and initializing TPM if there is a network connection issue.
Along with this, if the system admin has configured the computer to require the TPM recovery information to be saved in ADDS (Active Directory Domain Services) and if the computer cannot reach its domain controller, it cannot initialize the TPM.
To solve this issue, we can run the network connection troubleshooter to check for any problems regarding the internet connection. Also, if the system administrator has configured the TPM information to be saved in ADDS, we need to disable this feature. You can follow these steps to disable TPM recovery in ADDS.
Warning: Wrong registry changes can have a negative impact on your operating system and even cause it to malfunction.
- Press the Windows Key and R simultaneously.
- Type “Regedit” without the quotation mark and press Enter.
- Navigate to Computer\HKEY_LOCAL_MACHINE\SOFTWARE\Policies\Microsoft\TPM.
- Now, on the right panel, double-click on ActiveDirectoryBackup and set the Value data as 0 to disable the policy. Repeat the similar process for RequireActiveDirectoryBackup.
If the Registry does not have these values, we can use the Group Policy Editor to turn off TPM backup to ADDS.
- Press the Windows Key and R simultaneously.
- Type “gpedit.msc” and press Enter.
- Navigate to Administrative Templates > System > Trusted Platform Module Services.
- On the right panel, double click on Turn on TPM backup to Activate Directory Domain Services.
- Check Not configured or Disabled.
- Click Apply, then OK.
The Group Policy Editor utility is only available on Windows Professional and Enterprise edition. Windows Home edition users need to enable the Local Group Policy Editor feature using a third-party tool.
Clear all keys from TPM
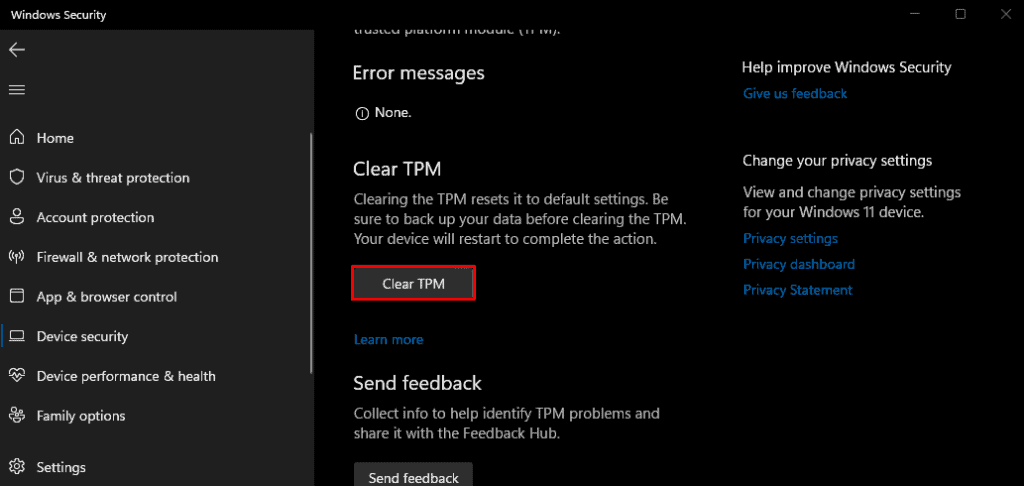
We can use the Windows Defender Security Center utility to clear the TPM values as a final solution before replacing the TPM chip itself. Clearing the TPM values will erase all information inside the TPM chip, reset it to the default state, and delete data protected by those keys.
You can follow these steps to clear the TPM.
- Press the Windows key + I.
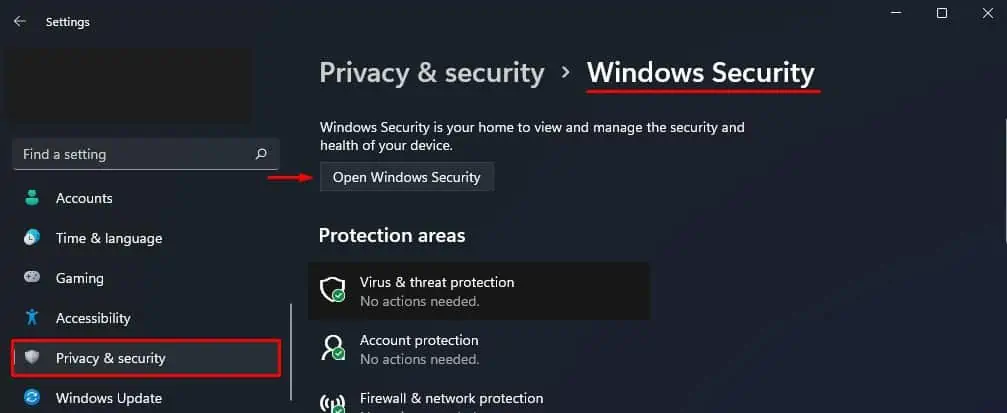
- Go to Privacy & security > Windows security > Open Windows Security.

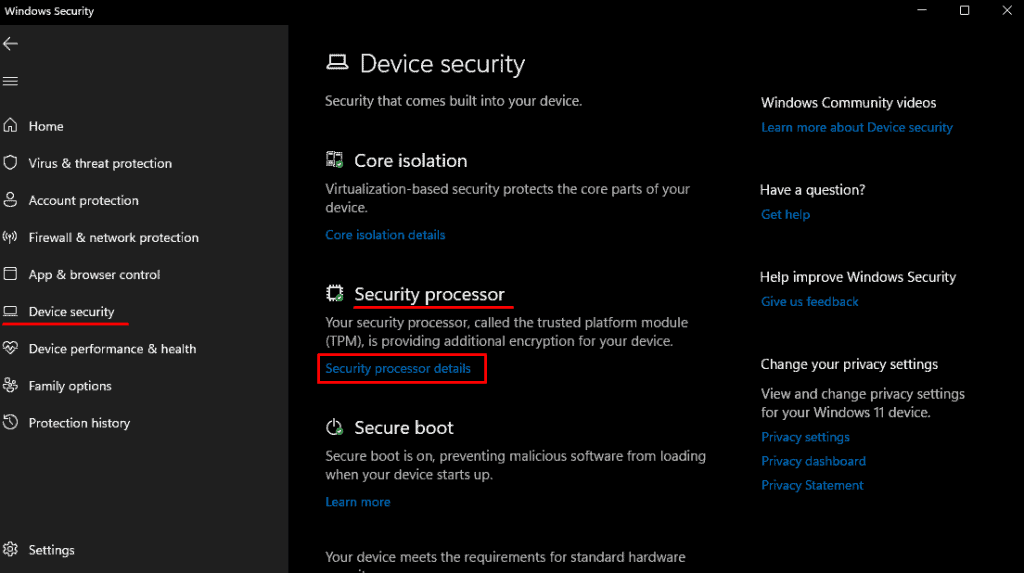
- Once the Windows Security dialog box opens, click on Device security.
- Under Security processor, click on Security processor details.

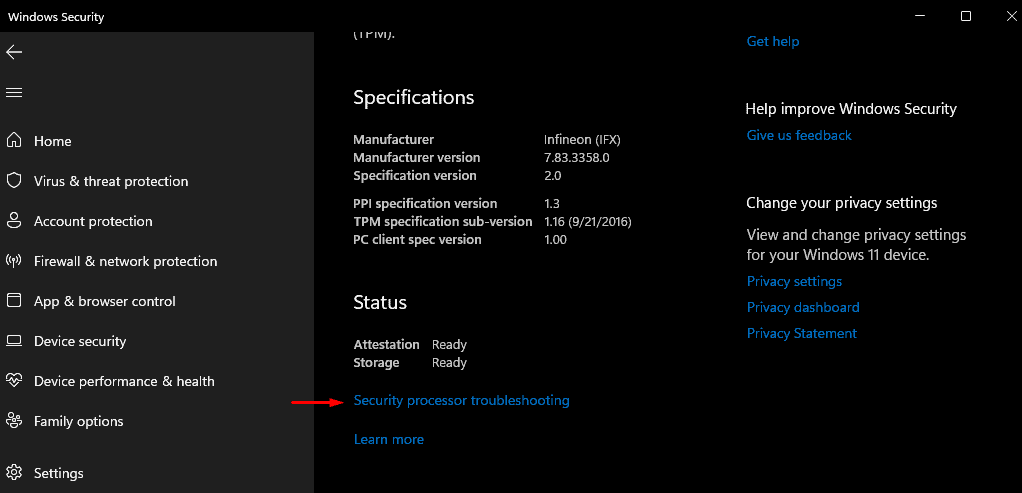
- Click on Security processor troubleshooting.

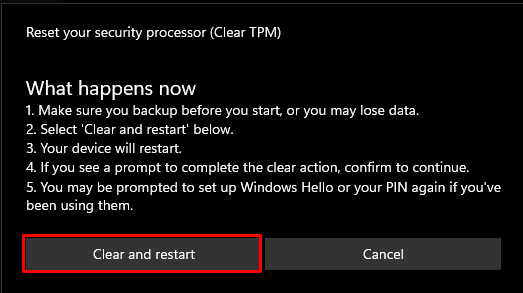
- Click on clear TMP.

- Now select Clear and restart.

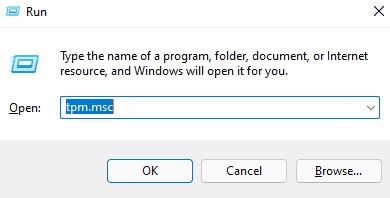
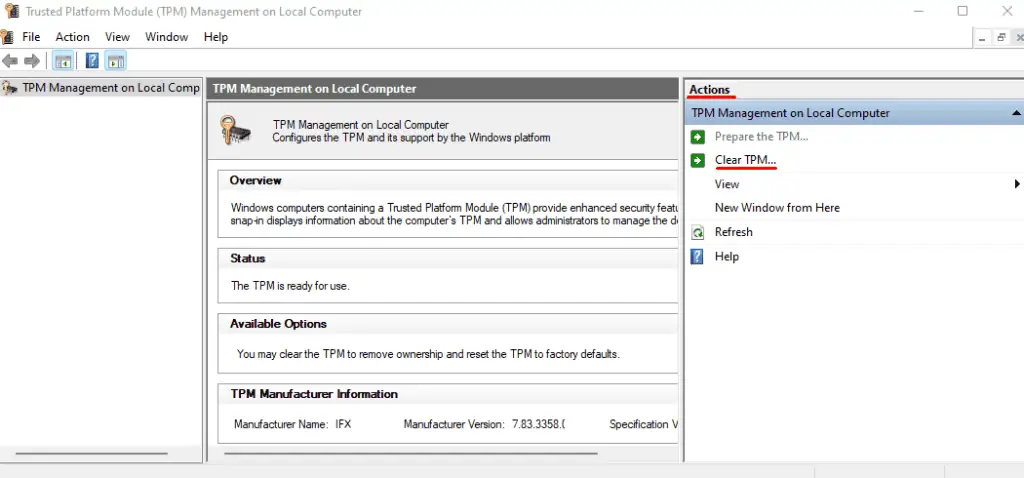
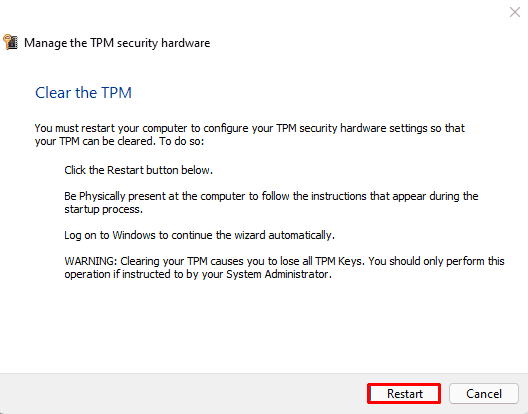
Alternately, you can also follow these steps to clear TMP.
- Press the Windows + R key.

- Type “tpm.msc” and press Enter.
- Under Action, click on Clear TPM…

- Click on Restart.


