VirtualBox offers multiple built-in methods to transfer files between VirtualBox and the host, thanks to VirtualBox Guest Additions. Even without GAs, you can share the files over a network or just use a USB to transfer files between the two systems.
This is definitely easier said than done, though. Some preliminary steps are required, without which these methods won’t work. We’ve listed the steps for all of these methods with further details in the sections below.
How to Transfer Files VirtualBox To Host
VirtualBox GAs are basically a collection of device drivers and system applications. Installing it enables support for various features, including Drag and Drop, Shared Folders, and Shared Clipboard. So, if you’re going to use any of these methods, you should check the next section for steps to install GAs first.
But if you’re going to use the Network Share or USB Drive methods, this isn’t necessary, and you can simply skip head to those sections.
Install VirtualBox Guest Additions (Optional)
Here are the steps to install VirtualBox GAs for your VM:
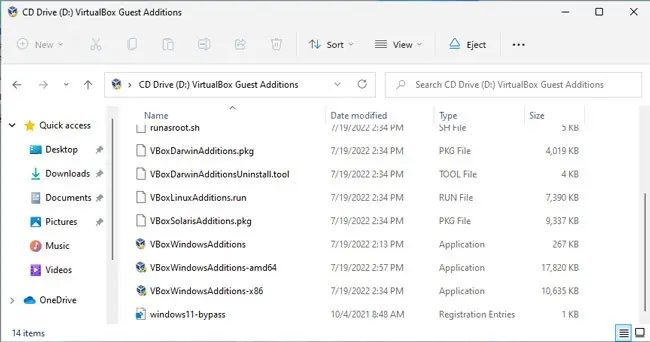
- Power on the VM and select Devices > Insert Guest Additions CD Image to mount the CD.
- Navigate to the mounted directory and run the
VBoxAdditions.exefile. Depending on the Guest OS, the filename will differ slightly, but in the case of Windows VMs, it’s namedVBoxWindowsAdditions.exe.
- Follow the on-screen instructions to complete the installation and restart the guest OS.
Drag and Drop (DnD)
As the name suggests, you can directly drag and drop files between VirtualBox and the host by enabling DnD.
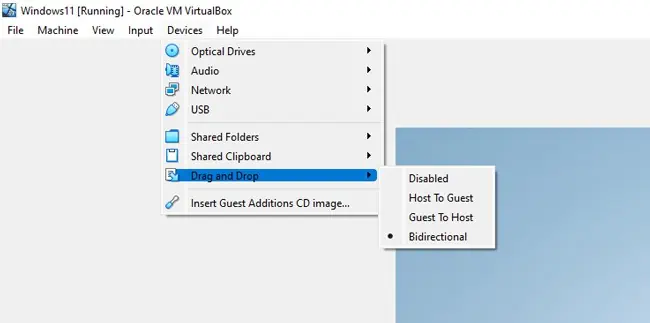
- Power on the VM and select Devices > Drag and Drop.
- Select Guest to Host or Bidirectional as you prefer.

- Select a file in VirtualBox, drag it outside the VM window, and drop it onto the host.
Drag and Drop is an extremely convenient and intuitive feature, but it’s not without its flaws. We have an in-depth article that will be helpful in case DnD isn’t working.
Shared Folders
Shared folders are another easy way to share files between VirtualBox and the host.
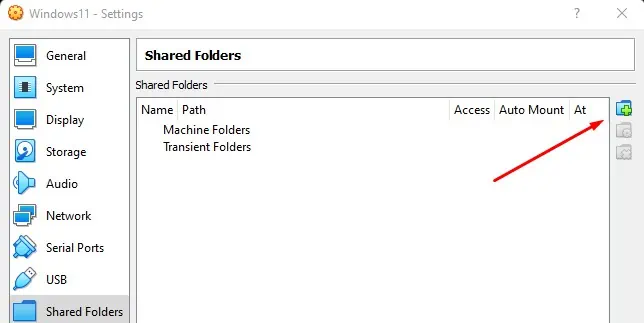
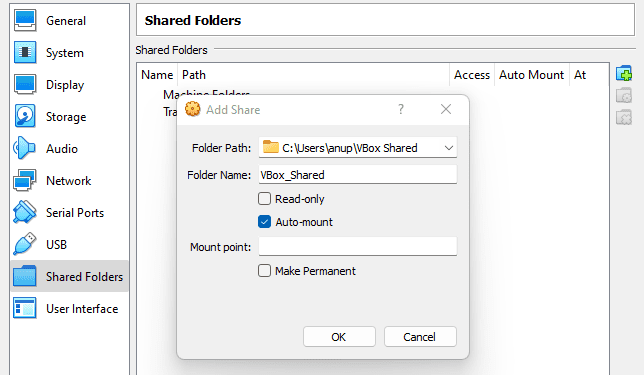
- Power on the VM and select Devices > Shared Folders > Shared Folder Settings.
- Press the Add new shared folders button.

- Click on the Folder Path dropdown arrow and select Other.
- Locate the folder you’re trying to share.
- Enable the Auto-mount option and press Ok.

Shared Clipboard
You can also configure the guest OS to use the same clipboard as the host, such that you can copy a file inside VirtualBox and paste it onto the host. Here’s how you can do this:
- Power on the VM and select Devices > Shared Clipboard.
- Select Guest to Host or Bidirectional as you prefer.

- Test the feature by copying a file inside the guest and pasting it onto the host.
Network Share
To share files between the guest and host over a network, you must first ensure they’re on the same network. Here’s how you can do this:
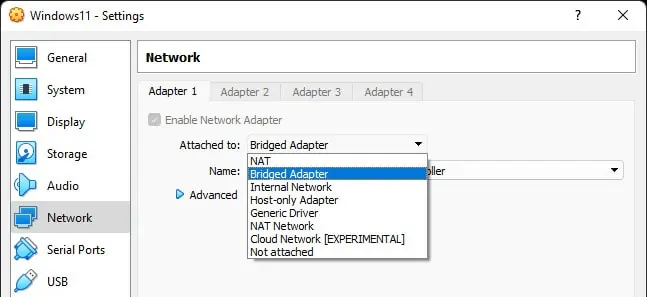
- Power on the VM and select Devices > Network > Network Settings.
- Select Attached to: Bridged Adapter and press OK.

- Use
ipconfigor a similar utility to check the host and guest’s IP addresses for confirmation and note them down for later.
Now, you can share the folder from the guest OS and access it from the host. We’ve listed the steps to network share files between a Windows host and a Windows guest below.
But we also have an in-depth article that details how to share files between various platforms (Windows and Mac, Windows and Linux, etc.) if that’s what you require.
First, we must ensure File Sharing is enabled on both systems. Here’s how you can do so:
- Press Win + R, type
control, and press Enter. - Navigate to Network & Internet > Network and Sharing Center > Change advanced sharing settings.
- Expand the current profile section, enable the Network Discovery and File Sharing options and save the changes.

Now, here are the steps to actually share and access the files:
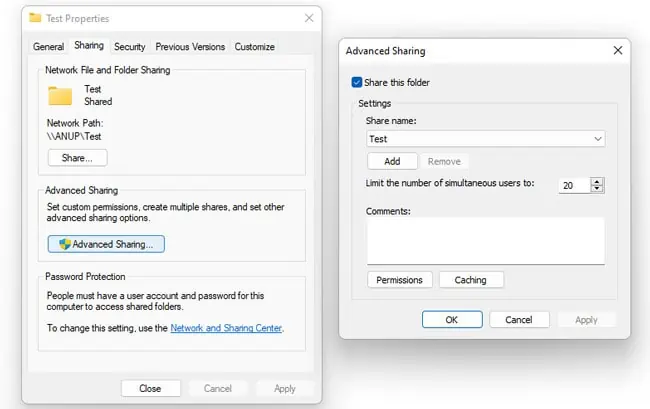
- On the guest OS, select the folder or drive you’re trying to share and press CTRL + Shift + Enter.
- In the Sharing tab, click on Advanced Sharing.
- Enable the Share this folder option and press OK.

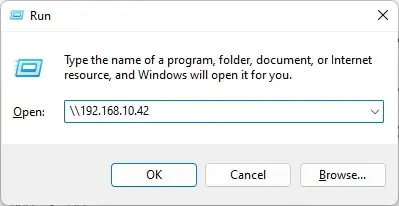
- On the host, press Win + R and enter:
\\<GuestIP>
- You should be able to access the shared folder now.
Optionally, you can also map the folder as a network drive for ease of access.
Using a USB Drive
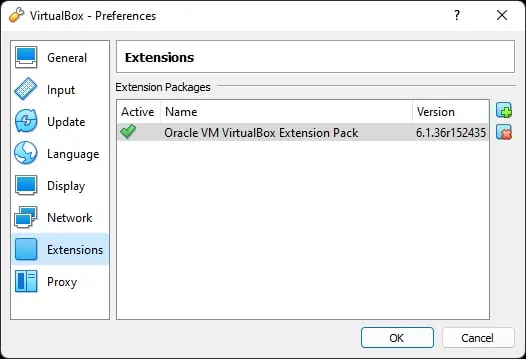
You can also simply use a USB drive to transfer files from VirtualBox to the host. Do note that you must have the VirtualBox Extension Pack installed for USB support.
- Download the extension pack for your VBox version.
- In VirtualBox, go to File > Preferences > Extensions and click on Add new package (+).

- Browse and select the extension pack you downloaded earlier and press Open.
- Accept the confirmation prompt and complete the installation.
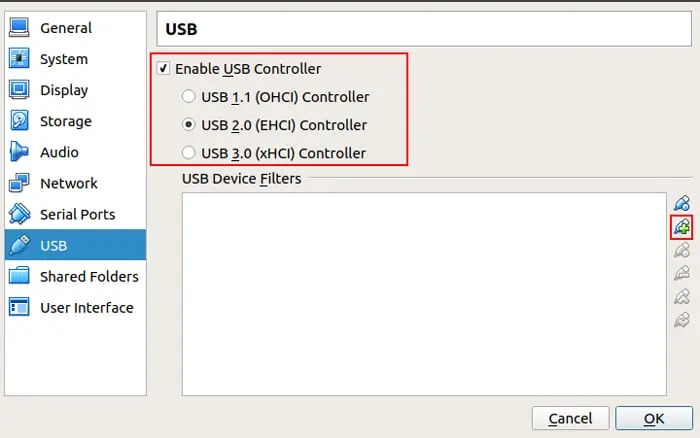
Afterward, connect the USB to your PC if you haven’t already done so, and follow the steps listed below to share files from the guest to the host OS:
- Select the VM and press CTRL + S.
- In the USB tab, select the appropriate USB controller to enable.

- Click on the Add new USB filter (+) button and select the USB device.
- Power on the VM. The USB should be accessible in the VM now.
- Copy the files to the USB and power off the VM afterward.
- Now paste the files onto the host.
Cloud Storage
Last but not least, cloud storage could also be a viable option for transferring files from VirtualBox to the host, although a roundabout one. Google Drive (15 GB) and Microsoft OneDrive (5GB) offer free options that you could use if the files you’re trying to transfer are small enough.
How to Transfer Files From Host to Virtual Machine?
You can use the same methods we’ve used in this article, in reverse, to transfer files from the host to the VM.
With DnD, Shared Folders, and Shared Clipboard, you’d select Host to Guest or Bidirectional. And in the case of Network Share, you’d share the folder from the host and access it from the VM.
We also have a dedicated article on transferring files to the VM, with other methods like mounting virtual disks, if you’re interested in further reading.

