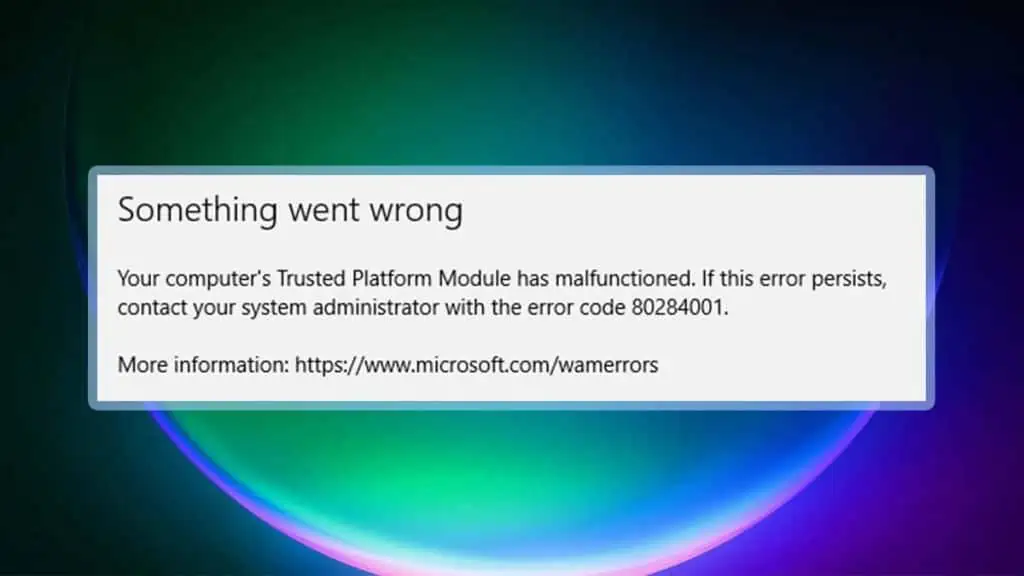
When an Microsoft 365 app fail to activate, it may give you the error “Your computer’s Trusted Platform Module has malfunctioned.”
It can come with different codes like 80090016, 80090030, 80284001, and so on. All individual error codes represent various causes and may need different solutions.
In general, you have to troubleshoot the activation state, reconnect to the Microsoft 365 work account, and resolve any credential/authentication issues. You should also look out for possible TPM issues.
If all these methods fail, create a new user account and start using Microsoft 365 from scratch.
Now, let’s discuss all these solutions in detail.
Reset Microsoft 365 Activation State
The first thing you should do is download and run the Microsoft Support and Recovery Assistant (SaRA) to reset the Microsoft 365 activation state. It will look for most issues with the activation process and automatically deal with them.
Disconnect and Reconnect to the Work Account
An easy fix that has worked for most users is to disconnect and reconnect to the Active Directory or Work Account that you use for Microsoft 365. It will refresh the connection and allow you to enter your credentials and activation keys afresh.
For this process,
- Press Windows + I to open Settings.
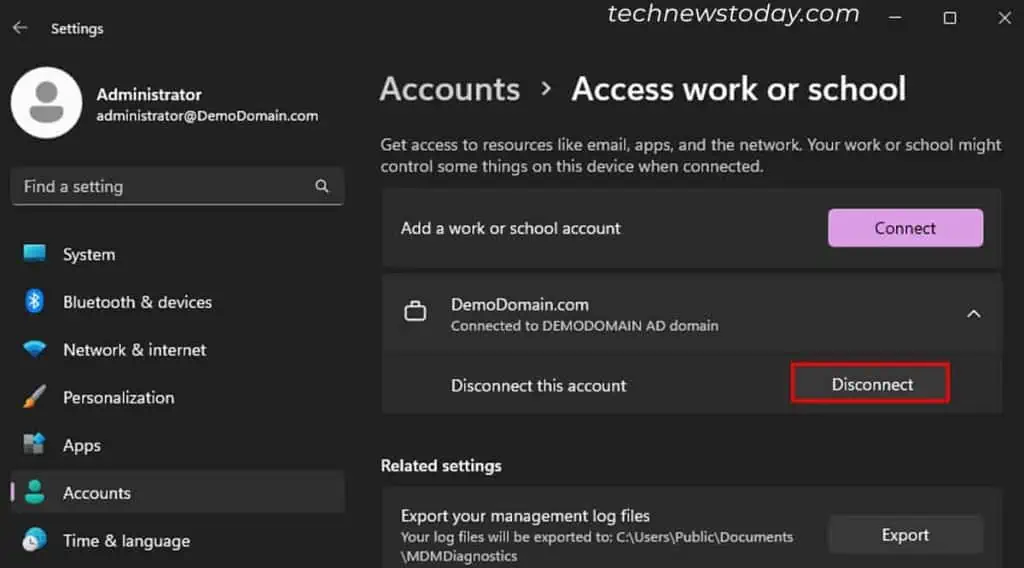
- Go to Accounts > Access work or school.
- Expand the Active Directory (AD) or Work account and select Disconnect > Yes.

- Restart your computer.
- Go back to Settings > Accounts > Access work or school.
- Click on Connect and follow the on-screen instructions to join the same AD or work account.
- Make sure to choose Let my organization manage my device while doing so.
Remove Office Credentials
If simply disconnecting and reconnecting with the Microsoft 365 work account didn’t help, repeat the process after removing all the Office credentials. This way, the current credentials won’t affect the reactivation process.
For this solution,
- Open Run.
- Type
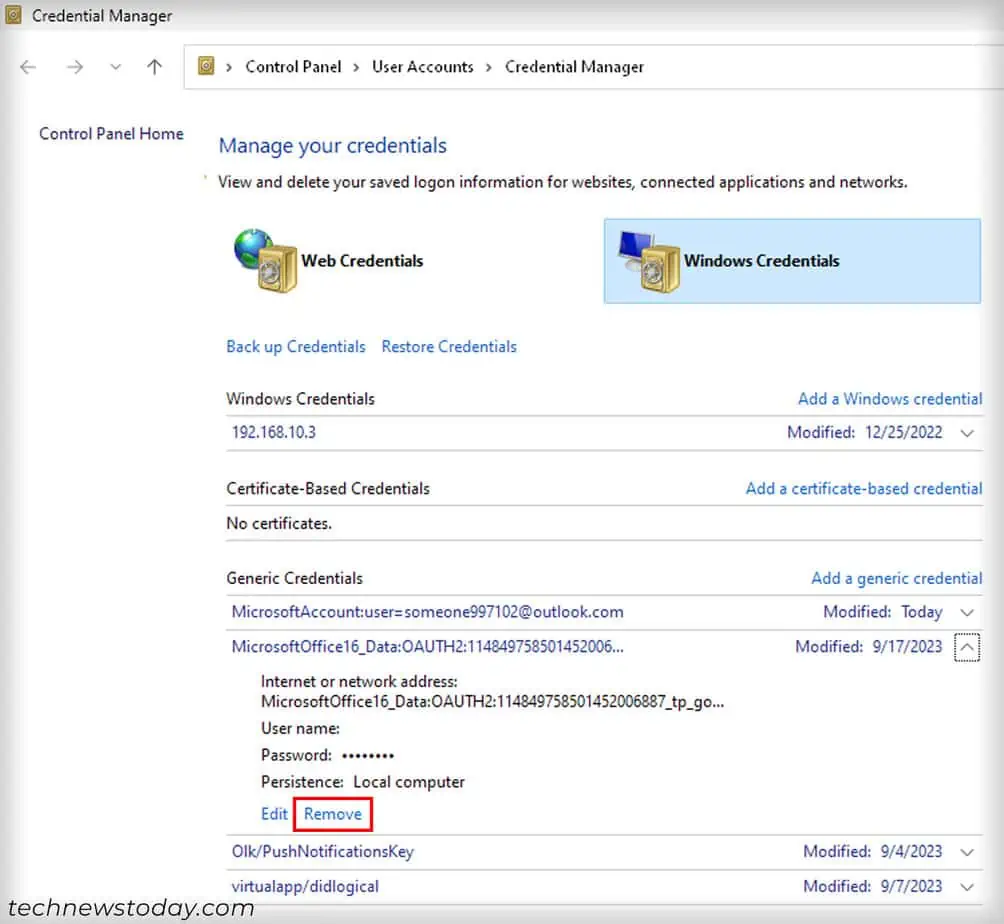
control keymgr.dllorcontrol /name Microsoft.CredentialManagerand press Enter. It will load the Credential Manager. - Go to Windows Credentials.
- Expand all credentials for Microsoft Office apps and select Remove > Yes.

- Restart your computer.
- Then, disconnect and reconnect to the work account for Microsoft 365.
Enable Office Protection Policy
Microsoft also recommends enabling office protection policy before reconnecting with the work account in case the above solutions don’t work.
Here are the complete steps:
- Go to Windows Settings > Accounts > Access work or school.
- Disconnect from the work account for Microsoft 365.
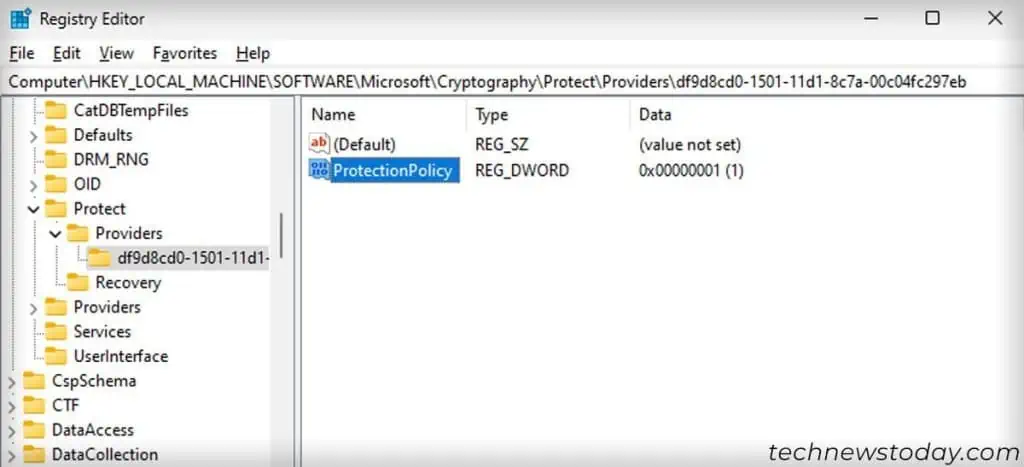
- Now, open the Registry Editor.
- Go to
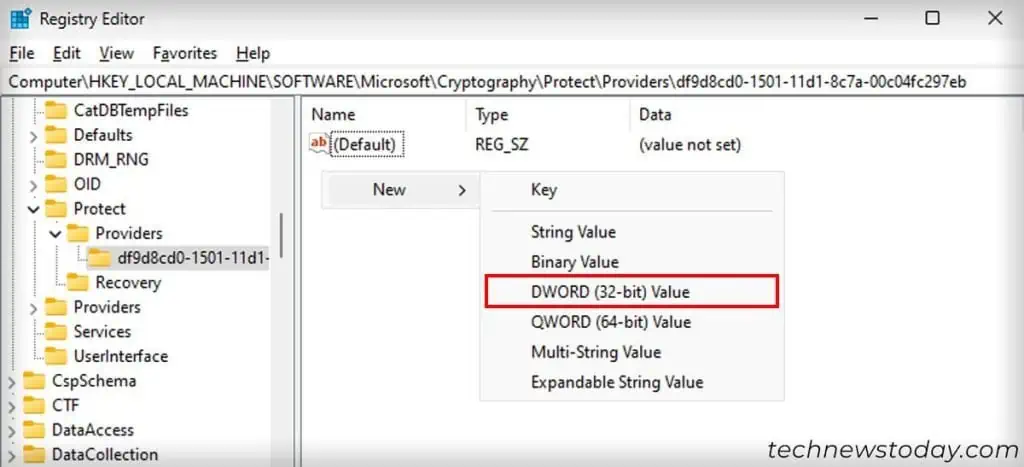
HKEY_LOCAL_MACHINE\Software\Microsoft\Cryptography\Protect\Providers\df9d8cd0-1501-11d1-8c7a-00c04fc297eb - Right-click on an empty area and select New > DWORD (32-bit) Value.

- Set its name to
ProtectionPolicyand value to1.
- Restart your computer.
Disable Security Software
You may also encounter this issue when an antivirus or security app blocks the Microsoft.AAD.BrokerPlugin_cw5n1h2txyewy plugin required for the activation. In such cases, temporarily disable your antivirus, firewall or any security app.
You should also contact your Microsoft 365 admin in case a proxy or firewall on their end is blocking this plugin.
Delete and Reinstall BrokerPlugin Data
You’ll also encounter this error if the Microsoft.AAD.BrokerPlugin_cw5n1h2txyewy plugin itself has some issues. In such cases, delete any related data and run the Microsoft Support and Recovery Assistant to recreate them from scratch.
The complete process includes,
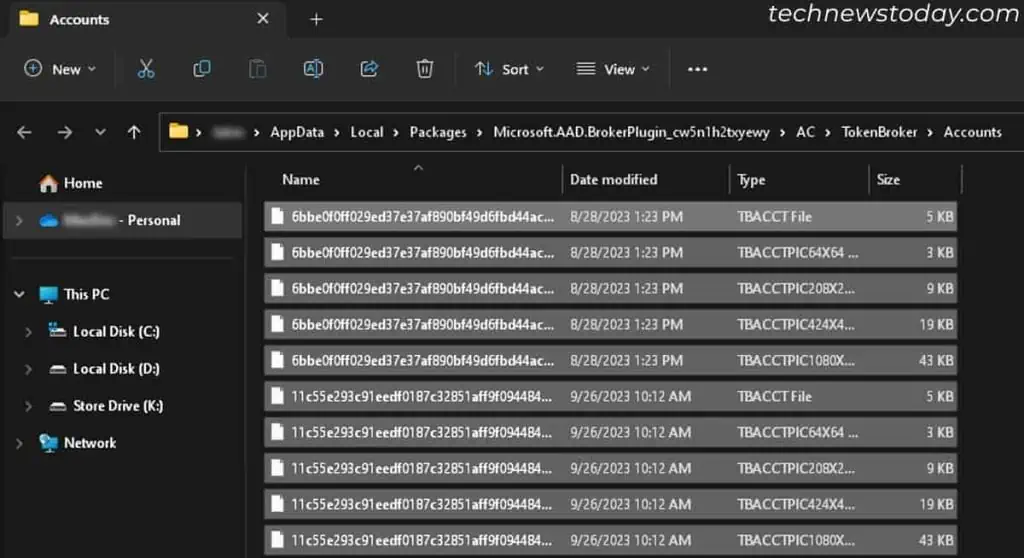
- Open Run.
- Type
%LOCALAPPDATA%\Packages\Microsoft.AAD.BrokerPlugin_cw5n1h2txyewy\AC\TokenBroker\Accountsand press Enter. It will load this folder in the File Explorer. - Select all of its contents and delete them.

- Now, do the same to the contents of the
%LOCALAPPDATA%\Packages\Microsoft.Windows.CloudExperienceHost_cw5n1h2txyewy\AC\TokenBroker\Accountsfolder. - Restart your computer.
- Download the Microsoft Support and Recovery Assistant (SaRA) package for sign in issues and run it.
Enable Multi-Factor Authentication on Admin
To improve security, Microsoft 365 apps requires multi-factor authentication (MFA) by default. This authentication must be enabled from the admin’s security properties. Otherwise, the users may experience “Trusted Platform Module has malfunctioned” error when activating the Microsoft 365 apps.
If you don’t have access to the admin account, contact the system administrator and have them make the necessary changes.
- Open a Web browser and go to Microsoft 365 admin center.
- Click on Show All on the left pane and select Azure Active Directory Admin Center.
- Here, go through Azure Active Directory > Properties > Manage Security defaults.
- Set Enable Security defaults to Yes and hit Save.
Disable Azure Active Directory Authentication Library (ADAL) Authentication
If the above method is not feasible, you can disable Azure Active Directory Authentication Library (ADAL) authentication to remove the local need for MFA.
However, keep in mind that the requirement for MFA is an improvement to the security so disabling ADAL may not be the best solution.
Regardless, you can use the Registry Editor for this purpose.
- Open Run.
- Type
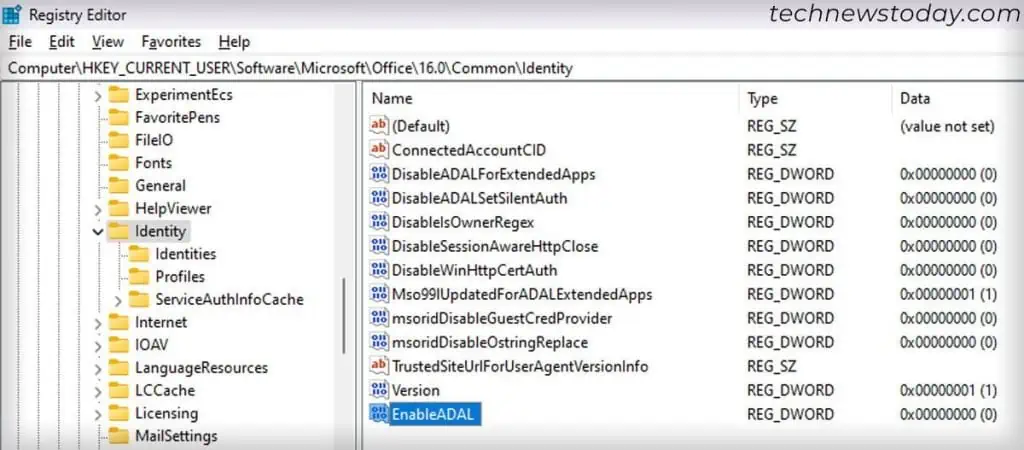
regeditand press Enter to open the Registry Editor. - Go to
Computer\HKEY_CURRENT_USER\Software\Microsoft\Office\16.0\Common\Identity - Right-click on an empty area and select New > DWORD (32-bit) Value.
- Name it as
EnableADALand set its value to0.
Enable TPM
Now, you should start troubleshooting for TPM issues. But before moving to other TPM related solutions, make sure it is actually enabled in your BIOS.
You will find it as TPM State, Intel PTT, AMD PSP fTPM, Intel Platform Trust Technology or a similar option under Security tabs inside your BIOS.
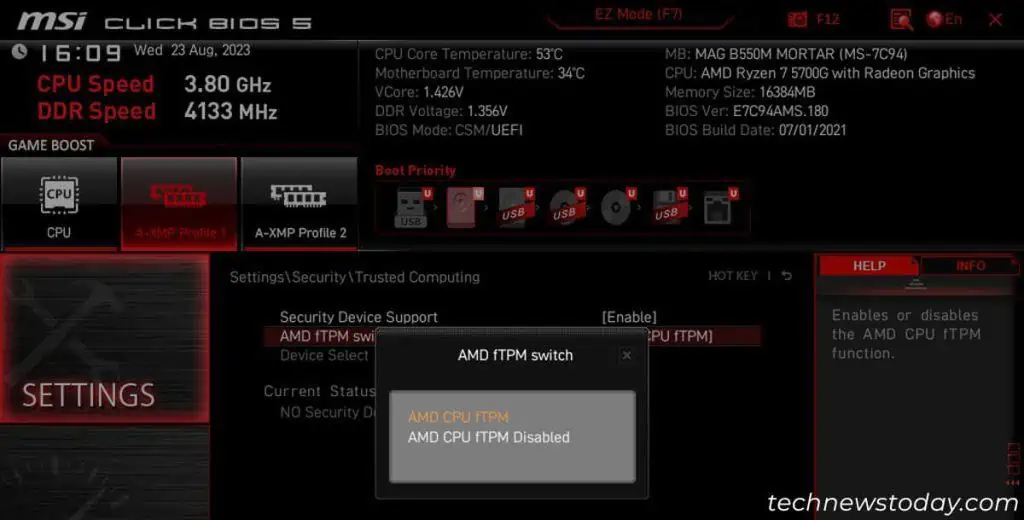
You can also use our dedicated motherboard BIOS guides for ASRock, ASUS, MSI and Gigabyte motherboards if you need additional help.
You may also need to prepare the TPM after enabling it in the BIOS. After logging in to your system,
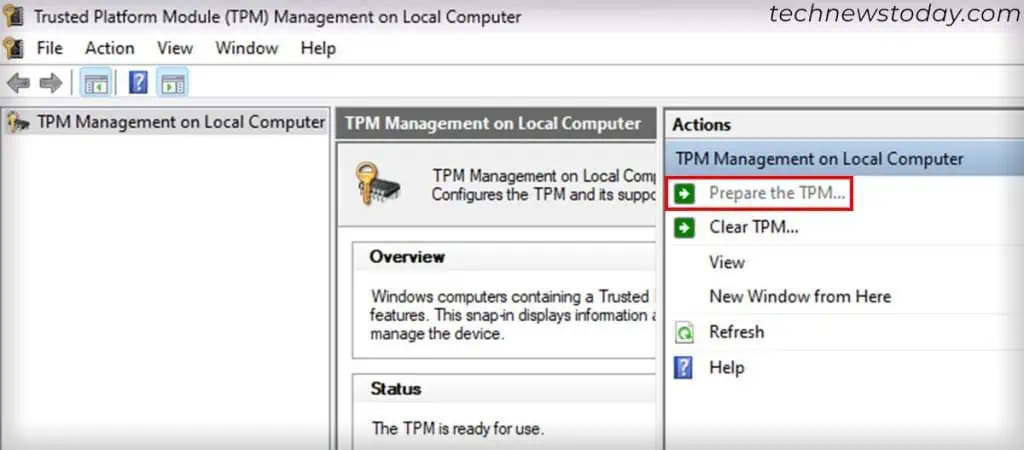
- Open Run.
- Type
tpm.mscand press Enter to open Trusted Platform Module (TPM) Management on Local Computer. - Select Prepare the TPM and confirm all following prompts.

- Restart your computer.
After that, it’s better to manually install Windows updates to update the TPM drivers alongside.
Clear TPM Keys
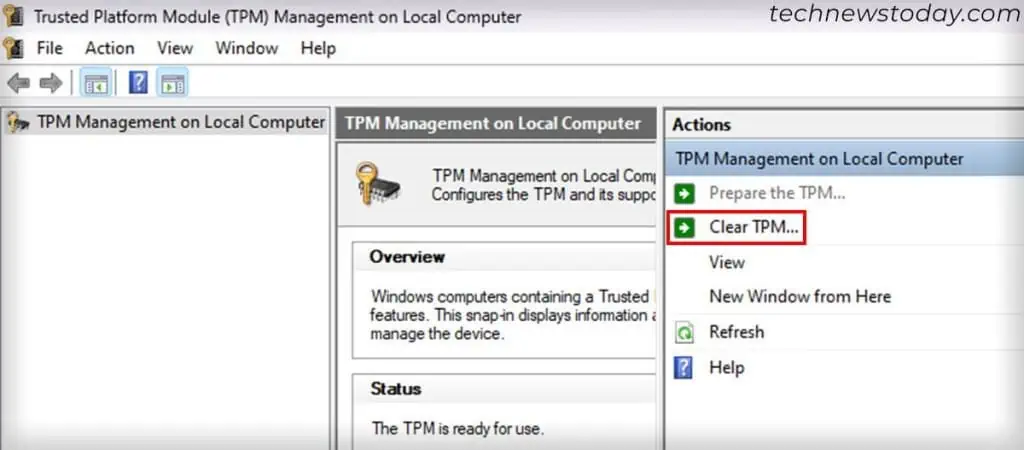
You can also try clearing the TPM keys and reset TPM to its default state to resolve any issues within.
Cleaning the TPM keys may result in data loss. Before clearing it, make sure to back up any important data that your system is encrypting with the TPM or BitLocker.
Then,
- Open Trusted Platform Module (TPM) Management on Local Computer.
- Select Clean TPM > Restart.

Uninstall and Reinstall TPM Drivers
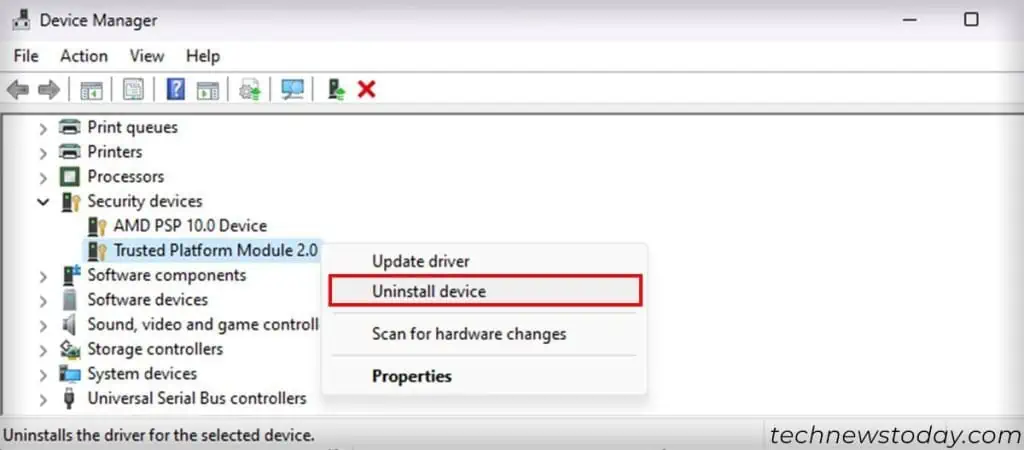
Another way you can try to troubleshoot your TPM is to uninstall and reinstall its driver. This process will refresh the device and resolve most errors with it.
- Open Run.
- Type
devmgmt.mscand press Enter to open the Device Manager. - Expand Security Devices.
- Right-click on Trusted Platform Module and select Uninstall device > Uninstall.

- Right-click on Security Devices or the computer name and select Scan for hardware changes.
Create New User Account
If you couldn’t resolve the issue through the above solutions, your user profile might have become corrupt. Rather than going through all nooks and corners to repair it, it’s better to create a new admin account and the corresponding profile.
For that,
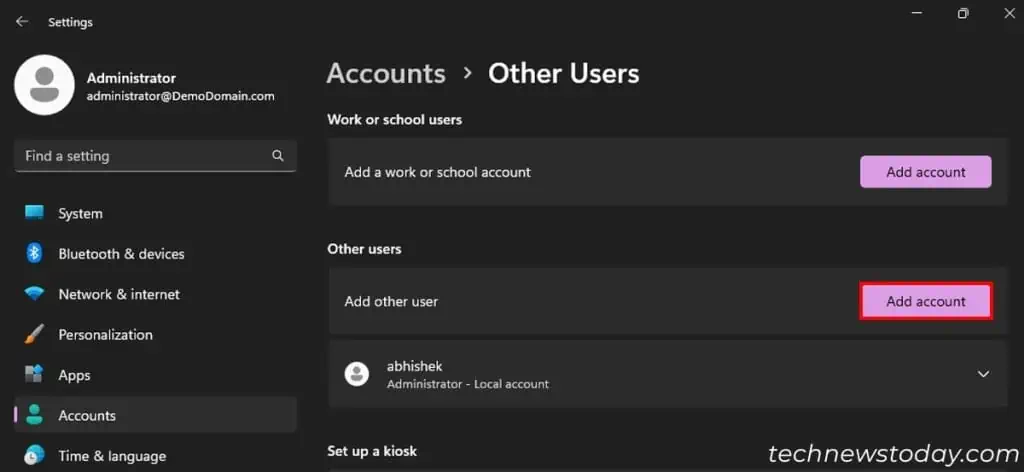
- Open Windows Settings.
- Go to Accounts > Other users and click Add account under Other users.

- If it asks you to create a Microsoft account, select I don’t have this person’s sign-in information > Add a user without a Microsoft account.
- Enter the new username and password. Click Next.
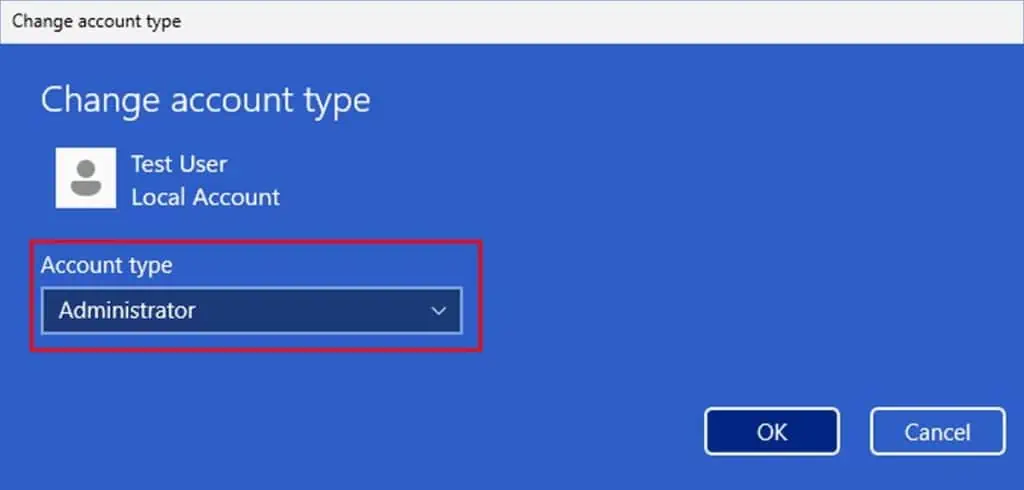
- Expand the new account and select Change account type.
- Set Account type to Administrator and click OK.

- Sign it to the new account, install Office or Microsoft 365, and try to activate it again.
If you are successful, transfer all non-hidden contents from your old user profile folder inside C:\Users\ to the new one. Then, remove your old account along with the user profile.
Update BIOS
TPM may not work with certain BIOS versions in some motherboards. So check the BIOS update page on your motherboard’s support platform and look for any TMP related improvements or fixes. If a later BIOS version carries such features install the latest stable BIOS update.
Since the exact process varies for different motherboards, I recommend checking out our dedicated guides for the motherboards below:
