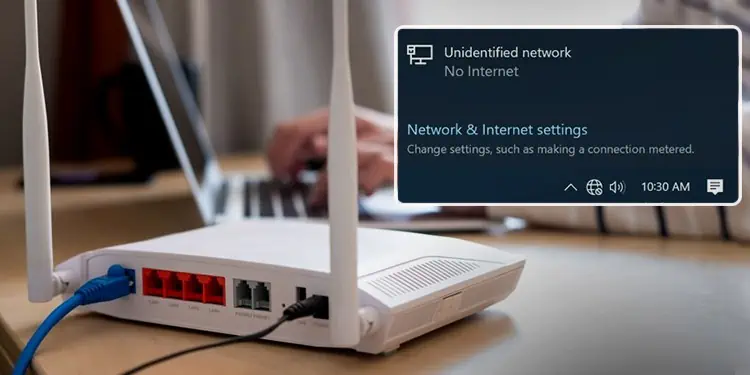
The “Unidentified Network No Internet Access” error occurs due to both hardware and software-end causes. A bad network controller on your PC, the router, or any components in between the two can cause this connection problem.
If you’re only facing the problem on one connection (Wi-Fi or Ethernet), the Wi-Fi or Ethernet card or its driver is most likely the issue. Aside from this, invalid IP and DNS address configurations or incompatibility with third-party tools (VPN, Firewall, etc.) are other common reasons on the software end.
This troubleshooting guide will help you figure out what exactly is causing this problem and how you can fix it to get your internet up and running again.
How to Fix Unidentified Network No Internet Access
Before anything else, restart your router, modem (if applicable), and PC. Then, disconnect the Wi-Fi or Ethernet connection and reconnect to it. Often, re-establishing the connection like this will resolve the issue.
There are also some cases where Windows shows the Unidentified Network No Internet notification in the taskbar, even when you actually have internet access.
Once you confirm that you’re not dealing with a visual bug and the problem isn’t resolved by simply restarting, please move on to the solutions listed below.
Fix Hardware Problems
Faults with the networking hardware are one of the most common reasons for this error, so we’ll cover this first. Feel free to try the software-end fixes first if you don’t feel comfortable checking the hardware.
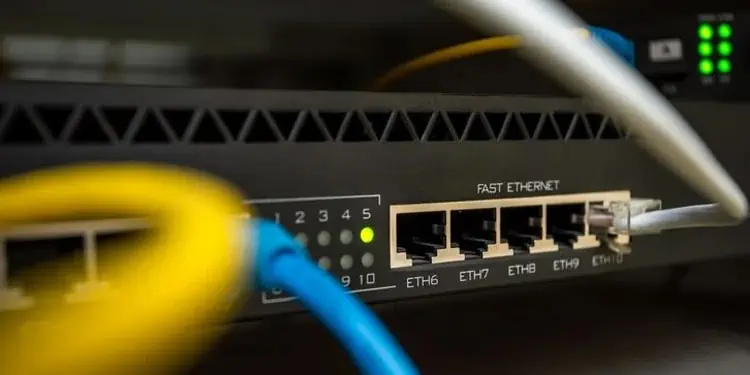
Now let’s look at some possible causes, starting with the DHCP server. Typically, your router will function as a DHCP server and assign IP addresses to devices on the network. A faulty router (e.g., firmware issues) can lead to this error by assigning invalid IP addresses.
Or the router may be good, but any of the components involved in connecting your PC to the router (e.g., PC’s NIC, Ethernet port, Ethernet cable, router ports, Powerline adapters, Switch etc.) could be the problem.
If you use tools like the Windows Network Diagnostics utility (covered further in this article), you might encounter messages like No DHCP Server present or Unable to reach DHCP Server. This is one way to confirm problems with the hardware.
As for how to diagnose which component exactly is the problem, trial and error, basically. Here’s what we recommend:
- First, try to narrow down the problem to Wi-Fi only, Ethernet only, or both.
- If only the Wi-Fi doesn’t work, try swapping the wireless card on your PC with a different one.
- If only the Ethernet doesn’t work, try the same but with your Ethernet adapter.
- Check the Ethernet wire, connectors, ports, switches, and all other components involved for visible damage.
- Connect the Ethernet cable to a different port on your PC. Or to a different port on the switch. Or connect the switch to a different port on the router. Or use a different Ethernet cable. As we said, trial and error until you root out the culprit.
- Some switches are auto-sensing, meaning you can use whichever ports you want. Others have a specific uplink port that is used to connect to the router. This varies according to the switch model and firmware, but it’s something to keep in mind.
- Also, consider that if both Wi-Fi and Ethernet don’t work, and the hardware components seem fine, the router itself could be the problem. You can try resetting the router, updating the firmware, or simply replacing it.
- Finally, with things like Powerline or MoCA Adapters, checking the coax cables or changing the outlet can help.
Run Windows Network Diagnostics
On the software end, we recommend starting by running the troubleshooting tool provided by Windows. There are a few ways to do this. You can right-click the Network icon from the taskbar and select Troubleshoot problems. Or you can use the msdt.exe -id NetworkDiagnosticsNetworkAdapter run command.
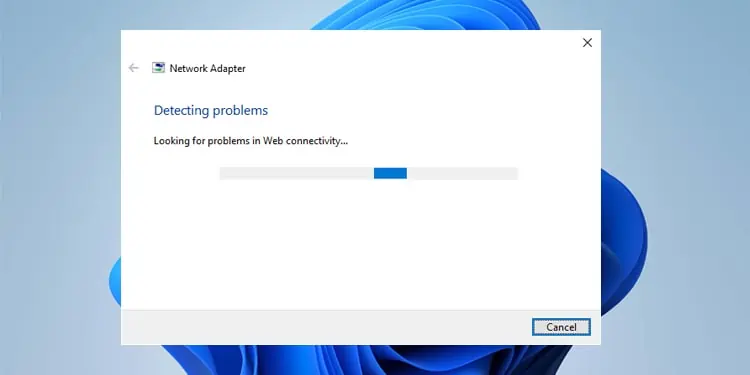
Either way, the troubleshooter may help identify the problem and suggest some solutions like Restarting the adapter or resetting the network. Apply these fixes if possible. If the fixes don’t work or no fixes were suggested, to begin with, move on to the other solutions.
Check Network Adapters
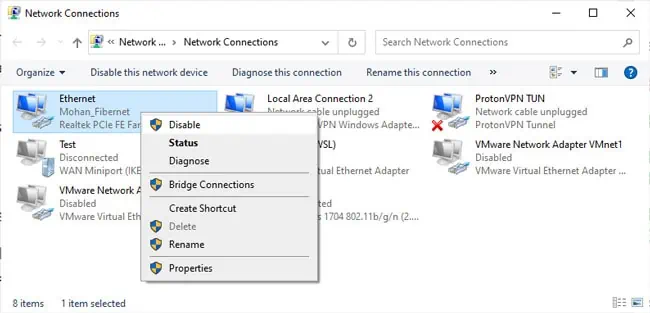
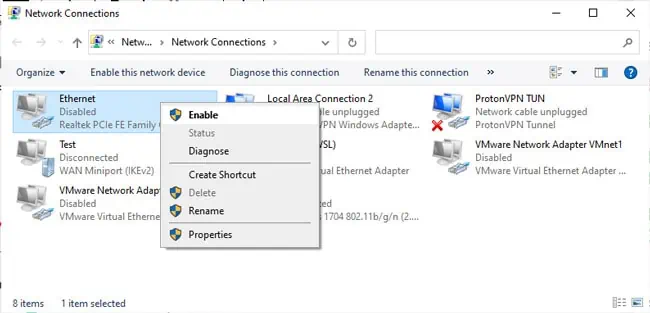
Disabling and enabling the network adapters is an easy solution to various networking issues. In this case, specifically, you should also keep all unnecessary adapters, including virtual ones, disabled to rule out any conflict between adapters. Here’s how you can do this:
- Press Win + R, type
ncpa.cpl, and press Enter. - Right-click and disable all the connections listed here.

- Only re-enable the connection you’re trying to use right now (e.g., Ethernet) and check if you have internet access now.

Start Network Services
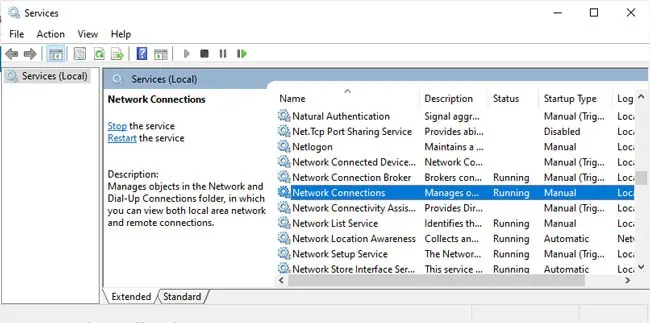
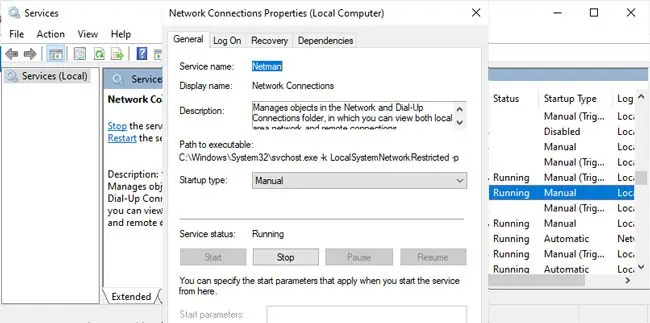
Background services like DHCP Client or Network Connections are crucial for proper network functionality in Windows. We recommend that you ensure the necessary services are running with the following steps:
- Press Win + R, type
services.msc, and press Enter. - Double-click the Network Connections service.

- Start the service if it isn’t currently running, change the Startup type to Auto and save the changes.

- Repeat the same for the following services:
- DHCP Client
- DNS Client
- Remote Procedure Call (RPC)
- Server
- TCP/IP NetBIOS helper
- Wired Autoconfig
- WLAN AutoConfig
Reset Network Stack
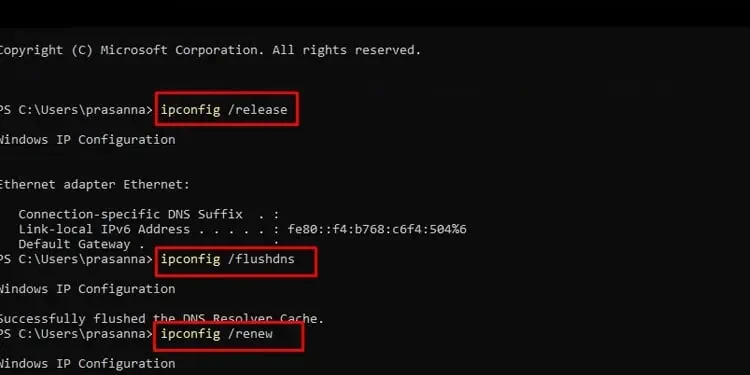
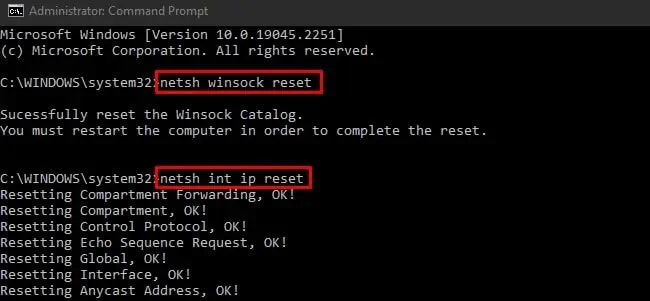
Problems with your system’s network configurations, such as a corrupt TCP/IP suite or DNS cache, can lead to this error. In such cases, removing and reinstalling the TCIP/IP components, clearing the DNS cache, and renewing your device’s IP can help. Here’s how you can do this:
- Press Win + R, type
cmd, and press CTRL + Shift + Enter. - Execute the following commands:
ipconfig /releaseipconfig /renewipconfig /flushdns
netsh winsock resetnetsh int ip reset
- Restart your PC and check if the error is resolved.
Update Network Adapter Driver
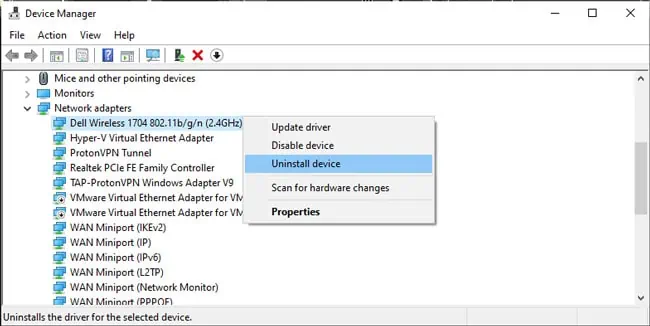
As stated, in cases where only one of the connections (Wi-Fi or Ethernet) is facing this issue and the other works fine, the adapter driver is the most common culprit. Here’s what you can update network adapter drivers in such situations:
- Press Win + R, type
devmgmt.msc, and press Enter. - Expand the Network Adapters section.
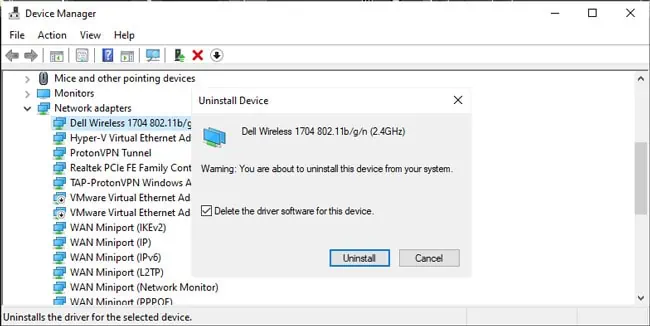
- Right-click the problematic network adapter and select Uninstall Device.

- Toggle on the Delete device driver checkbox and press Uninstall.

- Restart your PC to reinstall the adapter driver from the driver store.
- If this doesn’t help, launch the Device Manager again.
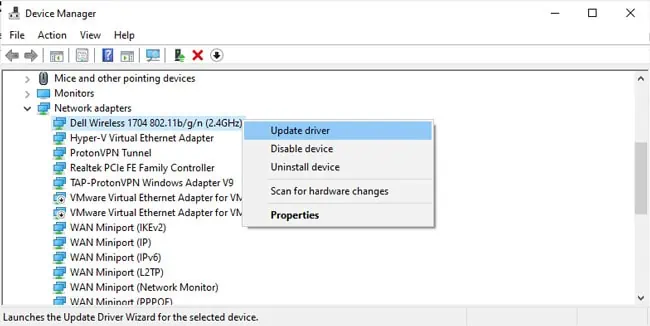
- Right-click the Network Adapter listing and select Update Driver.

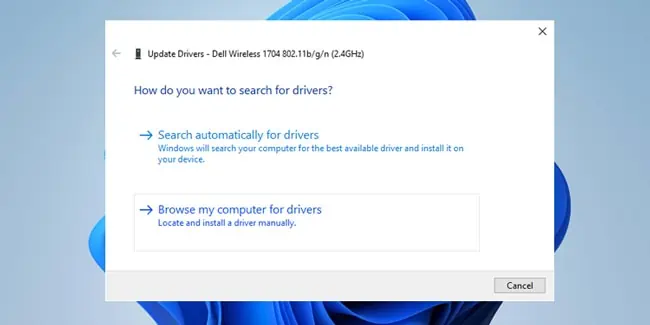
- Select Search automatically for drivers and follow any on-screen instructions.

- If updating automatically doesn’t help either, go to your device manufacturer’s support site and look for the latest network drivers there.
- If they provide an executable installer or driver updating tools, use those. If they provide
.inffiles instead, launch the Device Manager once more time. - When updating the network adapter driver, select Browse my computer for drivers.
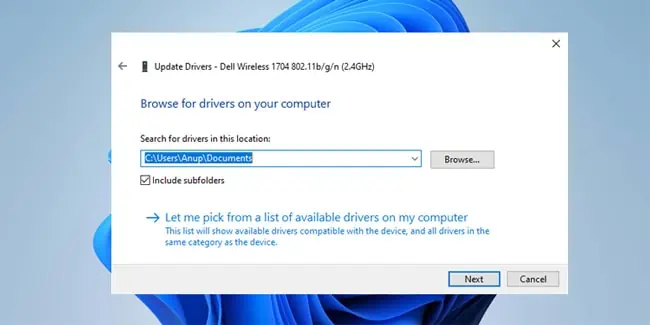
- Select Browse and locate the folder containing the driver files.

- Press Next > Ok and follow the on-screen instructions to update the network driver.
- Restart your PC afterwards and check if the issue is resolved.
Manual IP/DNS Configuration
When a DHCP server isn’t available, Windows may automatically assign an IP address to itself (APIPA) in the 169.254.0.1 to 169.254.255.254 range. Alternatively, the DHCP server may be available but might assign an invalid IP, or it might not assign one at all. Finally, your DNS servers could also be the problem.
In such cases, you can manually set valid IP and DNS server addresses yourself. The linked article goes much more in-depth and contains detailed instructions if you require them, but here are the core steps for now:
- Use the
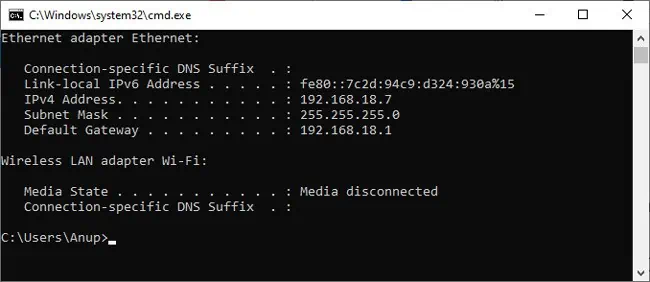
ipconfigcommand in CMD and note down the Default Gateway and Subnet Mask.
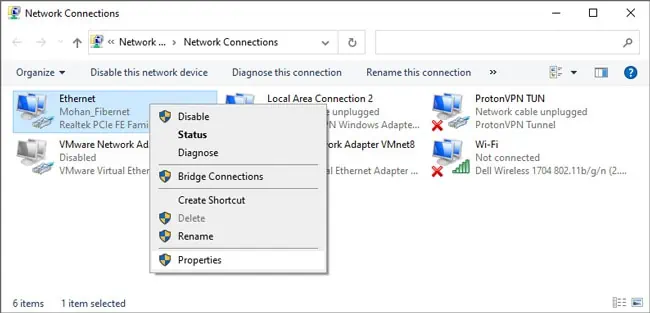
- Press Win + R, type
ncpa.cpl, and press Enter. - Right-click your network connection and select Properties.

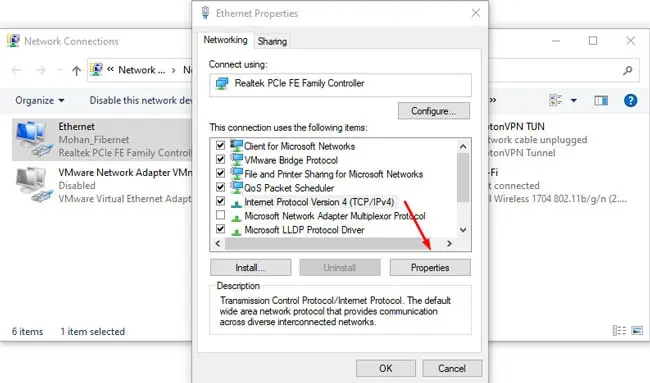
- Select Internet Protocol Version 4 (TCP/IPv4) and click on Properties again.

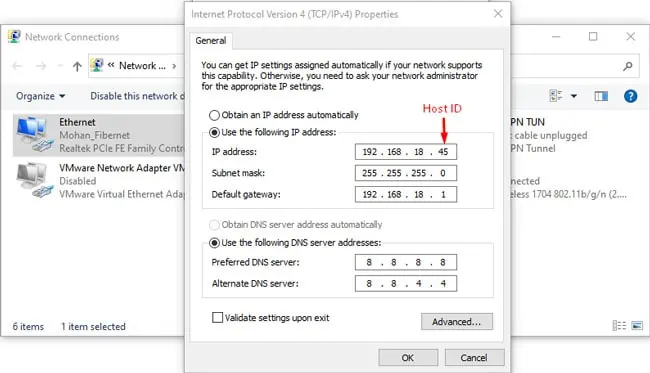
- Select the Use the following IP Address option.
- Enter the Default Gateway and Subnet Mask values from Step 1.
- In the IP address field, enter the default gateway’s value but change the host ID portion to something else. Generally, this is the last of the four numbers.

- Next, set the Following DNS server address:
- Preferred DNS server: 8.8.8.8
- Alternate DNS server: 8.8.4.4
- Finally, press OK to save the changes.
Remove VPN/Firewall
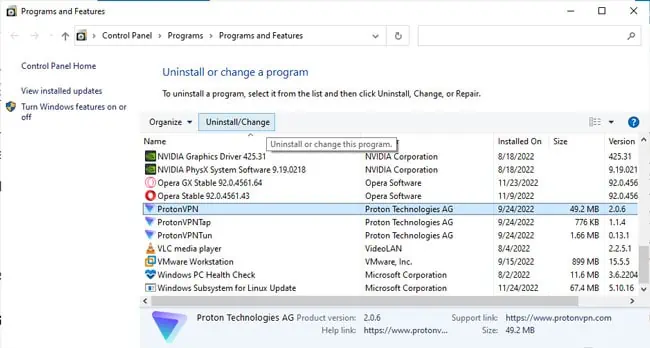
Third-party VPN and firewall programs are known to cause various networking problems due to incompatibility with Windows. With this error specifically, we’ve found programs like Hotspot Shield and Kaspersky Internet Security to be the culprits.
We recommend disabling such programs, or ideally, removing them, to check if that fixes the problem. If they turn out to be okay, you can always reinstate them later. Here’s how you can do this:
- Press Win + R, type
appwiz.cpl, and press Enter. - Select the VPN or firewall program from the list and press Uninstall.

- Follow the on-screen instructions to remove the program.
- Restart your PC afterwards and check if the issue is resolved.
Upgrade Router Firmware
As mentioned earlier, corrupt router firmware can be the reason you’re facing DHCP server issues on your network. Going by real-world data, this is possible but very uncommon.
Thus, if the other fixes haven’t helped, you can try updating the router firmware as a last resort, but its efficacy isn’t guaranteed. Your time and effort may be better spent contacting your network admin or ISP for support.

