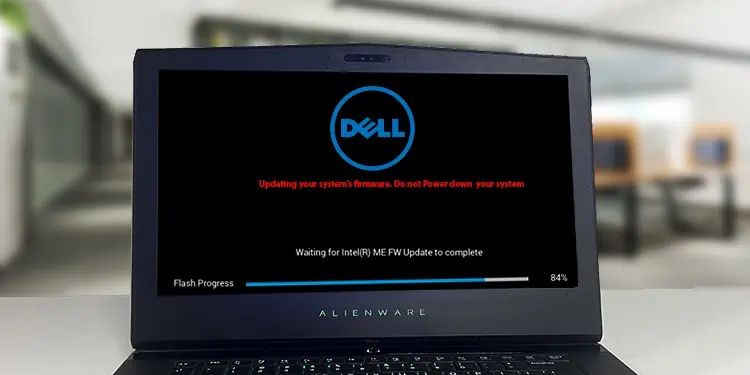
When you update the BIOS of your Laptop, you may receive added hardware support, security updates, and stability enhancements. However, if you are not careful enough while performing the updates, it can give diminishing returns.
For Alienware laptops, Dell offers a convenient update package that can update your BIOS without many risk factors involved. There is also an option for these laptops where you can install the updates without having to Boot into the operating system.
Step 1: Turn Off Bitlocker Encryption
You must temporarily disable the BitLocker encryption on your Alienware laptops before you update the BIOS. BitLocker stores its encryption keys using the Trusted Platform Model (TPM), which is integrated into the laptop’s Motherboard.
Because of this when you update the BIOS, the system will not accept the BitLocker Keys and you won’t be able to boot into Windows after the BIOS update.
- Press Windows Key + R, type
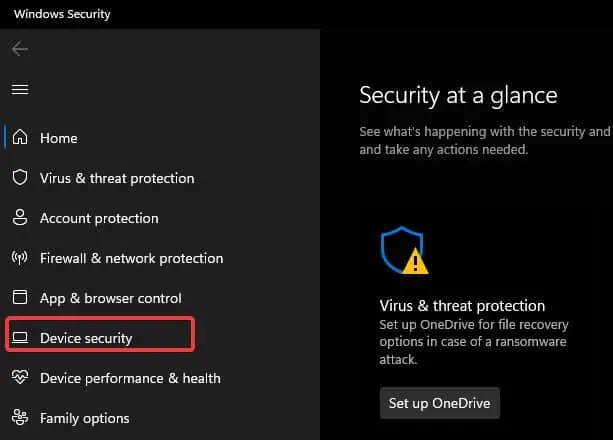
windowsdefender:, and hit Enter. This will open the Windows security app. - Go to Device Security.

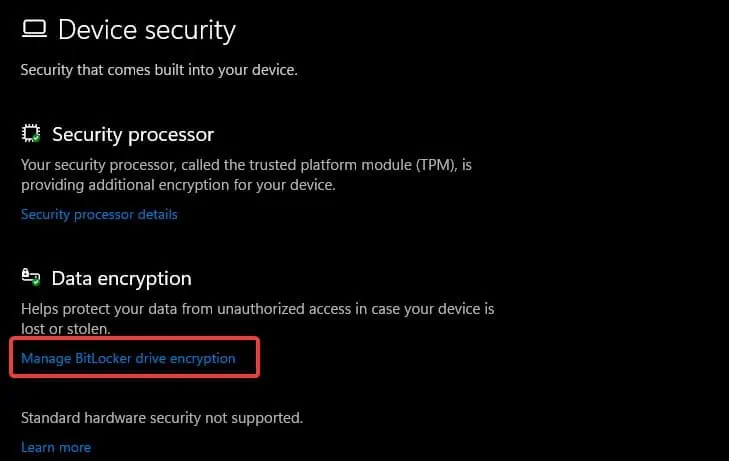
- Under the Data encryption section, click on Manage BitLocker drive encryption.

- It will show you the drives on your computer with their encryption status.
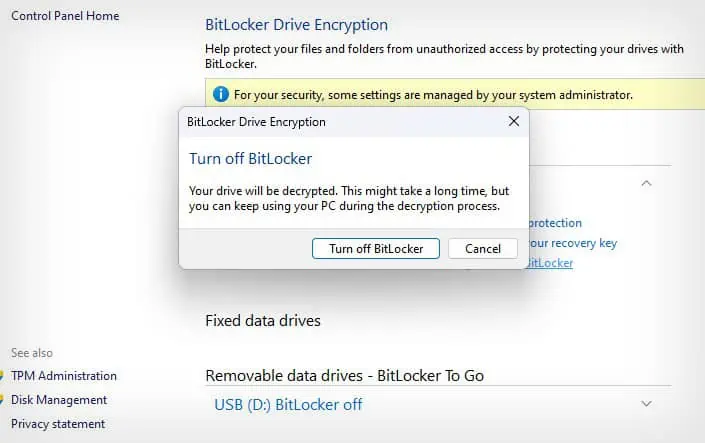
- Select Turn off BitLocker and follow the onscreen prompt. This will disable the encryption on the selected drive.

- You will need to turn off the Bitlocker on every drive.
Step 2: Check the Current BIOS Version
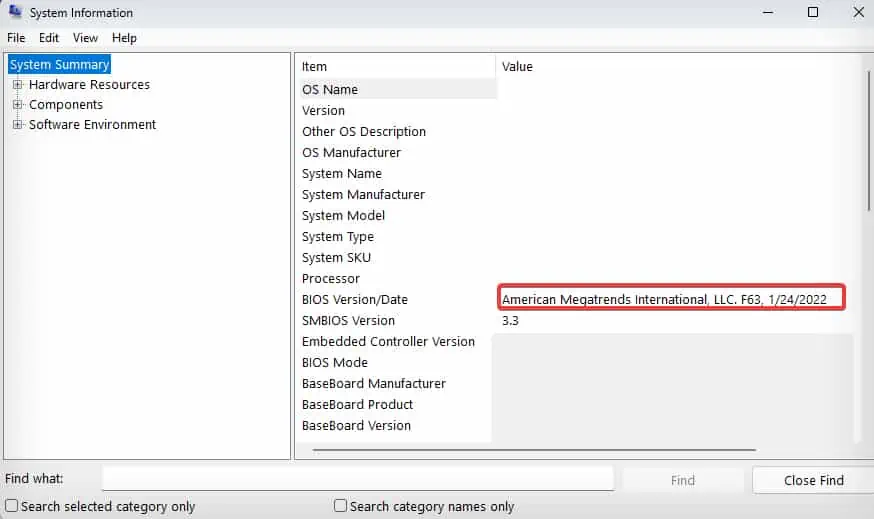
After you have suspended the BitLocker, check the currently installed BIOS version. System Information can give you crucial information regarding the BIOS version, manufacturer, etc.
- Press Windows Key + R, type
msinfo32, and hit Enter. This will open the System Information Window. - Under System Summary, check the BIOS Version/Date field. You will find the information on the current BIOS version here. You will need it to download the newly released BIOS update.

Step 3: Downloading the BIOS Update
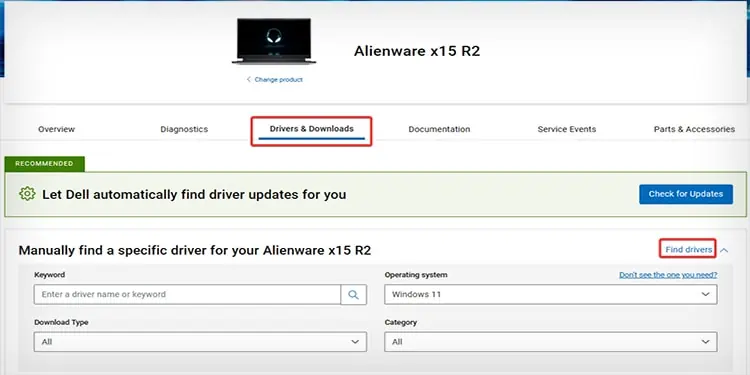
The next step is to download the latest version of the BIOS from Dell’s official driver download page.
- Go to Dell’s Official Support Page.
- Search for your Alienware Laptop model in the Identify your Product field.
- Go to the Drivers & Download tab.
- Select the System BIOS from the Download Type drop-down.

- Identify the latest version of BIOS. For this, you can compare the BIOS date of the currently installed version with the release date shown on the website.

- Click on the Download button. The installer will now start downloading.
Note: If the existing version of BIOS on your Alienware is two versions behind the latest released update, it is advised that you update the BIOS gradually without skipping the prior versions. This is to avoid compatibility issues during the BIOS update.
Step 4: Installing the BIOS Update
Once you have downloaded the installer from Dell’s website, it’s time to perform the BIOS update. But before you proceed, follow these measures for a successful BIOS update.
- Keep the Laptop’s charger connected the whole time during the update.
- Close any program that could interact with the update process.
- Make sure the update process does not get halted at any point as this can make your computer not function.
- Each time you wish to update the BIOS, suspend the BitLocker Encryption and gradually perform the update without skipping any versions.
After you have ensured these precautionary measures, this is how you update the BIOS on your Alienware device.
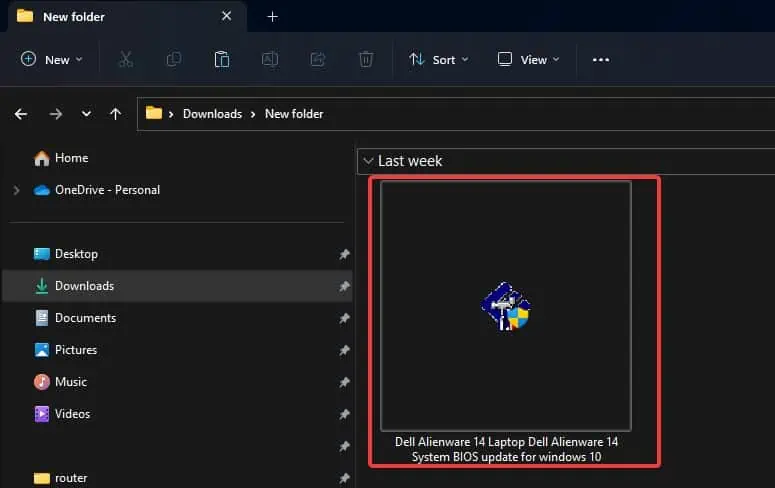
- Go to the download directory and run the BIOS update’s executable file.

- Click on Yes to give the final confirmation for the installation.
- Follow the on-screen instructions. The system will restart and the update process will start.

- The system will reboot once the process is complete.
- After you log in to Windows, go to the system information and check the BIOS version to verify if the update was successful.
How to Update Alienware’s BIOS Using USB?
There’s another way that lets you flash the BIOS, in case you cannot access the Operating system. You can create a Bootable USB flash drive with a BIOS update package and perform the updates. This comes in handy for a new system on which Windows is not installed or is corrupted.
You need to rely on another computer to make your USB drive bootable i.e for steps 1 and 2.
Step 1: Install DDDP
In order to create a bootable USB flash drive with a BIOS update file, you need to use the Dell Diagnostic Deployment Package (DDDP) software.
- Download the DDDP package from Dell’s download page.
- Go to the download directory and run the software package.

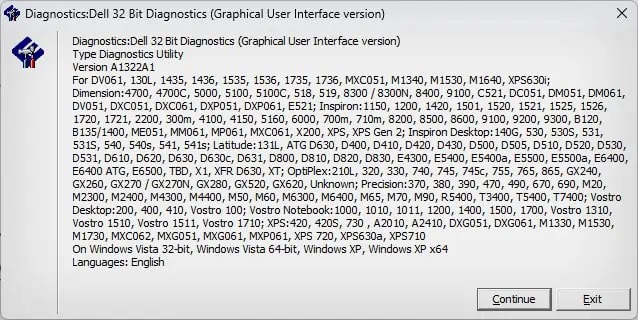
- Follow the prompts and the Dell Diagnostic window will open up.
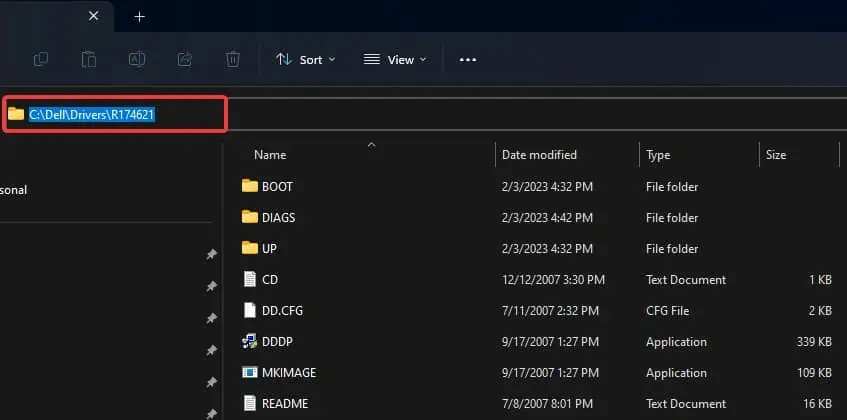
- Close the program and then go to
C:\Dell\Drivers\R174621directory and open the DIAGS folder.
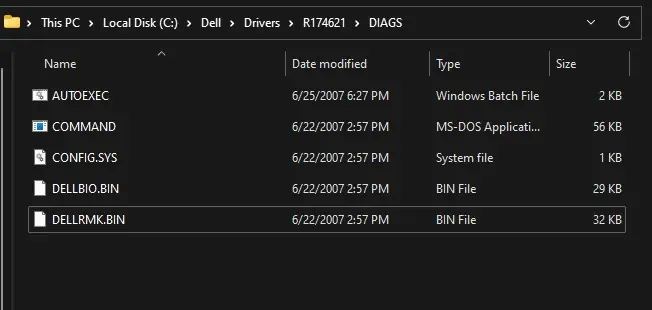
- Delete all the contents inside this folder except for the following files in the image below.

Step 2: Create Bootable USB Drive
Now, you can create a BIOS update Bootable USB drive using the DDDP and a USB flash drive.
Note: The process will format the USB flash drive. Ensure that there aren’t any important files inside the drive before you proceed.
- Download the BIOS update setup file for your Alienware model from the Dells support page.
- Connect a USB flash drive to your Laptop.
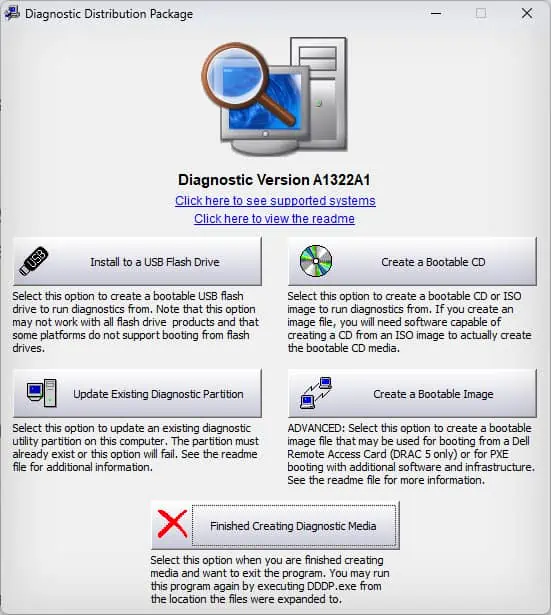
- Open the DDDP software and select the Install to a USB flash drive option. This will create a bootable USB flash drive

Step 3: Update BIOS
Once the Bootable USB is created, you can use it to update the BIOS of your Alienware Laptop following this process.
- Copy the BIOS update package you downloaded earlier to the Bootable USB drive.
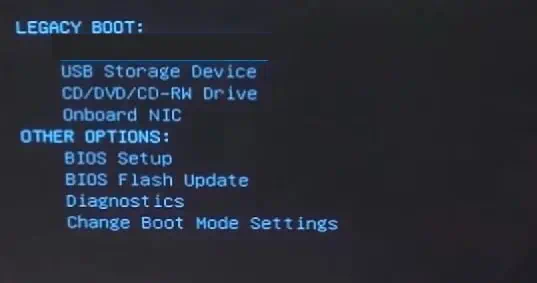
- Restart the computer and press F12 when you see the Alienware logo on the screen to enter the boot menu.
- Choose the USB flash drive. If the USB drive is not seen in the menu choose BIOS flash update option.

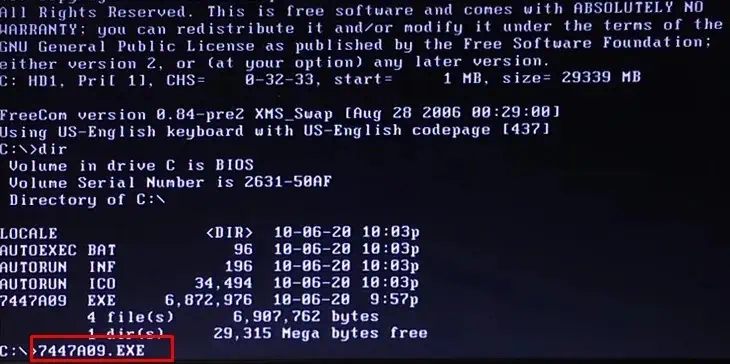
- Type the BIOS setup program name and hit enter. For instance, the name of the setup file in our case was
7447A09.exe
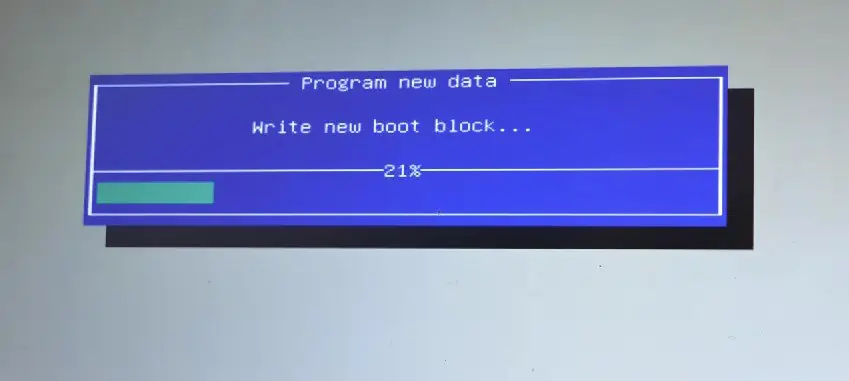
- The BIOS update utility will then run. Follow the on-screen prompts to update your Alienware’s BIOS.

