UPnP means “Universal Plug and Play,” and it’s a router configuration. The UPnP Not Successful in Xbox One or Xbox Series error is tweaking your home network settings.
“UPnP Not successful” is a network permission error. If you see it, you may be dealing with one of three things:
- The console’s firmware is outdated
- Your router’s UPnP feature is off
- Your router’s NAT Type configuration is out of date
The solution is right through the router’s admin page regardless of the issue. In any case, the symptoms are similar. In essence, sharing features like voice chat malfunction, party chat not working, or your unstable connection.
UPnP Not Successful in Xbox Error Causes

The Universal Plug and Play router feature is a permission protocol. It allows devices in its network to share information and communicate with devices on other networks.
The “UPnP” error means your router is not allowing your Xbox to share communication with other consoles. As a result, multiplayer and voice chat features become very limited.
The first cause is your console’s firmware needs an update. If it’s working with outdated protocols, it may not be loading your router’s network permissions properly.
The second reason is the UPnP feature is off. It’s a straightforward issue, as it would block many third-party sharing from your devices.
The third is your router has restrictive settings on the router. As a result, the device’s NAT configuration is not allowing you to play and share with your friends.
NAT (Network Address Translation) refers to the type of NAT connections you can join as a guest. There’re three NAT types:
[table id=412 /]
For instance, your router may be setting the NAT Type as Strict. In that case, voice chat, multiplayer, and other sharing features would only work with users on an Open Nat Type.
How to Fix UPnP Not Successful in Xbox One?
Each cause requires a different solution. Updating the console is much easier, so let’s hope it’s that.
Changing the Nat Type requires tweaking both router and Xbox network settings. Yet, enabling UPnP in the router doesn’t require many steps.
Let’s trim down the issue, and check the Nat Type of your Xbox first:
- Turn on your Xbox.
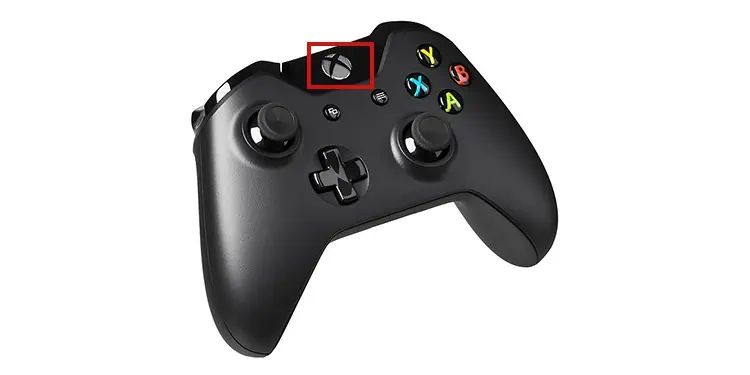
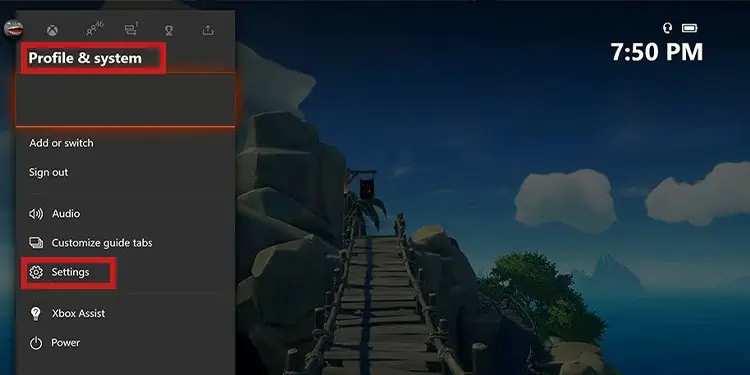
- Press the Xbox button to open the Guide.

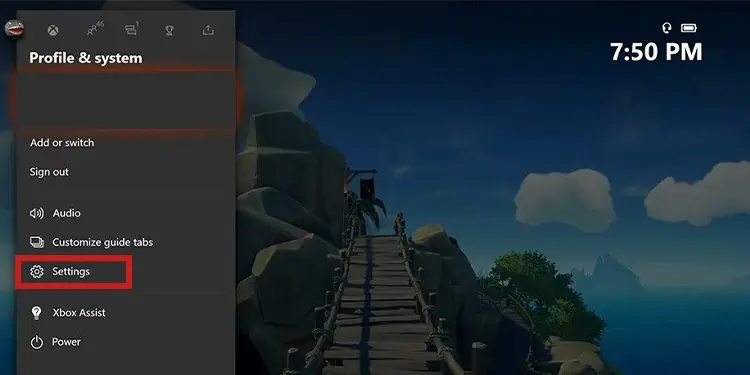
- Go to Profile & system.
- Select Settings.

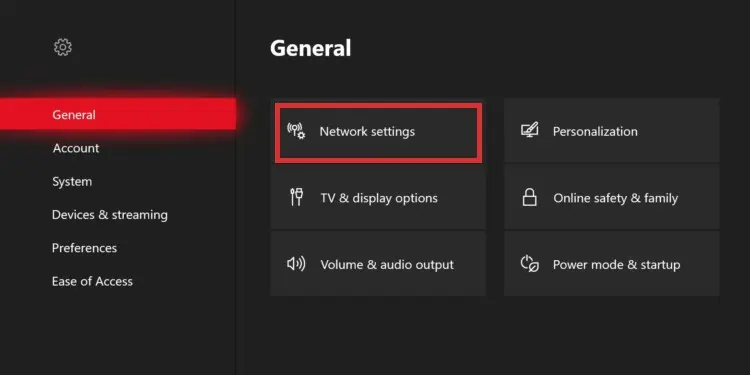
- Select General.
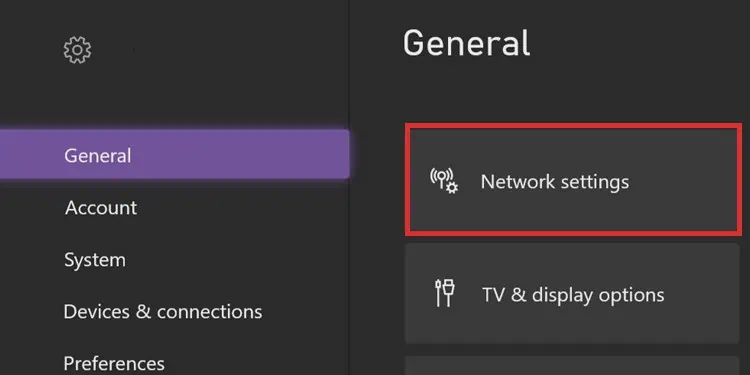
- Select Network Settings.

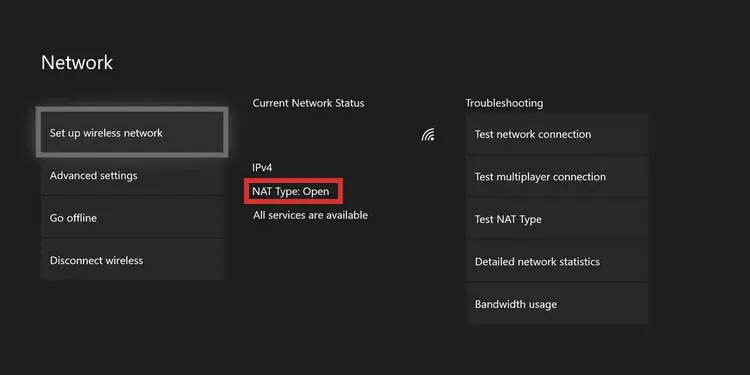
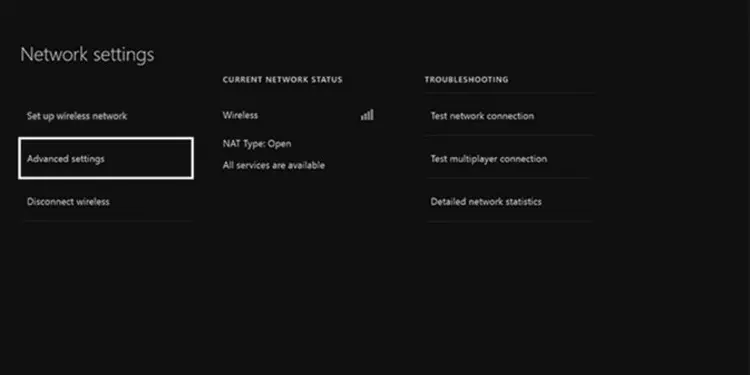
- Under Current Network Status, you’ll see the Nat Type information.

It should be Open or Moderate, but not strict. If it’s one of these two, you’d need to update your console or enable UPnP. Otherwise, you’d need to “port forward” your Xbox connection to change the Nat type.
Update the Xbox
I encourage you to start troubleshooting by updating the Xbox One or Xbox Series. The console should manage updates automatically, but it can skip or fail an automatic update if the connection is unstable or if you don’t use it often.
Here’re the steps for a manual update:
- Turn on your console.
- Ensure the console has an internet connection.
- Press the Xbox button to open the guide.

- Go to Profile & system.
- Go to Settings.

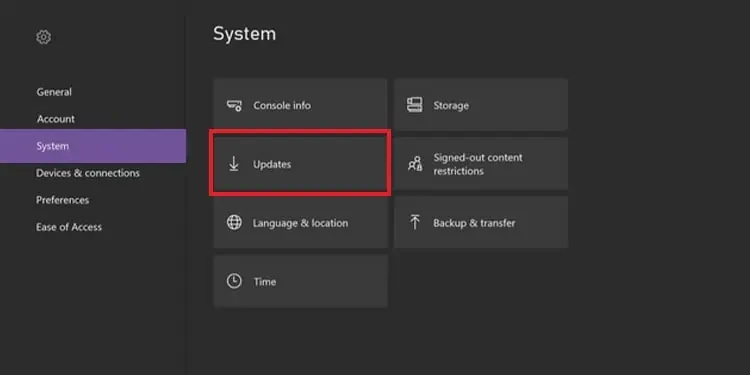
- Go to System.
- Go to Updates.

- If there’s an update available, select Console update available.
Turn on Universal Plug and Play
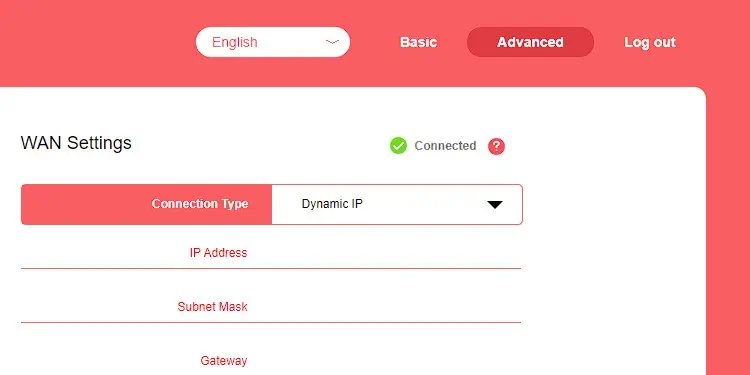
You would turn on Universal Plug and Play through the router’s admin page. It means typing your router’s IPv4 Default Gateway Address on your browser to access its settings page.
Accessing the router’s page
Every router has an IP address you can type on your browser to access its advanced configurations. It requires you to access it as an administrator, so you’ll have to type the default username and password within the page.
You have to find your router’s username, password, and IPv4 address.
The username and password could be at the back of your router or the router’s manual. This is in case your modem and router work on a single device. If it’s two devices instead, it would be at the back of the modem or the modem’s box. 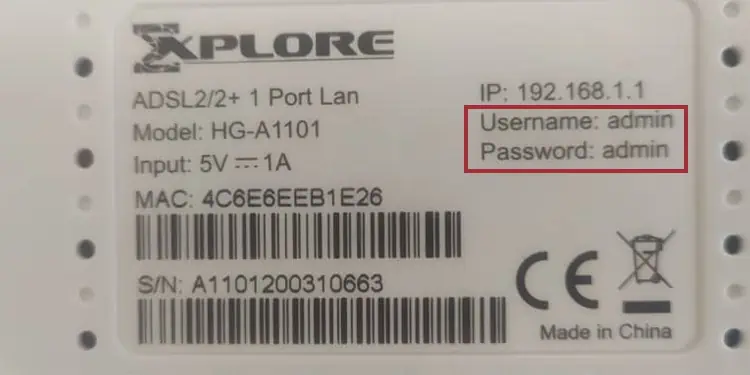
The credentials are frequently the same:
Username: admin
Password: admin
Then, you can find the router’s admin page at the back of your router or modem or in the manual. It’s frequently atop the Username and Password. It’s the Default IPv4 Gateway Address.
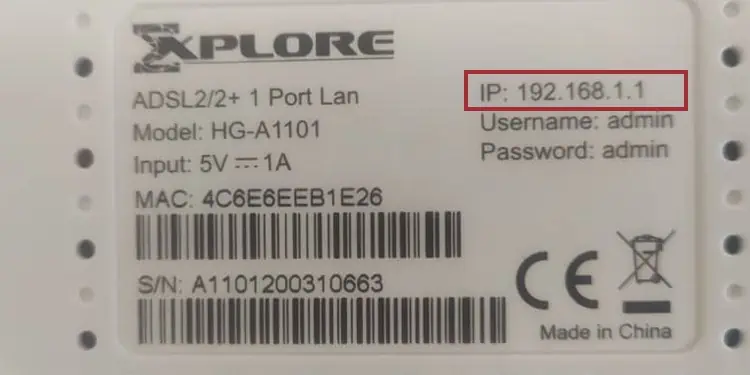
Alternatively, it’s at the back of your router. It leads to the same admin page.
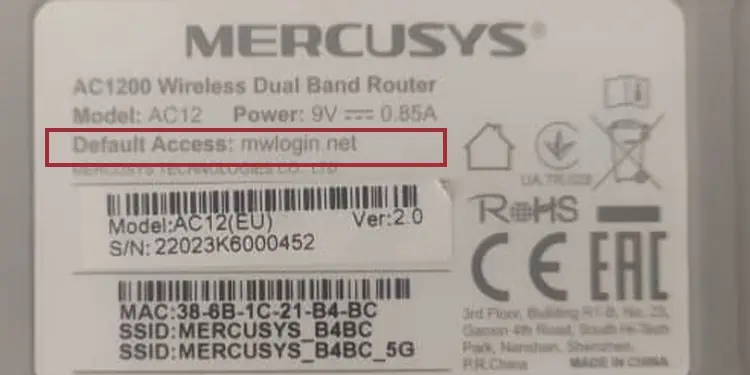
If you can’t find the address, try one of these two standard IPs:
192.168.1.1
192.168.0.1
Most router brands use the same IP address, making it easier for users to access the site.
Once you find the information you’re looking for, open your browser, and type the address like this:
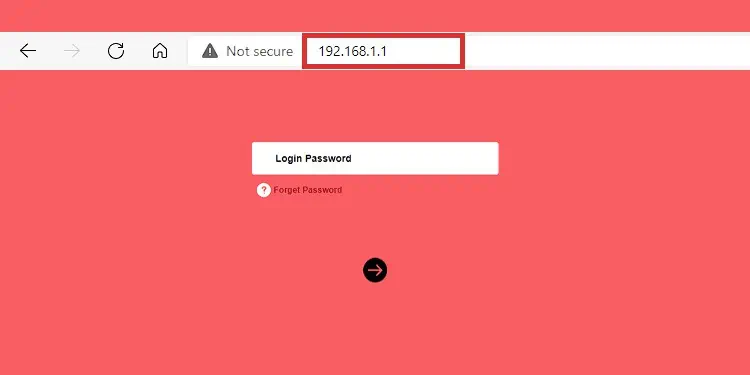
Because I have already logged into the site, the page only asks for their password in my case. However, if it looks like this for you, someone else in your household has already accessed the network.
If this is your case, try the default password. Otherwise, either ask for the password to that person. Alternatively, locate the reset button on your router, and press it to factory reset the network. Afterward, use the default password for the upcoming instructions.
Enabling UPnP
The UPnP feature allows your network to discover and communicate with your devices. At the same time, it manages communication channels with other devices on the internet.
It’s a key protocol present in every router. However, every brand uses a different interface, so finding the option is not the same.
I use a Mercusys router, and these are the steps I follow:
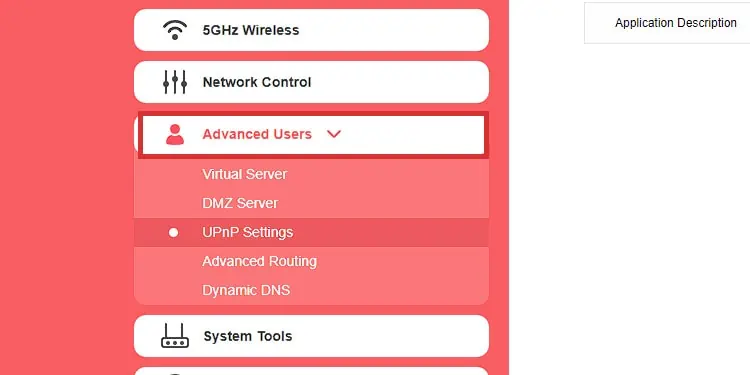
- Access the router’s page as an administrator
- Click on Advanced at the top right

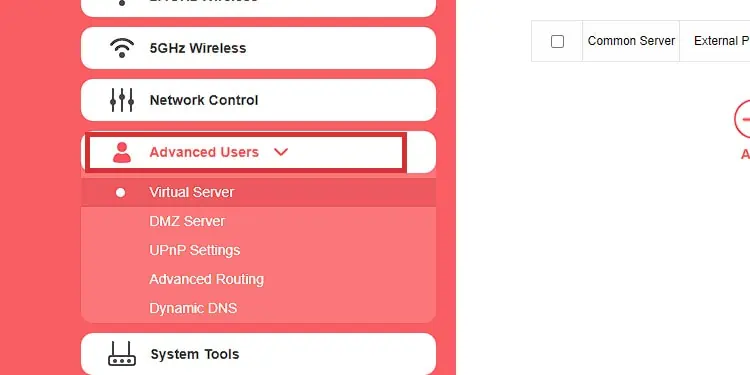
- Click on Advanced Users on the left-side menu
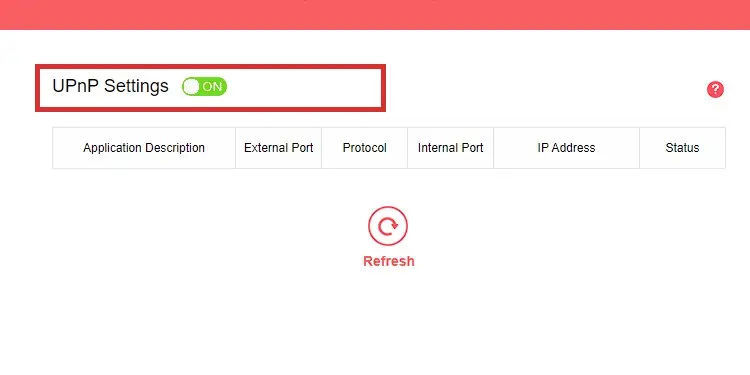
- Click on UPnP Setting

- Slider the feature to turn it on

You may have to follow similar steps. Depending on your router, these are the menus you can look at:
- Advanced
- Advanced Users
- Advanced Settings
- Advanced Configurations
- Sharing Options
- Media
- Media Options
- Media Settings
- Media Configurations
UPnP commonly has a switch, a slider, or a button to turn on and off.
Lastly, press it to save the configuration if you see a save button.
Change NAT Type Configuration
Changing the Nat Type configuration means “port forwarding” the Xbox. In other words, sending your Xbox’s network to connect to a particular public or private network for better functionality.
Doing so requires opening a special “Port,” a port we know works. Then, your consoles use the port automatically to share and receive data from other devices.
Before port forwarding the Xbox, you’d need to add a static IP address to the console.
Adding a Static IP Address to Your Console
Your router assigns dynamic IP addresses to your household devices every time they log into the network. “Dynamic” means these addresses change every time they log.
A static IP address is a manual choice, a numbered ID that won’t change. It makes the connection more stable, and it allows you to use its specific address to port forward a device.
Here’re the steps:
Here’re the instructions:
- Turn on your console
- Press the Xbox button on your controller

- Go to Profile & system
- Go to Settings

- Select General
- Select Network Settings

- Select Advanced Settings

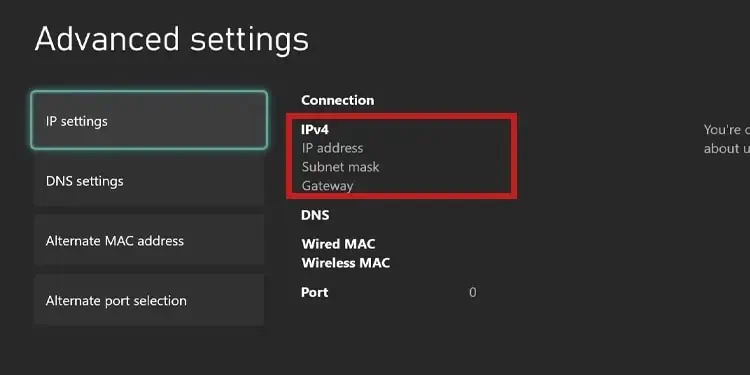
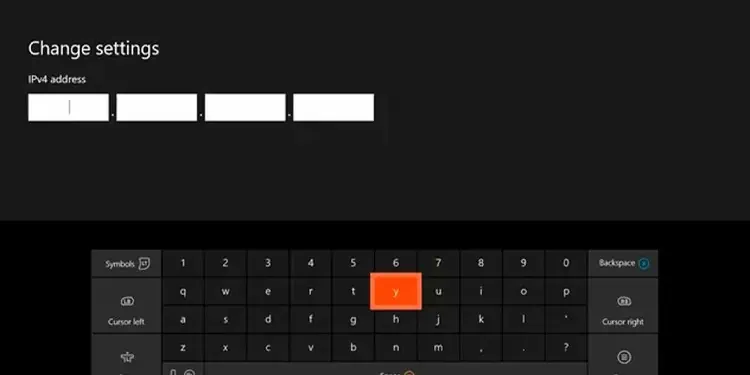
- Write down the following data under IPv4: IP Address, Subnet Mask, Gateway Address

- Select IP Settings
- Select Manual
- Type the same IP address you wrote down, but add 100 or 50 to the last digit. For instance, if the original IP is 196.160.0.0, you would type 196.160.0.50. Write down the address you typed

- Press continue and enter Gateway number and Subnet Mask if needed.
After you finish the process, test the connection and see if it works.
Additionally, you can configure a public DNS to improve your connection. Public DNS addresses are shared by companies like Cloudflare and Google to enhance worldwide internet service.
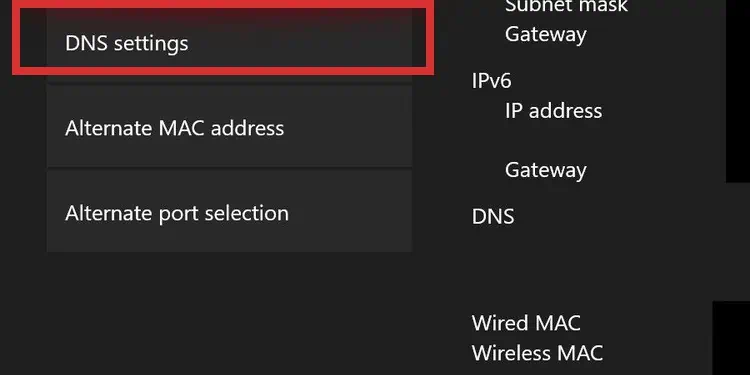
- On the same menu (Network Settings – Advanced Settings), select DNS Settings

- Select Manual
- As primary DNS, select 1.0.0.1 / As secondary DNS, select 1.1.1.1
Once again, test the connection. You can also use any of the free DNS available worldwide.
Port Forwarding the Xbox
It shouldn’t be too difficult, though. It’s usually near the UPnP option or within the UPnP option. Otherwise, look for menus similar to these:
- Port Forwarding
- Port Forwarding Rules
- Port Forwarding Options
- Virtual Servers
- Port Range Forwarding
- Applications
- Media Applications
- Sharing Applications
- Advanced Applications
- Apps & Gaming
- Gaming Rules
- NAT Rules
- NAT Forwarding
- Port Triggering
In my case, these are the steps I took:
- Click on Advanced at the top right

- Click on Advanced Users on the left-side panel
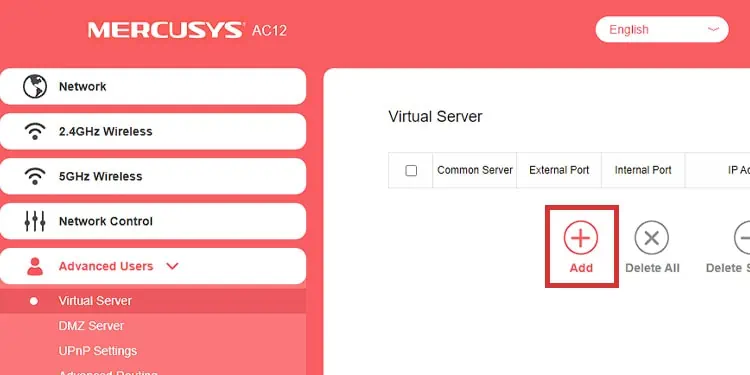
- Click on Virtual Server on the drop-down menu

- Click on “Add “

You may see the appropriate option as:
- Add a custom port
- Add rule
- Add port
- Forwarding rule
- etc
In any case, your screen should look like this: 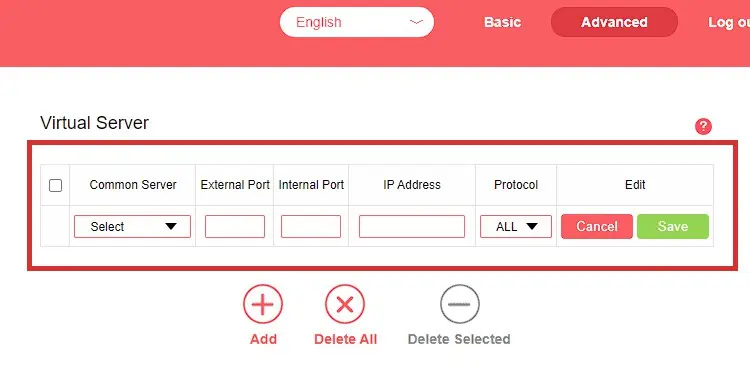
You’re to type the specific information your Xbox will use. Here’s the cheat sheet:
| Common server | External port | Internal port | IP Adress | Protocol |
| Don’t select anything | 88 | 88 | Type your Xbox’s static IP address | UPD (preferably). You can also choose ALL, Both, or similar options (it depends on the router’s interface) |
The internal and external ports Microsoft recommends for port forwarding the Xbox:
- Port 88 (UDP)
- Port 3074 (UDP and TCP)
- Port 53 (UDP and TCP)
- Port 80 (TCP)
- Port 500 (UDP)
- Port 3544 (UDP)
- Port 4500 (UDP)
The external and internal ports should be the same regardless of which one you choose. Also, if you choose 3074 or 53, you should use “All” or “Both” as protocol.
Lastly, after you type the information, save the configuration. 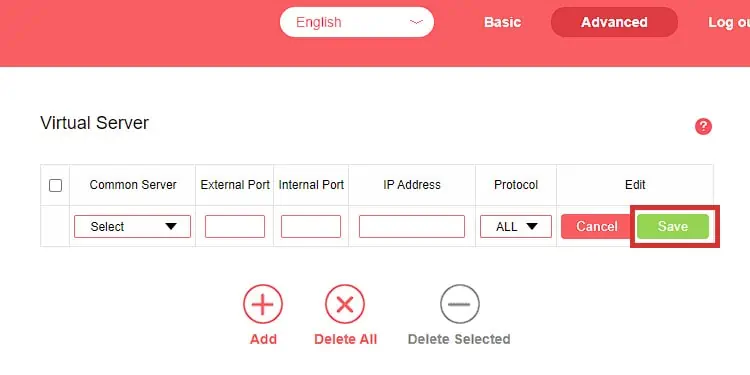
Then, go back to your Xbox and check if the NAT Type changed.

