USB Drive Encryption is especially essential if your USB contains sensitive information that’s not meant to be seen by third parties. This could be anything from personal identification to financial documents to login credentials.
Windows and Mac both have in-built tools for encrypting a disk; namely BitLocker and FileVault. We’ve listed all the necessary steps to encrypt your USB using these tools and more down below.
Before You Start
A USB encrypted using BitLocker on Windows will only be accessible on Windows. You’ll need to format the drive to use it on a Mac. Similarly, you can only remove the encryption using the tool you used to encrypt it (i.e. BitLocker in this case).
The same applies if you encrypted using a Mac, or using third-party encryption software.
If you plan to use your USB with different operating systems, you should think about the compatibility issue before encrypting the USB.
How to Encrypt USB on Windows
Windows has a native disk encryption tool called BitLocker, which uses AES encryption in CBC or XTS mode with a 128-bit or 256-bit key to protect your data. To use it:
- Connect the USB stick to your PC.
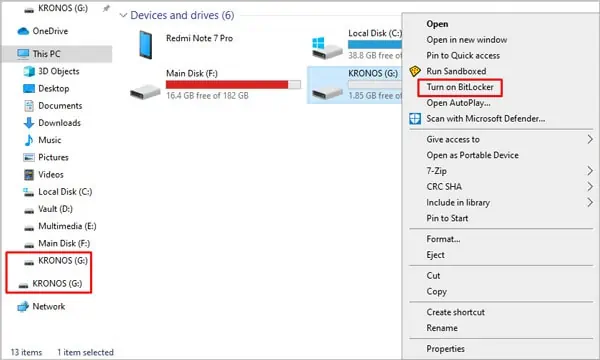
- In File Explorer, right-click the USB and select Turn on BitLocker.

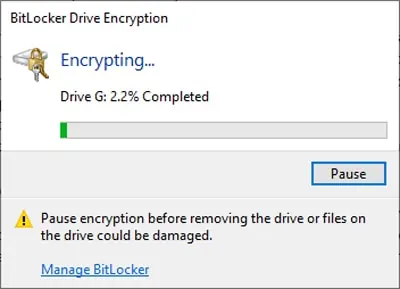
- Wait for the initialization process to complete. Don’t disconnect the USB during this time as that can damage your USB or cause data loss.
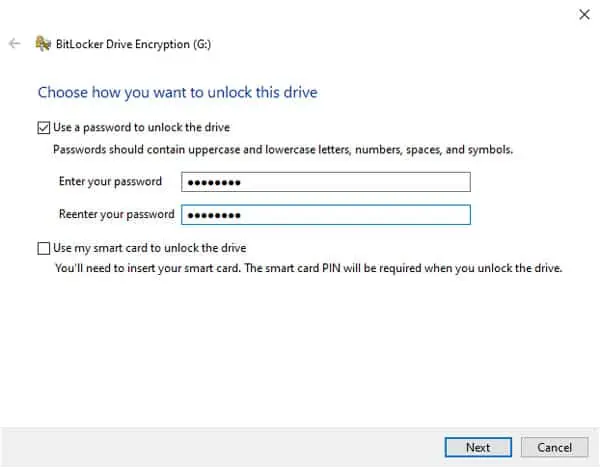
- Select the appropriate method to unlock the drive. The available options are Use a password to unlock this drive and Use my smart card to unlock the drive. As the smart card method won’t be applicable to most users, we’ll use the password method for tutorial purposes.
- Enter a strong password, re-enter to confirm it, and press Next.

- Choose the appropriate backup method for your recovery key. The available options are Save to your Microsoft Account, Save to a file, and Print the recovery key. For tutorial purposes, we’ll use Save to a file.
- Browse to the location where you wish to save the backup file, press Save, then click Next.
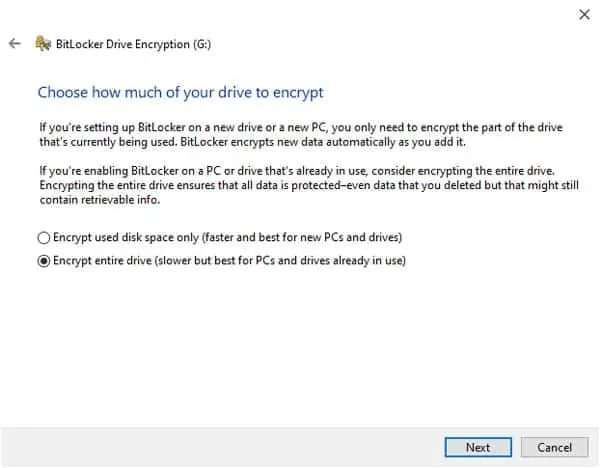
- Choose how much of your drive to encrypt – Encrypt used disk space only or Encrypt entire drive. You can decide which one is right for you after reading the description on the screen.

- Choose which encryption mode to use – New encryption mode or Compatible mode. The description for both is shown on the screen.
- In the confirmation screen, press Start encrypting.
- You’ll get an encryption is complete message once it’s done.

How to Encrypt USB on Mac
Mac users can encrypt their USBs with XTS-AES-128 encryption with a 256-bit key via the Finder or Disk Utility. Connect the USB to your Mac and follow the steps listed below:
Finder / Desktop
- Press Command + Option + Space to open the Finder and locate the USB Drive on the left. Alternatively, you can also find it directly from your desktop.
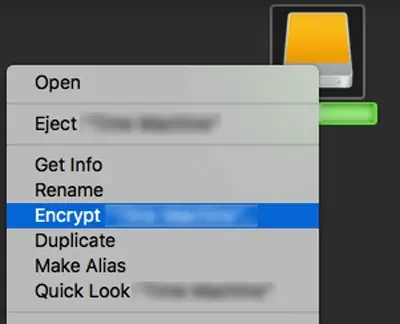
- Right-click the USB drive and click on Encrypt <Device Name>.

- Enter a strong password, re-enter it to verify it, and use a password hint if necessary.
- Press Encrypt Disk.
If you couldn’t find the Encrypt Device option, you can fix this issue by formatting the USB with GUID Partition Map scheme. Once that’s done, the encryption option will become available both via the Finder and Disk Utility. The steps for it are listed in the section below.
Also, before you format, remember to back up the USB’s contents elsewhere if necessary.
Disk Utility
- Press Command + Shift + U to open the Utilities folder.
- Launch Disk Utility and look for your USB drive on the list. If you don’t see it, click on View from the top-left and enable the Show All Devices option.
- Select your USB drive and press Erase.
- Select GUID Partition Map as the scheme.
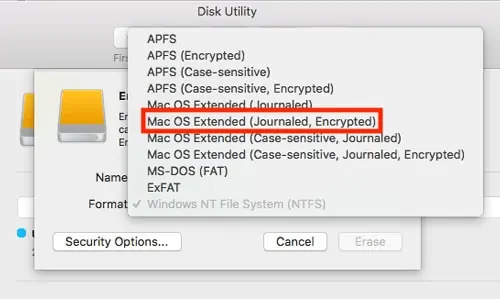
- In the format field, select APFS (Encrypted) or Mac OS Extended (Journaled, Encrypted) as the file system.
APFS is the default file system with more features, while Mac OS Extended is older but has better compatibility. Read APFS vs Mac OS Extended for more on this if you’re not sure which to pick.
- Name your drive and press Erase.
- Enter a strong password, re-enter it to verify it, use a password hint if necessary, then press Choose.
- Finally, press Erase once more to format and encrypt the USB.
Third-Party Encryption Tools
If the native encryption tools in Windows/Mac don’t quite cut it for you, some reputable third-party options include VeraCrypt, AESCrypt, TrueCrypt, AxCrypt, DiskCryptor, Gilisoft USB Encryption, USB Safeguard, and Kruptos 2 Go-USB Vault.
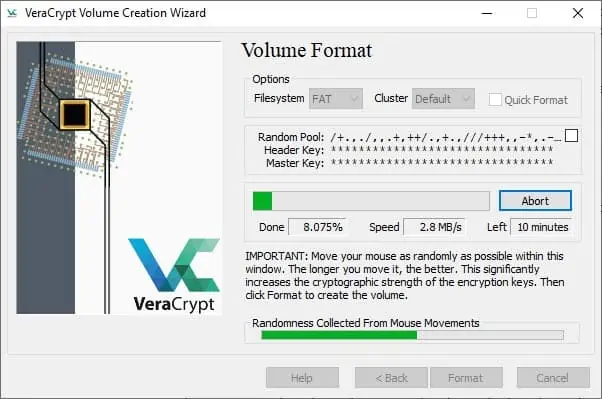
While the exact steps will slightly differ for each software, the general idea will apply to all of them. For tutorial purposes, the steps for VeraCrypt are listed below:
- Connect the USB to your PC and launch Veracrypt.
- Press Create Volume and select Encrypt a non-system partition/drive.
- Select the appropriate volume type.
- Select the device and choose to encrypt it with or without formatting the contents.
- Under Encryption Algorithm, the default option will be AES. Under Hash Algorithm, it will be SHA-512. While you can pick other options, we recommend just using the default ones.
- Enter a strong password, press Next, and accept any prompts.

- Once the encryption is complete, press Next to continue.
- To access the encrypted drive, press the Select Device button on the main screen.
- Select your USB from the list, pick an unused drive letter, and press Mount.
- Enter your password and press OK. You can now access the USB from the file explorer.
How to Disable USB Drive Encryption?
The steps for decrypting your USB will depend on what encryption method you used to start with. Connect the USB to your PC and try the steps listed below as appropriate:
BitLocker
- Press Windows + E to launch the File Explorer.
- Right-click the USB drive and click on Manage Bitlocker.
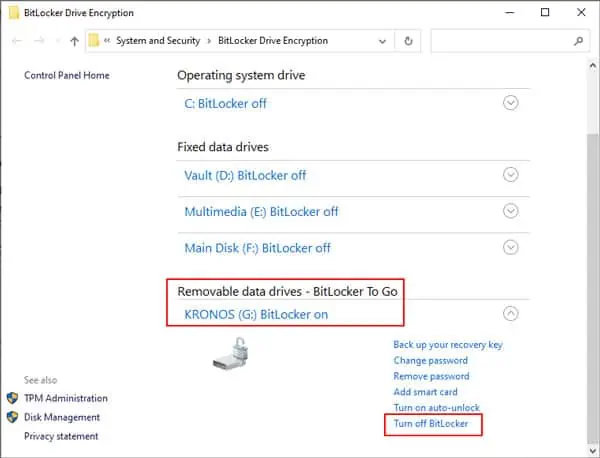
- Under Removable data drives – BitLocker To Go, select the USB and press Turn off BitLocker.

- Once it’s done, you’ll receive a Decryption is complete message.
Disk Utility / Finder
- Press Command + Option + Space to open the Finder.
- Right-click the USB drive and click on Decrypt <Device Name>.
- Enter your encryption password when prompted to confirm that you want to decrypt the USB.
Third-Party Tools
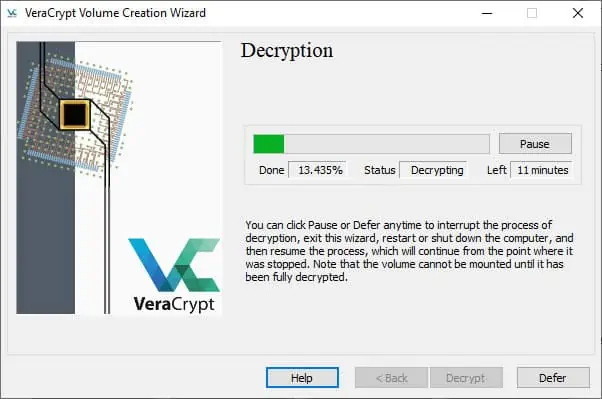
The steps to disable USB encryption will slightly differ according to the software, but for tutorial purposes, the steps for decrypting using VeraCrypt are listed below:
- Connect the USB to your PC and launch VeraCrypt.
- Press the Select Device button.
- Select your USB from the list.
- Pick an unused drive letter and press Mount.
- Enter your password and press OK.
- Right-click the USB and select Permanently Decrypt.
- Accept the prompts and enter your password.
- Press Decrypt and accept the prompts once more.

- You’ll receive a The VeraCrypt volume has been successfully decrypted message once it’s done.
Should I Buy an Encrypted USB Drive?
Encrypting a normal USB Drive using the methods we listed above will be secure enough for most users. But if you want to bump up the security level a notch higher, pre-encrypted USB Drives can be purchased directly.
These encrypted drives have physical features for protection such as numeric keypads for password entry, fingerprint sensors, and so on.
On the software end, they typically have mechanisms such as erasing data upon too many unsuccessful password attempts to protect against brute force.
One downside is that encrypted USB drives tend to be expensive – the more the features, the higher the cost.

