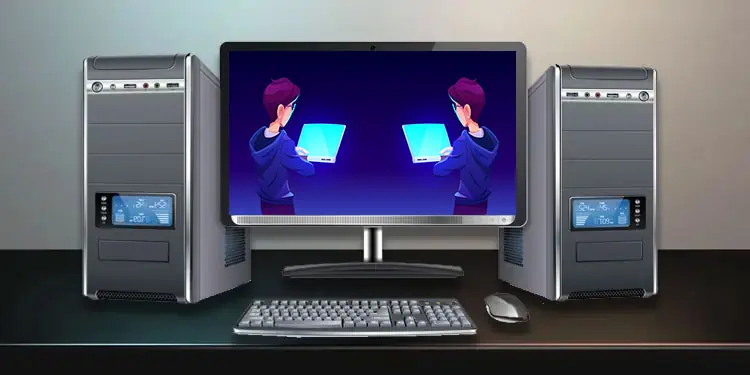
It can be troublesome to arrange two full PC setups if you have a small space. You could somehow stack the casings, but monitors require much more space.
One of the ways that you can use to solve the issue is by operating both computers using a single monitor. You may have to toggle between the display of each computer or can view both systems at the same time seamlessly, depending on the methods.
In this guide, we are going to talk about all the possible ways you can accommodate two computers on a single monitor.
How to Use Two Computers Within One Monitor?
The notion of using two computers within one monitor can be extended beyond the perspective of small space. If you demand working on different operating systems simultaneously or just multitask remaining on a budget, you can make use of this technique.
So, let’s not delay anymore and move on to the methods that we have compiled for you.
Using Multiple Video Cables
The basic idea here is to connect the display cables from each of the computers to the monitor. You can achieve this in three different ways. Let’s discuss all of them here.
On a Monitor with Multiple Video Port
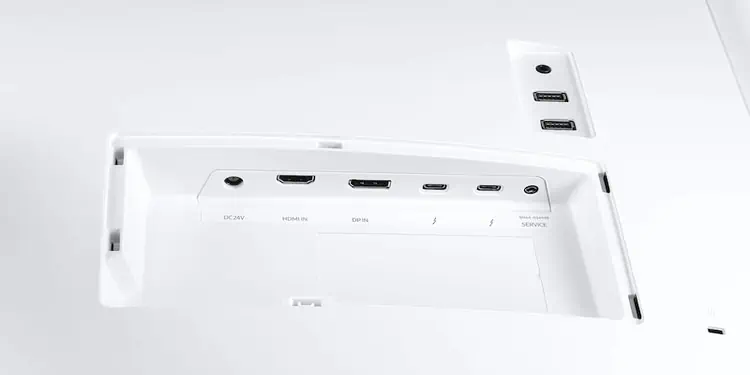
Most of the monitors have multiple ports to connect the display cable coming from the computer. Earlier, there used to be two VGA ports, but now, the monitors are provided with a multitude of ports ranging from VGA, DVI, HDMI, DisplayPort, or even thunderbolt interface.
You can connect a VGA cable or an HDMI from one computer to the monitor and an HDMI from another one. The benefit of this method is that you only need the cables and no extra accessories.
If your monitor features two or more video ports, let’s see how you can set this up.
- Find what kind of video ports your monitor has.
- Obtain the cables as per your requirement.
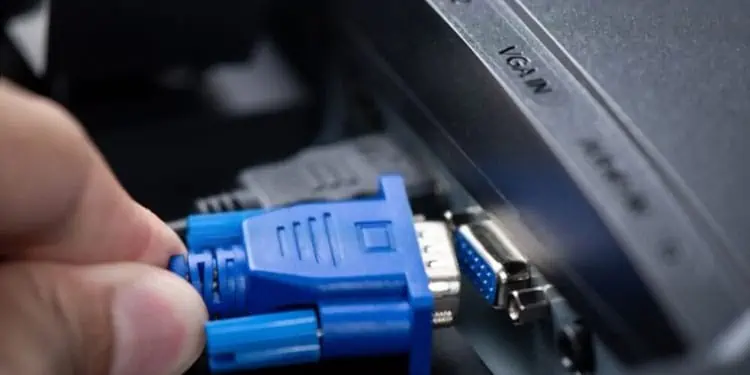
- Reach to the back of the computer and connect the cable to Video IN port.

- Connect the Video OUT connector of the cable to the monitor. Do this for another system as well.
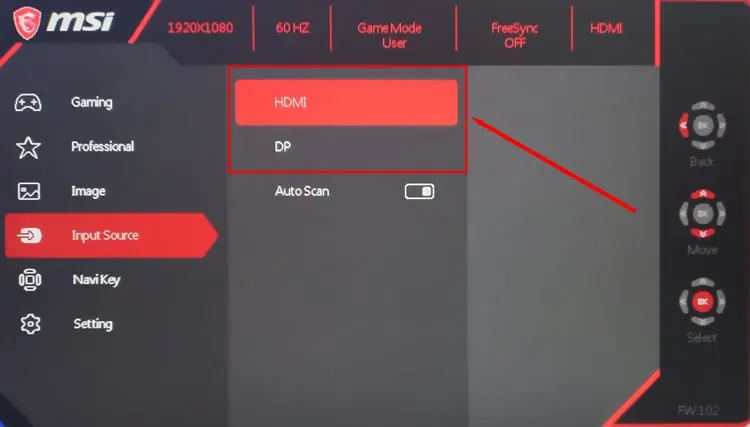
- Now, turn on your monitor and press the menu button on it.
- Go to Input Source and choose the appropriate source where you connected the system.

- Turn on that particular system whose display you set up as input in the monitor. You will find its contents on the screen.
- Change the input source by the same method when you want to run the other one.
Enjoy the features of two systems in a single monitor. However, switching the source continuously through the monitor setting can be quite troublesome and time-consuming.
Through a Video Splitter Switch
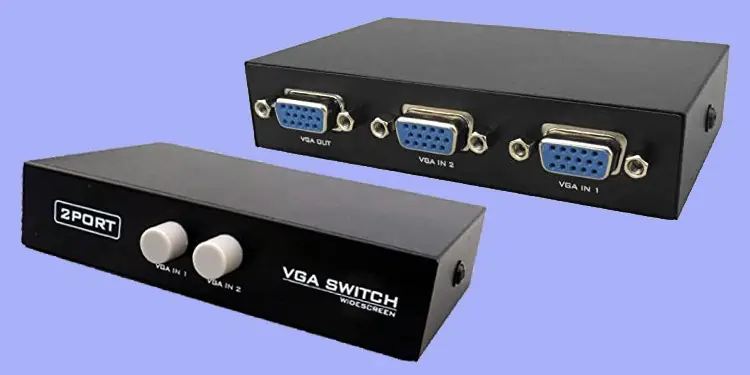
If your monitor does not have multiple video ports, you can use a Video Splitter Switch or a Multi-monitor splitter device. It takes the input from two different sources (one at a time) and sends a single output signal.
But the principle is actually the same. It consists of two VGA, HDMI, or Display ports for the input and one port for the output. However, the device consists of a switch that can easily change the input source without any hassle.
Here is how to set this up.
- Find the type of ports your monitor and computers have and procure the Video Splitter Switch having the same ports.
- Connect the Video IN of the cable to the back of the computer and Video OUT to the port marked as Input 1 on the splitter.
- Do this for the other system as well.
- Now, connect Video IN of the third cable to the splitter’s output port and Video OUT to the monitor.
Power on your computers and the monitor. Change the monitor’s display to the system of your necessity by pressing the switch.
On an Ultra-Wide Monitor
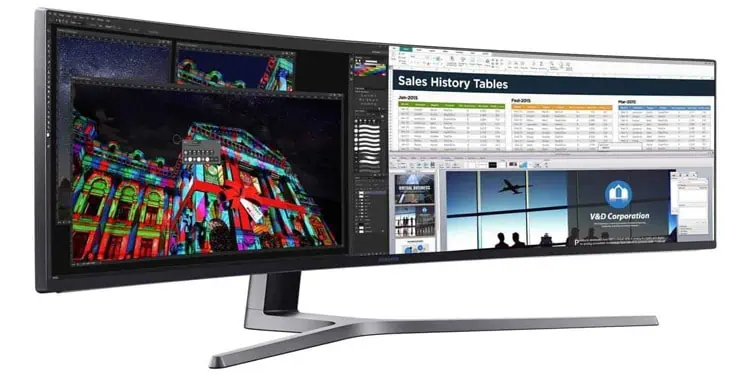
Nowadays, the ultra-wide monitor provides an option to split the screen to accommodate two different computers. This eliminates the need to switch the input sources every time you need them. However, it surely is costly.
But, if you can spend a few bucks on an ultra-wide monitor, you can just connect the video cables from two systems to the monitor and split the screen. Please follow the instructions below to prepare the setup.
- Look at the ports available on your computer and obtain the cables accordingly.
- Connect the Video IN of the display cable to the port on the computer and Video OUT into the monitor.
- Do this for the next system as well.
- Find a button on the monitor to open settings.
- Go to Input and choose Picture-in-Picture or Picture-by-Picture mode. The name may vary with manufacturers.
- Select an aspect ratio for the displays and press Ok.
You can now view the contents of both systems on one monitor simultaneously.
However, these methods have a significant disadvantage. You cannot use the same keyboard and mouse for both computers. You will need to have a different set of keyboards and mice for each system. Or, you will have to disconnect and reconnect them whenever you switch the computer.
But, there are a few workarounds for this problem. Let’s see them now.
Use a KM-Software Switch
A KM or Keyboard-Mouse Switch allows you to move the input devices from one system to another without the necessity to remove and reconnect them. It works by creating a server-client interface through Wi-fi.
There are alot of such software, but most of them are paid. Nevertheless, Microsoft has provided free access to its program, Microsoft Garage Mouse Without Borders. Here is how you can set it up.
- Download and Install Microsoft Garage Mouse Without Borders on both of your computers.
- First, run the application on the system that you would like to be the host.
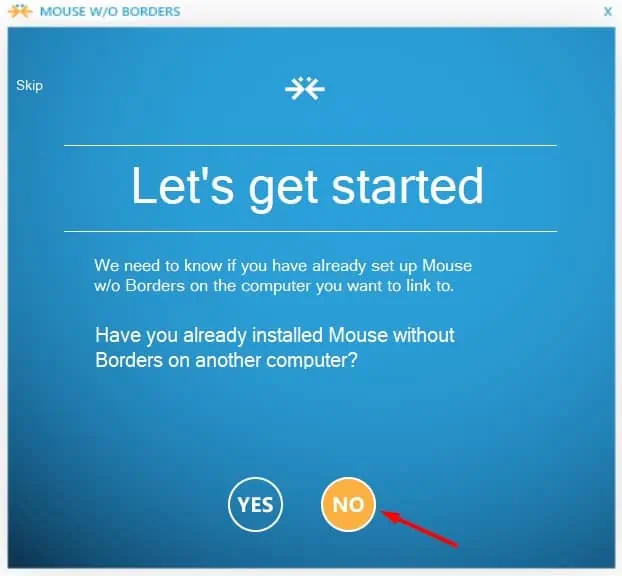
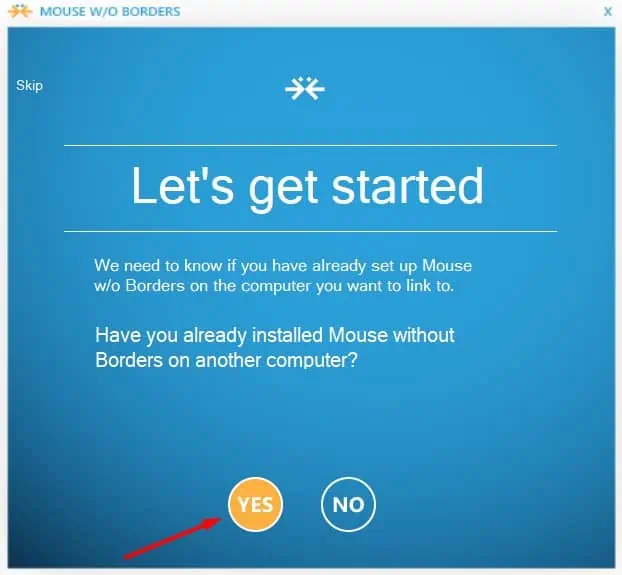
- A window with the question “Have you already installed Mouse without Borders on another computer?” will pop up. Click No.

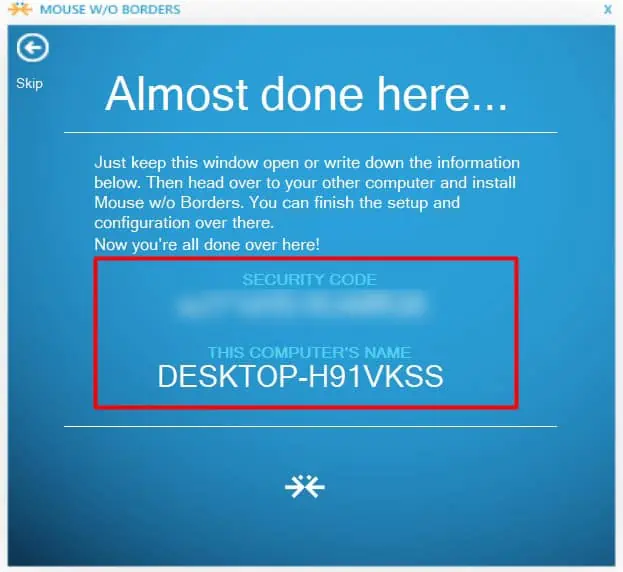
- Note the security code and the computer’s name.

- Now, run the application on the next system.
- This time select Yes as the answer to the question.

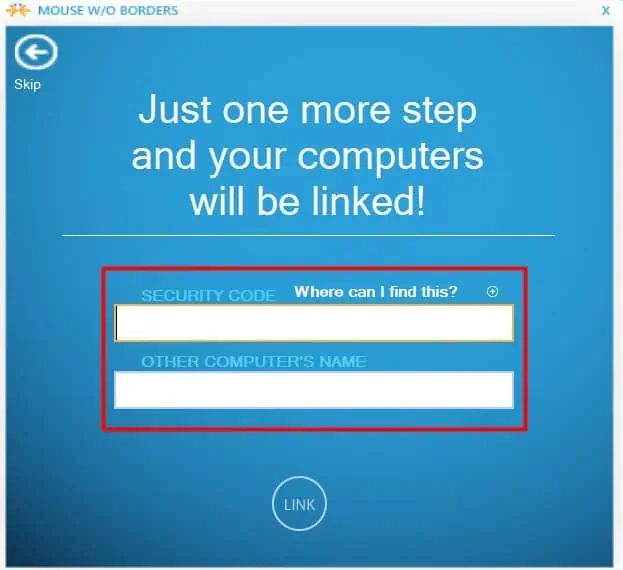
- Enter the security code and the host computer’s name on the next page.

- Click Link. Your keyboard and mouse are now connected to both systems.
You can use other free KM-Software switches, ShareMouse or Input Director, to share the input devices between a Windows computer and a Mac.
Use a USB Splitter
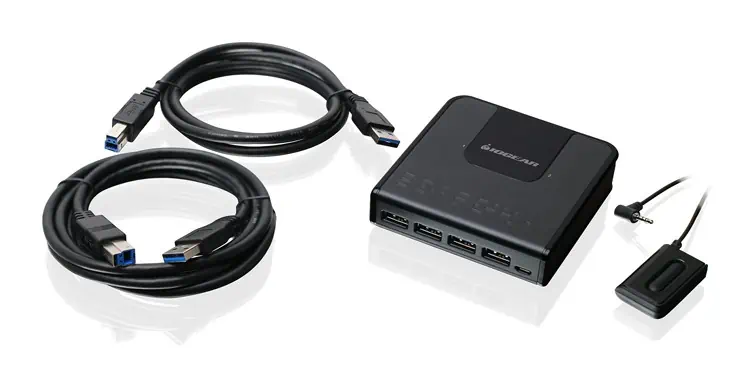
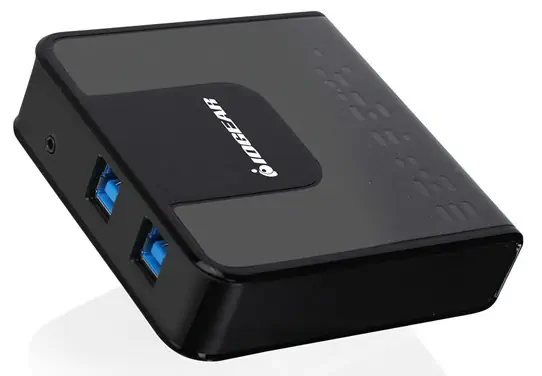
USB Splitter is a device similar to the VGA splitter but with the feature of splitting USB devices between different systems. It also features a switch to interchange between the connected systems.
You will need two USB cables with a male connector at both ends. This is to provide a communication channel for the splitter and the system.
Let’s see how to set a USB Splitter.
- Connect the keyboard and mouse to the input USB ports on the splitter. If you use wireless devices, insert the USB Bluetooth receiver into the port.
- Insert USB IN connector to the output port of the splitter and USB OUT to one system. The USB IN connector may be a Type B or Type A depending on the splitter.

- Use another USB cable in the same way for another computer.
- Turn on the system and press the respective switch to share the keyboard and mouse with the associated system.
Usually, the USB splitter is used with a VGA splitter to use two different systems on a single monitor.
Use Multi-Device Mouse and Keyboard
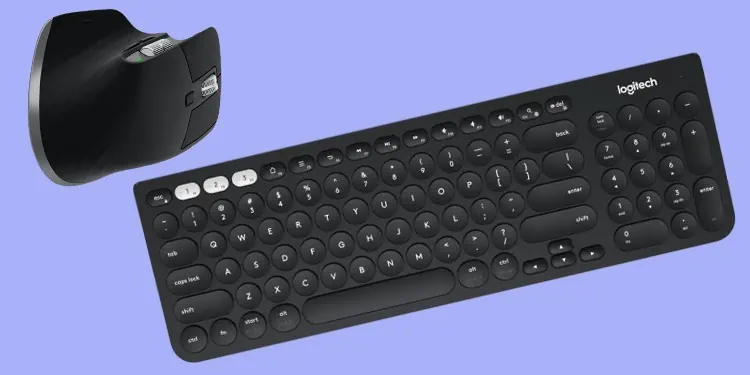
You have yet another option of using a Multi-Device mouse and keyboard to share between the connected systems. These devices connect through a common software installed on both computers, similar to KM software switches.
One of such mice is provided by Logitech, i.e., Logitech MX Master 3, and the keyboard is Logitech K780. These devices use Logitech Flow software for synchronization. You just need to connect both of your systems to the same network. Let’s look at the basic steps to set up the Multi-Device mouse and keyboard.
- Turn on the mouse and keyboard as well as the computers where you would like them shared.
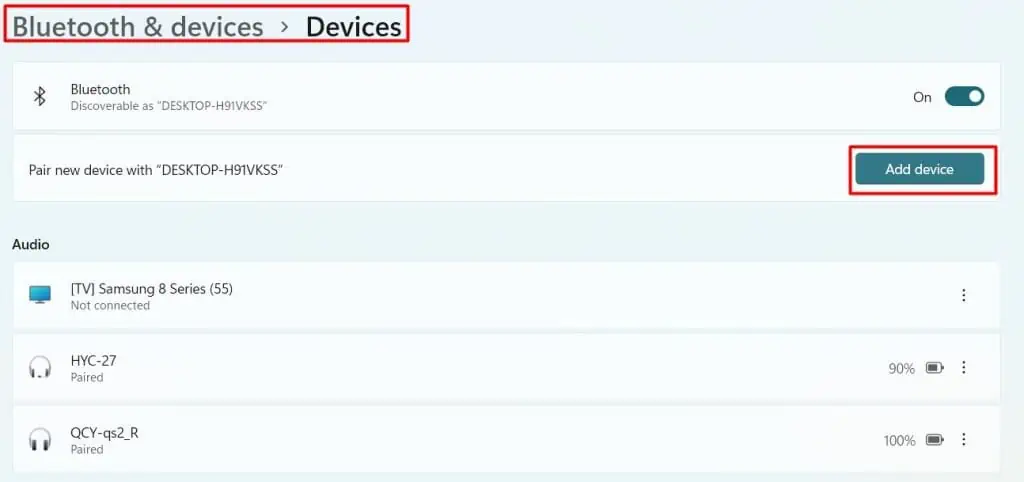
- Right-click on the Bluetooth option in the taskbar and go to settings.
- Click Add new device. Follow the instructions to pair the devices to the computer.

- Do this for another computer as well.
- Download and Install Logitech Options or Logitech Flow on both PC. The software may vary depending on the manufacturers.
- Open the program and enable Logitech Flow on both computers.
- Arrange the two monitors in Logitech Options software similar to their actual physical orientation on your desk.
You will find the keyboard and mouse work for both monitors without any hassle. Apart from Logitech, you can also use the multi-device mouse and keyboard from high-end manufacturers such as Corsair and iClever, among a few.
Using KVM Switch
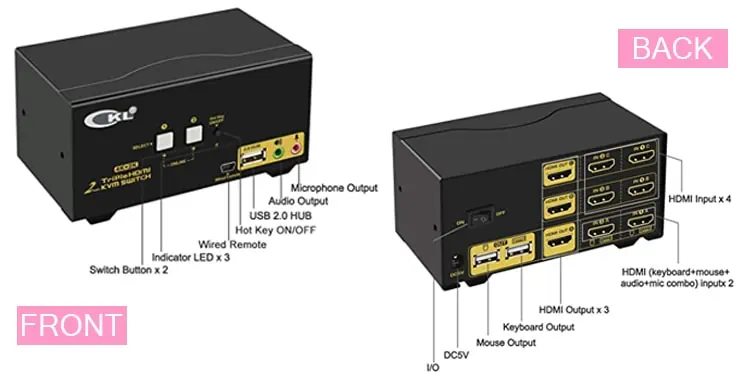
A KVM (Keyboard-Video-Mouse) switch is the hardware version of the KM software switch. It allows connecting multiple computers to a single monitor, similar to a VGA splitter. But the improvement here is it provides a common port for the keyboard and mouse so that you can use the same input devices on up to four computers.
You do not have to get a separate splitter for display and USB devices. Similarly, there is no need for switches to share the input devices. You can connect the display and USB cables to the computers and KVM switch and press a button to change between the systems. However, it can be quite costly.
Let’s look at the way you can set the KVM switch.
- Find the type of video ports featured in your monitor and computers.
- Obtain a KVM switch that accommodates the same kind of ports.
- Connect the display cable to one computer and the input port of the switch. Do this for both systems.
- Now, insert the display cable from the monitor to the output port of the KVM switch.
- Attach the keyboard, mouse, speaker, and other accessories to the respective port in the switch.
Power on the systems and press the switch to toggle between the computers.
Using Remote Desktop Applications
A remote desktop connection allows you to control another PC remotely from across the world. You can use this feature to create a host-client network and operate another computer on the same monitor.
Windows provides its own remote desktop application to connect to several systems. You just need to be on the same network. Let’s set the remote desktop to use two systems on a single monitor.
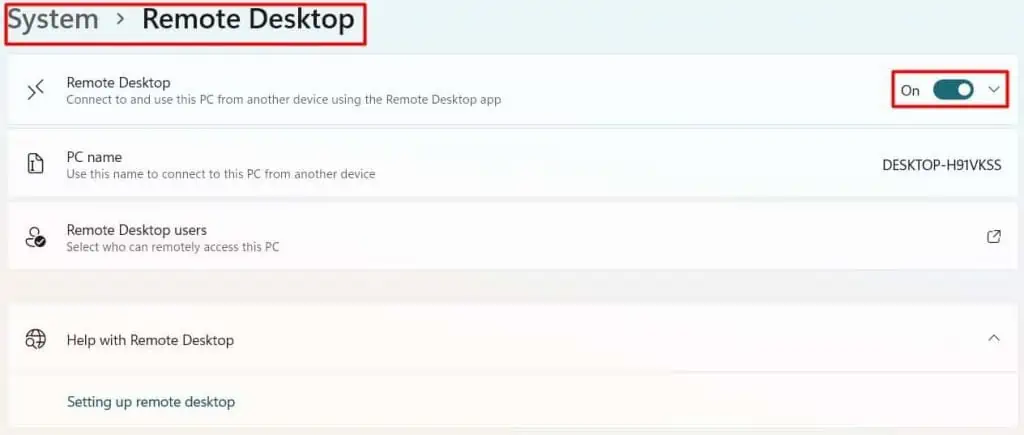
- Press Windows + ‘I’ to open Settings on one of the computers.
- Go to Remote Desktop and enable the feature.
- Note the PC name and Remote Desktop Port if provided.

- Download the appropriate version, x64, x86, or ARM64, of the Microsoft Remote Desktop application on the next computer. You can find the application on Android and Apple platforms as well.
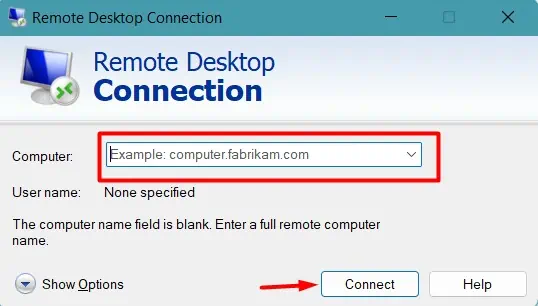
- Open the application and click Add device.
- Type the Computer name and port, if required. And click Connect.

You will find the contents of your next PC on the screen. You can minimize the remote desktop to work on the current system.
If Microsoft remote desktop does not work for you, then you can opt for other free applications such as TeamViewer, AnyDesk, etc., to set up the remote desktop.
But, the major disadvantages while using a remote desktop are that the functioning is not smooth, and the processes may lag too much, along with poor display quality.

