A VPN allows us to mask our online privacy and internet traffic through an encrypted connection. Having a VPN not work all of a sudden when you use it daily can be dreadful. Without a VPN, your IP address is exposed which can attract a lot of unwanted traffic and make you vulnerable to cyber-attacks.
Usually, if your internet connection is too slow or has high traffic can cause the VPN to disconnect. In most cases, you can bypass this by changing to a different server. But doing this may not always yield the same result.
Let’s go over some of the reasons why your VPN keeps disconnecting and how you can fix it.
Why Does My VPN Keep Disconnecting?
Your VPN disconnecting can be the result of several reasons. High latency, conflicting firewall, or even an outdated VPN can cause the issue. Let’s go over some of the main reasons why your VPN keeps disconnecting.
- Outdated VPN software.
- Slow internet connection.
- High traffic server.
- Expired VPN subscription.
- VPN services blocked by the region.
- Interruption caused by the system.
How to Fix VPN From Disconnecting?
This may sound very simple but sometimes restarting a router can fix various issues related to the internet connection. It may get rid of VPN disconnecting in your network. We talked about some more possible reasons why you may be having the issue. Now, let’s go over some of the ways we can prevent the VPN from disconnecting.
Verify Your Connection Speed
Before you go trying different methods and fixes, start by diagnosing your internet speed. It may be obvious but a slow internet connection is the main reason for VPN related issues, including frequent disconnection. Make sure that your internet is somewhat fast and capable of supporting a VPN.
Verify VPN Subscription
VPNs usually come with subscription-based services. Meaning if your subscription plan has ended then you might get issues such as auto disconnecting and more. Check if your account’s subscription period is still active or finished.
You can go into your Profile section and then the Subscription option to check.
Change the VPN Server
The first thing you should try is changing to a different server. Sometimes, a particular server can have problems if there is too much traffic. Changing into a server with less traffic can result in better performance.
Preferably, change to a server that is near your physical location. Doing so maximizes the chance of faster speeds. To change into a different server, basically all you have to do is find the option called Select Location or something similar. Then choose the location that is closest to you.
Change Your VPN Protocol
VPN protocols are the link between your device and the server itself. Such protocols ensure fast connection. VPNs come with a long list of protocols to choose from. If you are having issues with one of the protocols, try changing to a different one and compare them.
To change your VPN protocol, there is usually a Protocols tab under Options.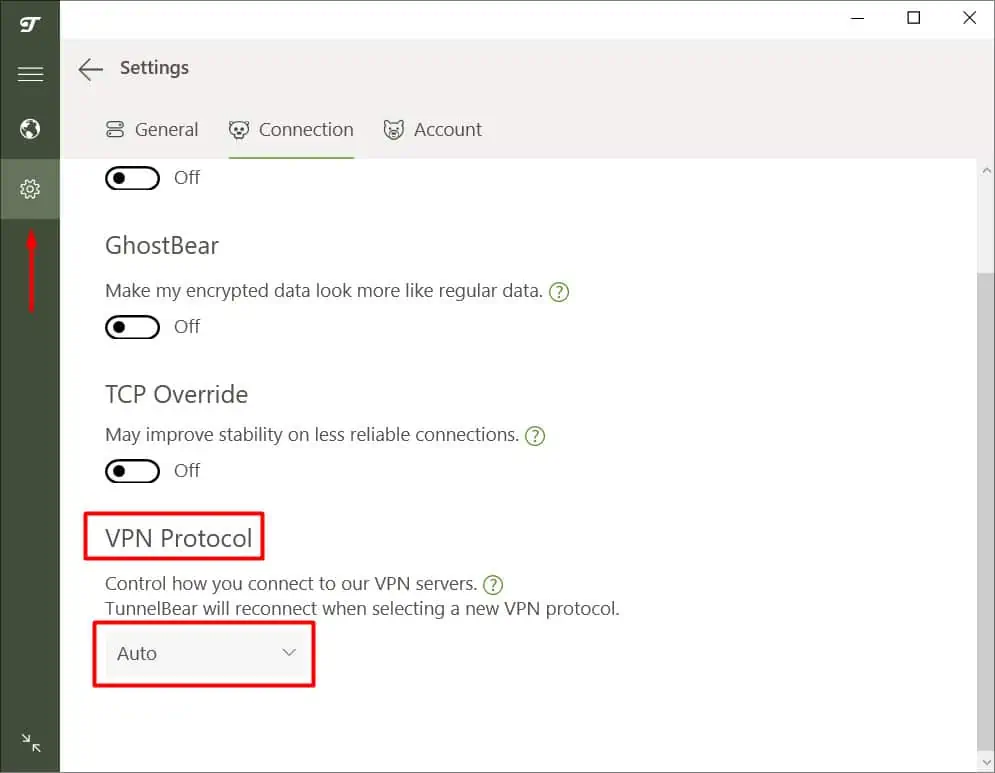
Create an Exception for VPN in the Firewall/Anti-virus
Sometimes the antivirus software or the firewall protection on your PC can interrupt the VPN’s connection. While the chances of this happening are slim, we still advise you to do so to minimize the risk.
To create an exception in your Firewall, follow these steps:
- Press Windows Key + R to open Run, and type in
firewall.cpl. - From the left panel, click on Advanced settings.
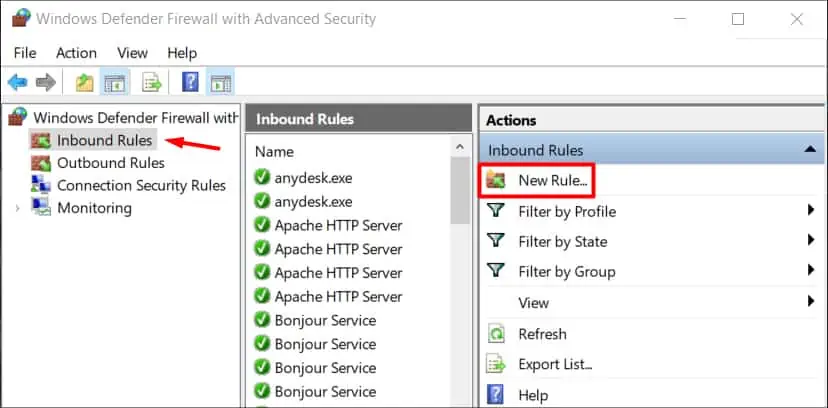
- Now, Inbound Rules > New Rule.

- Select Program and hit Next.
- Select Program and browse the VPN then click on Next.
- Choose Allow the connection option.
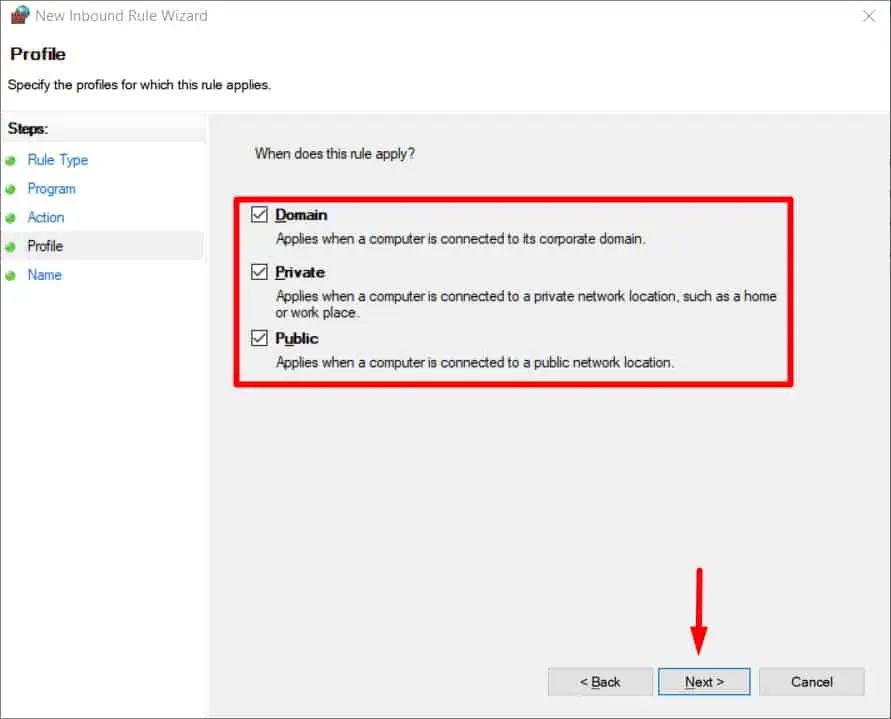
- Apply the rule for all types of connection and hit Next.

- Finally, give the rule a name and a fitting description.
Try a Different DNS
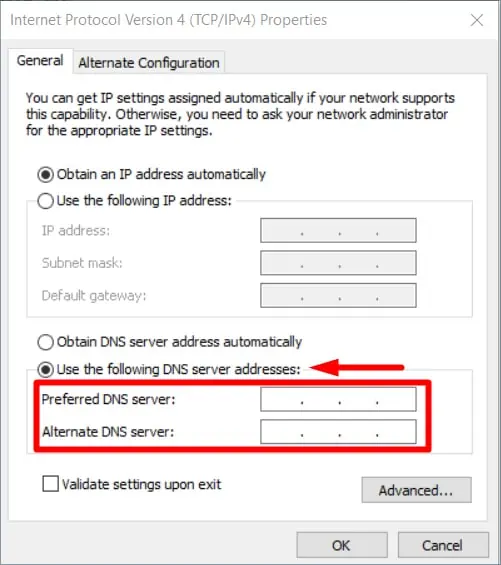
DNS is very important because it keeps track of our IP address in the internet traffic. If you are facing issues with your current DNS, change into a different one and cross check the performance. Some of the popular public DNS includes Google DNS and Cloudflare.
To change to a different DNS on Windows, follow these steps:
- Press Windows Key + S, and type Control Panel.
- Next, click on Network and sharing center and then Change adapter settings.
- Now, double click on the network you are currently on.
- Then click on Properties.
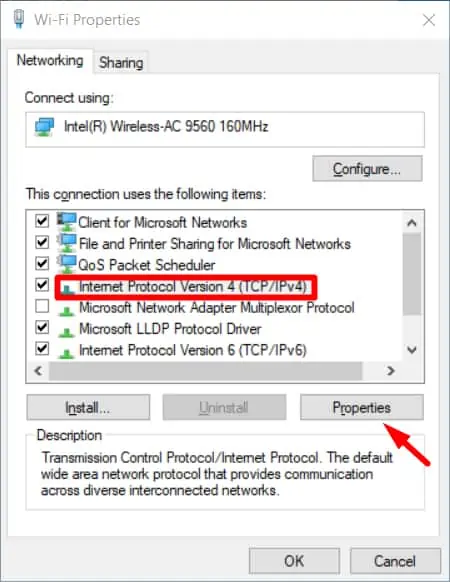
- Click on Internet Protocol Version 4 (TCP/IPv4) and then Properties.

- Choose to Use the following DNS server addresses.

- Enter the new DNS address and press Ok.
Restart your PC and check if the issue persists.
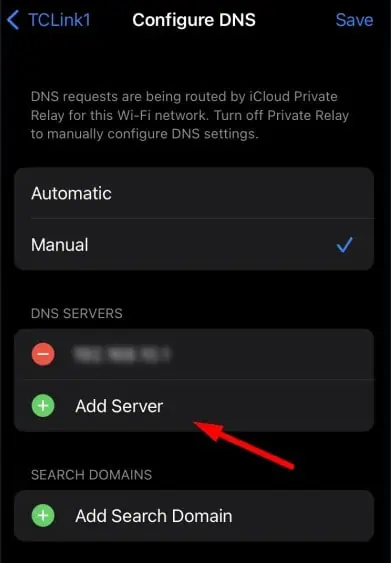
On iOS
- Open Settings.
- Press on the Wi-Fi icon.
- Now, press the i icon by the side of your connected Wi-Fi.
- Tap on Configure DNS and then overwrite the DNS with your preferred one.

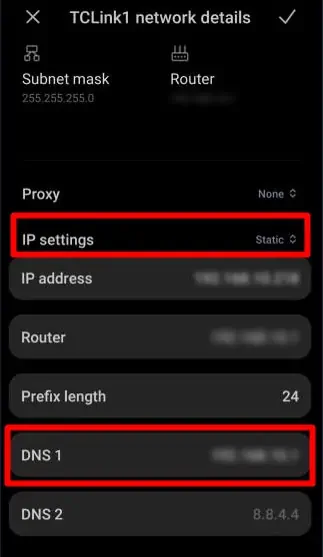
On Android
- Navigate to Wi-FI in the Settings.
- Tap and hold the Wi-Fi that you are connected to and hit Modify Network.
- Now, scroll down to Advanced options.
- Under IP settings change DHCP to Static.
- Finally change the value under DNS 1 to your preferred DNS.

Use a Different VPN Port
Routers house many ports for smooth data flowing. Such VPNs require certain ports to create hidden traffic of data. If you’re facing connection issues, try changing the ports.
Go to the connection settings of your VPN and change it there.
Diagnose Device Settings
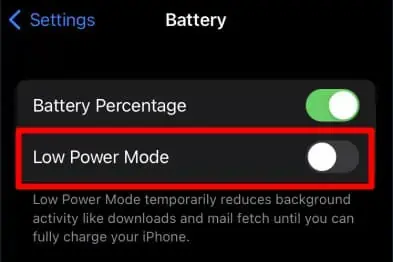
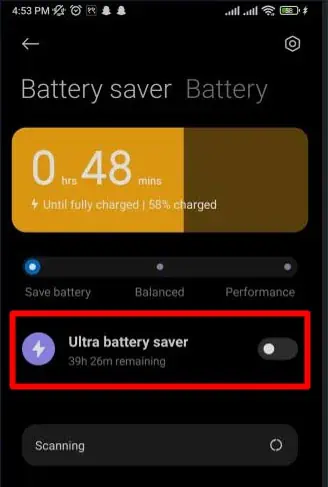
Sometimes the different settings in your device can be causing the VPN to disconnect and crash. Look for settings that block unknown software or interrupt the connection. If your device has a power-saving mode, it might be closing down the VPN to save power.
Additionally, try disabling any settings that cause a change in your device’s state i.e Sleep mode.
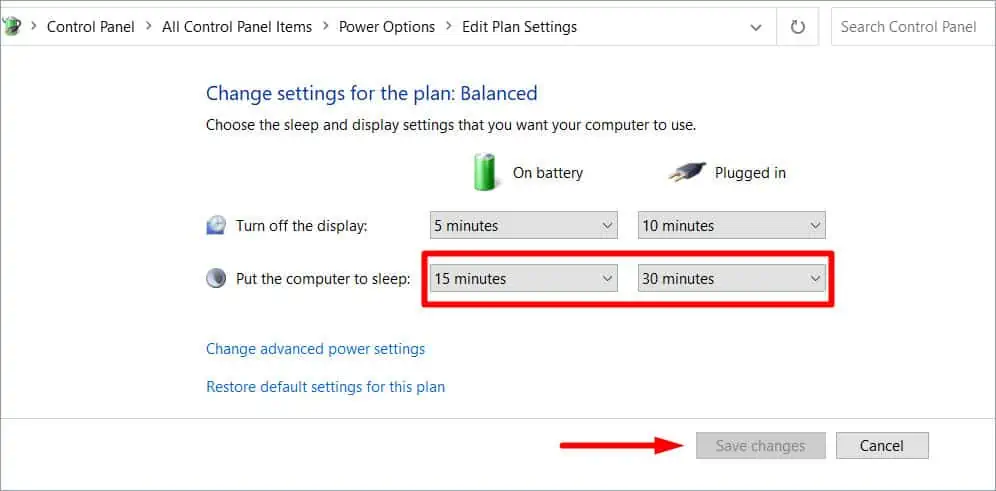
To disable power savings on Windows, follow these steps:
- Go to the Control Panel by searching it up on the Windows search bar.
- Navigate to Power Options.
- Next click on Change plan settings on your selected power plan.
- Now, under Put the computer to sleep, change the options to Never.

- Click on Save Changes and you are done.
On iOS
- Open Settings.
- Click on Battery and change the slider to Off for Low Power Mode.

On Android
- Go into Settings > Advanced Settings.
- Look for Battery Settings.

- Toggle the Battery Saver off.
Reinstall the VPN
In most cases, reinstalling a VPN resets any unwanted settings, deletes all the excess cache files, and removes any other settings that are causing your VPN to malfunction.
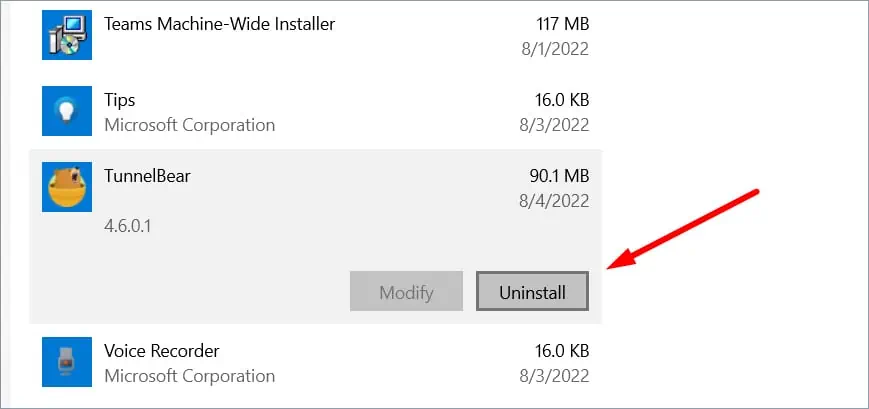
To reinstall VPN on Windows, follow these steps:
- Press Windows Key + I to open Settings, next click on Apps.
- Under Apps & features, search for your VPN and press Uninstall.

- Hit Next and complete all the steps.
After this, head over to your VPN site and download it again.
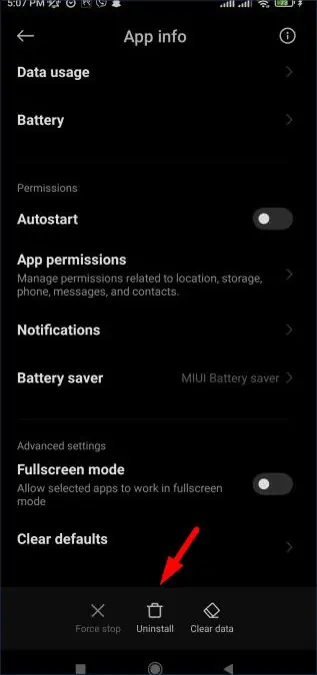
On Android
- Press and hold the VPN icon and click on App Info.

- Next, click on Uninstall.
Head over to Google Play Store and download the VPN again.
On iOS
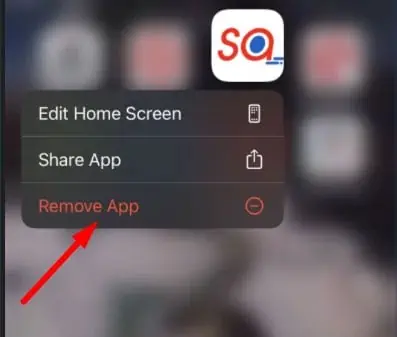
- Press and hold the VPN icon and click on Remove App.

- Head over to the App Store and download the VPN.
Update the Router Firmware
A router’s firmware does not necessarily impact a VPN but it can sometimes interrupt the network. So it is always better to have it updated.

