People generally do not care much about the chipset drivers. Especially, with the Windows users having generic drivers already installed, it’s less of their concern. However, without the proper chipset drivers, your device may function but it won’t be at its fullest potential.
Therefore, if you want to improve your windows device’s performance, it’s pretty wise to have a look at your chipset drivers. Furthermore, if you are still curious about why these drivers are needed, we will be going through the basics of these drivers in this article.
What is a Chipset Driver?
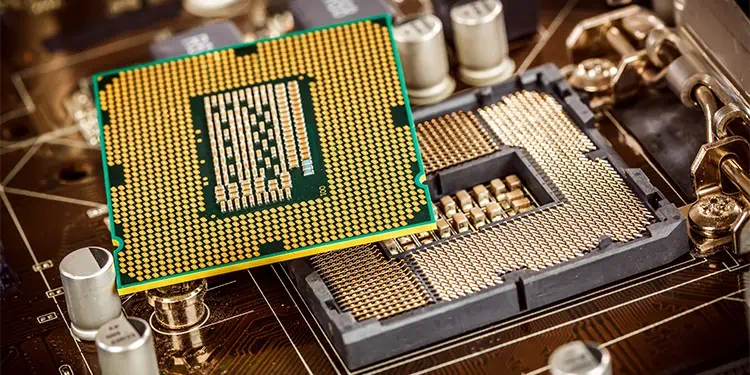
To understand what a chipset driver is, you must have a general idea regarding chipsets. As the name suggests, Chipsets are a set of chips that controls the various function of the motherboard. All the different components of a computer communicate through the chipset.
Traditionally, the chipsets used to be manufactured with two bridge segments: The North and South Bridge. The north bridge is directly connected to the memory slots, CPU, and PCI-E slots. It acts as a bridge between these components.
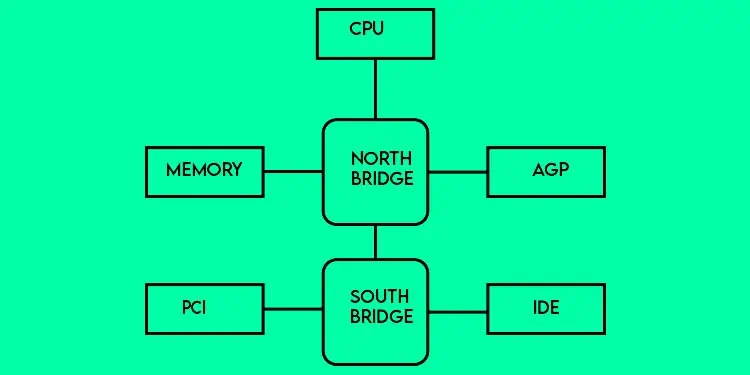
Similarly, the Southbridge connects to the PCI Bus slots, SATA, IDE connectors, and USB ports. There is no direct connection between the CPU and the Southbridge. All the communication with the CPU has to be done through the North Bridge. To make this communication efficient and effective Chipset drivers come into play.
However, Modern processors have integrated graphics, memory controllers, and PCI controllers. As many functions of the Northbridge are now handled by the CPU itself, chipset vendors have combined the two bridges into a single central hub.
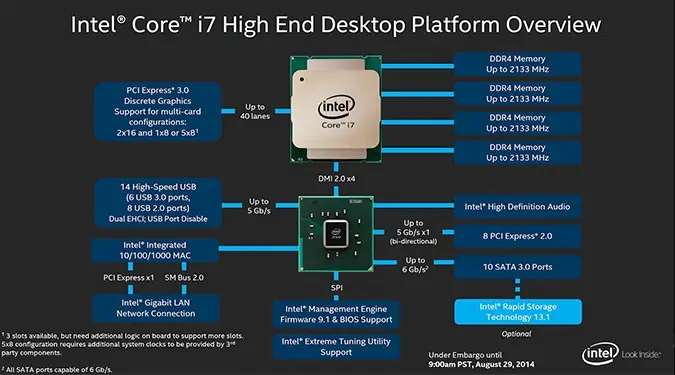
Intel calls this technology Platform Controller Hub (PCH). AMD used to call their version Fusion Controller Hub (FCH), but they’ve stopped using this term since 2017. While this does mean that chipset drivers don’t play as big of a role as they used to in the past, they’re still important for various reasons, which we’ve detailed in the sections below.
All in all, Chipset drivers are the files in the system that are installed for assisting the functionality of a chipset. These drivers facilitate the Windows to recognize and communicate with the motherboard. Moreover, these chipset drivers are primarily meant for the operation of the motherboard along with the peripherals integrated with it.
Why Do You Need the Chipset Drivers?
As we discussed earlier, these drivers are extremely important for running different hardware components. If you don’t have any chipset drivers installed, you may encounter various hardware issues. You also may experience that your computer not functioning properly.
Sometimes installing the chipset drivers are optional. However, having it on your system gives you a significant improvement in the overall computing experience. Here are some of the benefits you get from installing the chipset drivers:
Improved Power Efficiency
The Chipset drivers nowadays are even popular in enhancing the power efficiency of the devices. Some of these drivers incorporate the features like optimized power plans and hibernation of unused cores. These certainly improve the power usage of the system. If you own a laptop this might be a huge deal for you.
Hardware Compatibility
Without the chipset drivers installed, the things like sound subsystem, USB, Ethernet, etc won’t work as intended. Furthermore, with frequent updates in the drivers, some chipset manufacturers also provide added compatibility to newer hardware.
For instance, the new chipset driver update from AMD provides support for USB 4 to Windows 10 and 11 devices. Therefore, having updated drivers mean you can use the latest hardware without many issues.
Performance Boost
The major difference you would see when you install a chipset driver is in the performance. For instance, AMD claims that its latest drivers give remarkable boosts to gaming performance. AMD users also support their claim through real-life usage. Synthetic Benchmarks also show the same.
Bugs Fixes and Support for Other Drivers
Installing and updating the Chipset drivers can fix the bugs experienced while using some hardware components. These drivers also provide additional driver support to different peripherals such as PCI devices and network interfaces.
Graphic Improvements

In case your windows device has integrated graphics, the chipset drivers can bring some amount of improvements in this aspect too. You may notice some slight boost in FPS with the chipset drivers installed.
How to Install/Update Chipset Drivers on Your Windows Device?
The windows OS automatically installs the generic chipset drivers for your computer. However, it is advised that you also install the drivers released by the manufacturer of your motherboard. It gives much more functional improvements over the basic updates from Windows.
Manually Installing Chipset Drivers
You can download the installer from the chipset manufacturer’s website and install it. To do so, you first need to determine the chipset manufacturer and product name.
Follow these steps to check the chipset information:
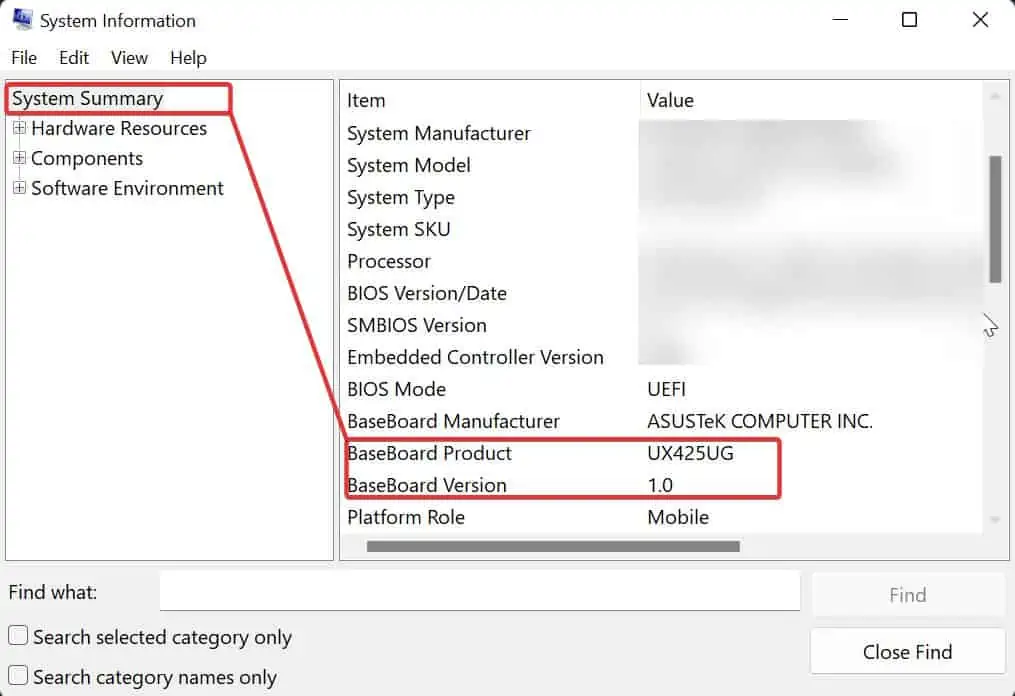
- Press Windows key + R. Then, type
msinfo32and hit Enter . - On the System Information Window, search for Baseboard Manufacturer and Baseboard Product. Note down the motherboard manufacturer and product’s name.

Now, once you have this information, follow the process to download the drivers.
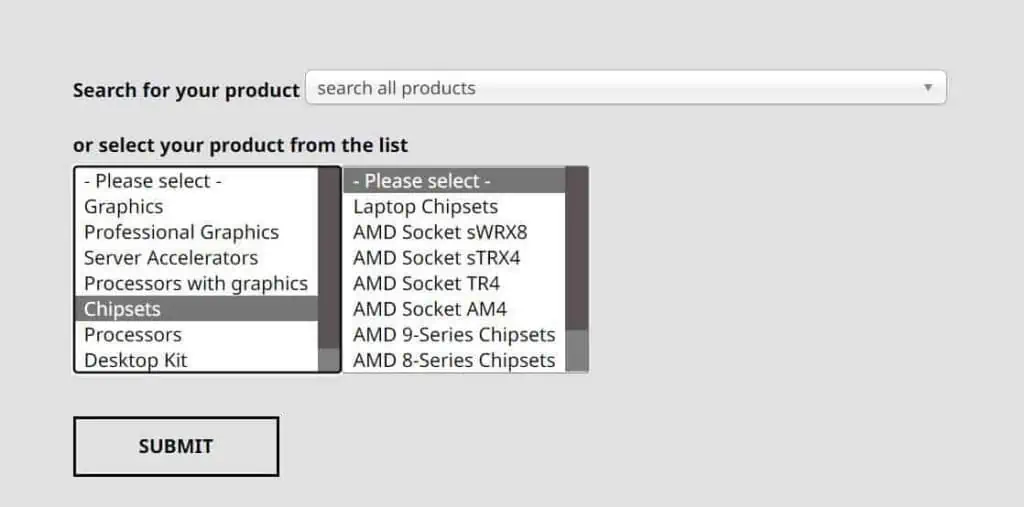
- Go to the Download Center of the manufacturer from its official website.
- Find your product by selecting the Product Line/Type, Product Series, and then Product Model.

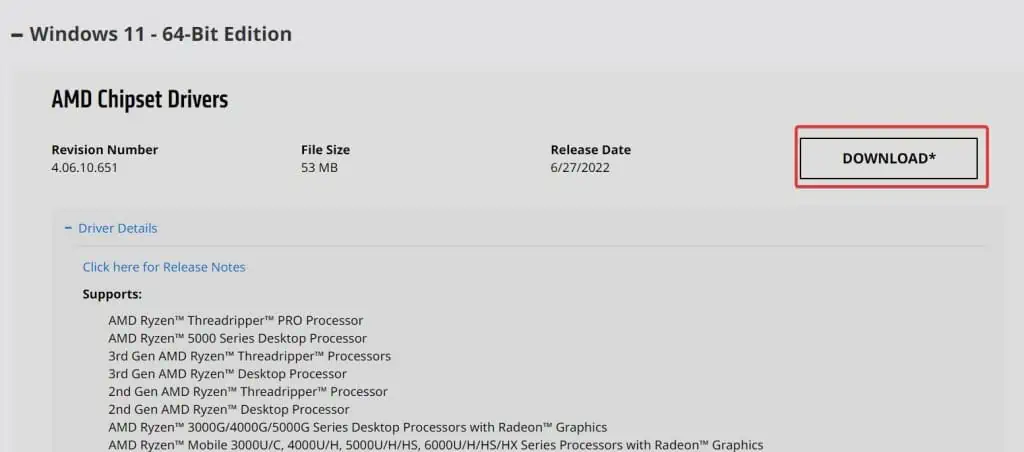
- From the list of different available chipset drivers, select the Chipset for your OS(Win 10/11, 64or32bit)and click on download.

- Now, a driver installation file will start to download.
- Once the download is complete, locate the file on your computer and install it. The Driver installation file may also be in a zip format. In such a case, extract the file and then start installing the drivers.
- Once the installation process is complete, restart your computer.
Install From Device Manager
You can also update the chipset drivers for the device manager. You can even download the latest updates for other different hardware drivers using the device manager.
To update the Chipset drivers, follow these steps:
- Press Windows key + R to open Run.
- Type
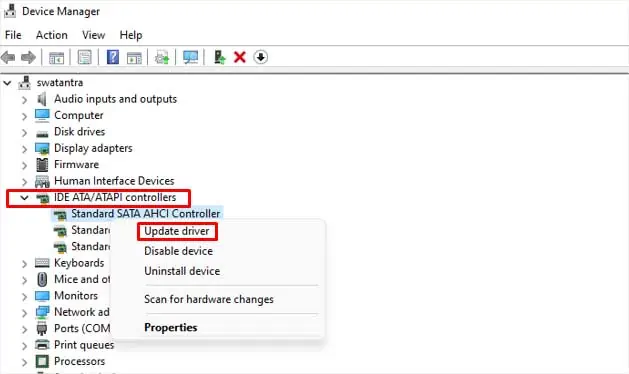
devmgmt.mscand press Enter. - In the device manager window, search for IDE ATA/ATAPI controllers. Right-click on it and select Update driver.

- Now, Click on Search automatically for drivers and follow the instructions.
- The drivers will automatically perform the update if the latest version is available for download.

