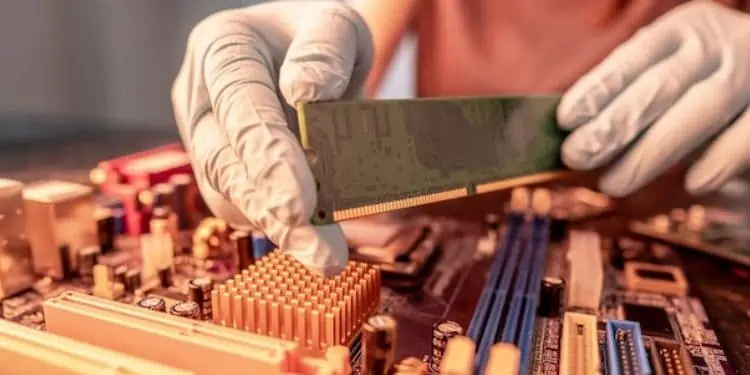
RAM is a storage device that temporarily stores electronic data so the processor can access and process them faster. Hence, you need RAM with better latency, frequency, and capacity if you seek better performance from your OS.
If you recently upgraded your RAM, your initial thought is probably what to do next. However, you do not need to scratch your head as there’s nothing really left for you to do. Since RAM adopts a plug-and-play feature, it should work just fine once the stick is seated in the right slot.
Well, you might have thought of installing a dedicated driver to run RAM. But the truth is you do not need any additional software to make this memory device work. Nonetheless, you can definitely check the RAM’s latency and frequency to determine if it is functioning the way it should.
Hence, we have presented this simple guide on what to do after installing new RAM.
Benefits of Installing New RAM
Most probably, you have installed a new RAM to improve the performance of your PC. Certainly, it’s not just limited to that, as an upgraded RAM offers tons of additional features.
- Your computer starts up way quicker than before
- Better gaming experience with improved frame rates
- Computer stores more data, reducing CPU load
- Enhances online activity, like improving streams and running browsers efficiently
- Can improve the overall performance of your PC
Things to Do After Installing New RAM
Once you know the benefits of installing new RAM, you need to check whether you’re achieving everything mentioned above. Basically, we’ll guide you in comparing your old RAM with the recently installed one to ensure that your upgrade is worth it.
So, without further delay, let’s jump right into the seven things you can do after installing new RAM on your laptop or desktop computer.
Basic Guidelines While Installing RAM
Firstly, if you haven’t installed a new RAM stick yet, there are certain things you need to consider. But if you’ve already done it, you can skip this section and move on with the second step.
If RAM isn’t properly seated, your PC won’t boot at all. This is because it is one of the essential hardware components responsible for communicating with the CPU.
Thus, if you haven’t installed the RAM correctly, your system will reach the power-on self-test and probably beep continuously. Moreover, you might even get an error message, or your PC might show a black screen.
So, we suggest checking if your RAM has been properly aligned with the motherboard. Here, you will learn to do so on both laptop and desktop.
On Desktop Computer
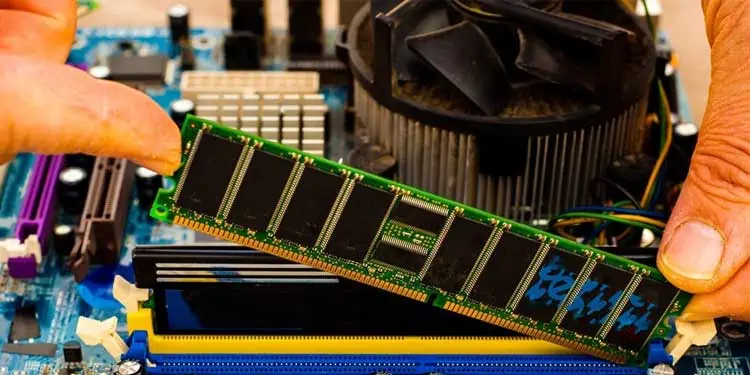
On a desktop, you need to open the cover plate of your PC casing to access RAM. Since you’ve already installed a new RAM, you should know about this. Now, here’s how you can check if RAM is properly seated and aligned on its dedicated slot in the motherboard:
- Shut down your computer and remove all the cables from the ports.
- Carefully remove the upper case of your PC. If you have an older processor, you may require a screwdriver to unscrew all screws from the case.
- Locate the RAM slots and carefully remove each stick.
- When reinstalling it, ensure the notch is properly aligned with the motherboard slot.

- Lastly, reassemble all the components and power on the CPU. This time, your system should start without any interruptions.
On Laptop
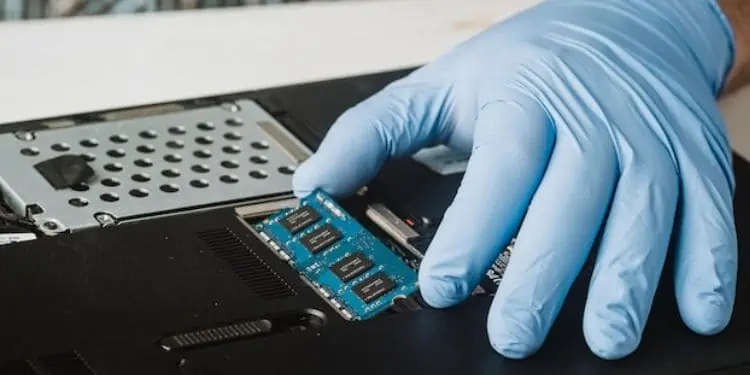
Unlike desktop computers, a RAM chip is located below the laptop surface. So, you need to open it up and check if it is installed the right way:
- First, shut down Windows, and remove the power cord if plugged in.
- Next, locate the battery latch and carefully remove it if the laptop battery is external. Then, use a screwdriver and unscrew all the laptop screws in order to remove the bottom case.
But, if the laptop’s battery is internal, remove the laptop’s back cover first and locate the battery. Usually, a connector is used to connect it to the motherboard. So, carefully unplug the cable using a flat-headed tool. Finally, unscrew all the screws and carefully pull it out. - Next, locate the RAM chip and carefully take it off.
- Now, align the ridge and the notch of the RAM chip and install it carefully. You should hear a click sound to ensure it is properly seated.

- Finally, reassemble your laptop and turn it on. This should start your PC without any errors.
Check Whether New RAM is Detected
When installing multiple RAMs, your motherboard may not be compatible with all of them. So, you need to consult the user manual to learn what RAM your motherboard supports.
For example, if the motherboard has a DDR4 RAM slot and you’re trying to use DDR3, your CPU won’t support it. This way, your upgraded RAM chip may not work, and only the compatible one gets detected.
Furthermore, if you bought cheap RAMs, there’s a possible chance you may have been scammed. So, it is vital to check whether the RAM has the same capacity as stated on the stick.
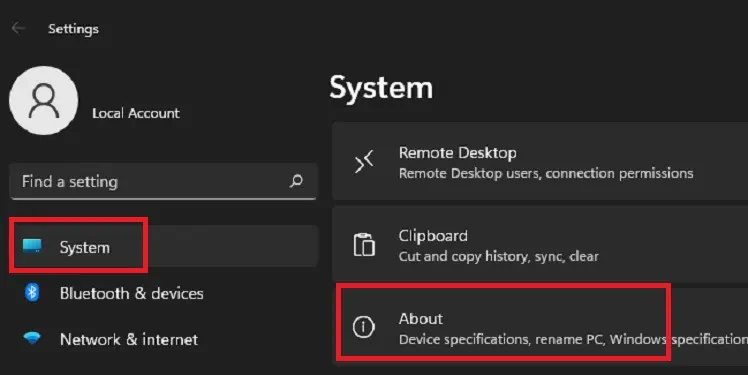
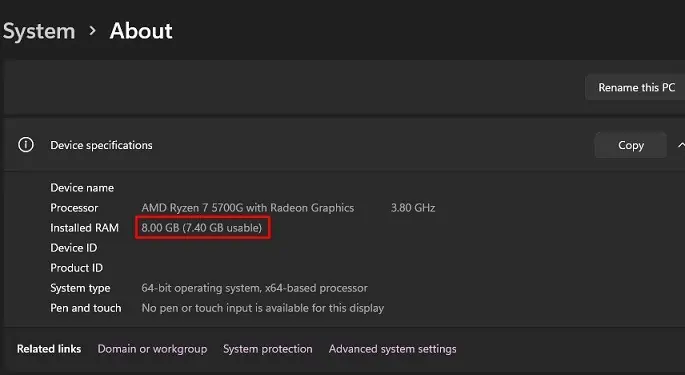
Luckily, Windows OS allows us to check several RAM settings without getting into the BIOS. Here’s how you can easily check whether the new memory is detected on Windows 11:
- Press Windows + I keys together to launch the Settings app.
- Go to the System tab and scroll down to choose the About option.

- Under Device Specifications, find Installed RAM that indicates the maximum RAM capacity.

- If the memory is the same as the old one, this means the RAM isn’t compatible with your motherboard. So, check the warranty and replace it with the one that works for you.
Run Windows Memory Diagnostic Tool
Indeed, it’s important to know whether your new RAM has any memory faults. Basically, using this utility helps you detect and diagnose these problems.
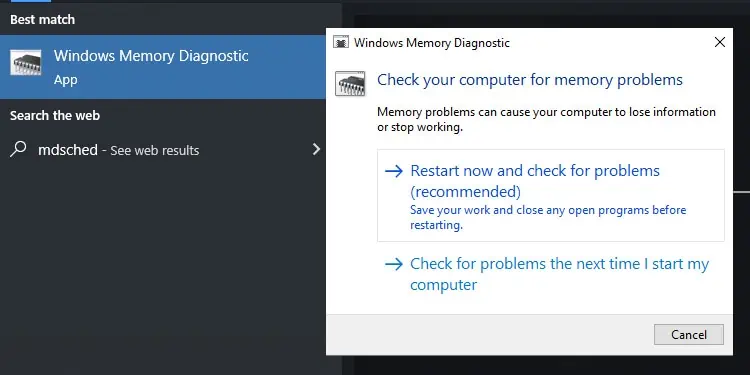
Hence, before moving on to other steps, we highly recommend running the Windows Memory Diagnostic tool that checks whether there’s a RAM error on your system. Here’s how you can do it:
- From Start Menu, open Windows Memory Diagnostic application.
- Then, select the Restart now and check for problems (recommended) option.

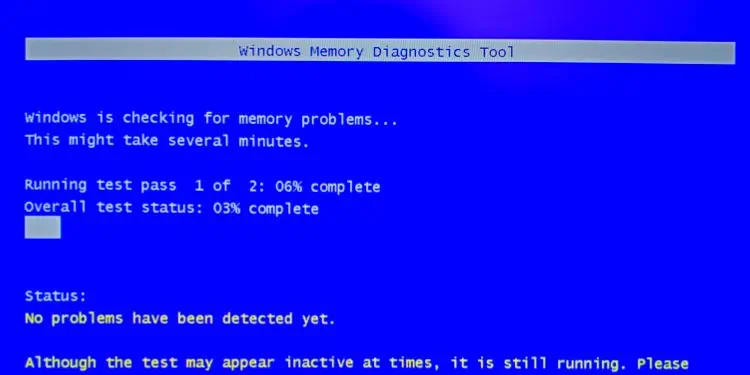
- Now, the diagnosis begins automatically, and your PC restarts.

- Once you’re navigated to the desktop, the application notifies you with a list of possible memory errors.
Install Useful Applications
As soon as you install the right RAM and power on the CPU, it gets up and running. So, you do not really require any third-party applications.
Nonetheless, a few useful applications let you check various RAM settings that aren’t accessible within your Windows OS. For example, you can check the DRAM frequency, CAS Latency, and even your processor’s vital information.
Some popular applications include CPU-Z, Memtest86, Piriform Speccy, and many more. You can download them via each manufacturer’s official site.
Examine RAM Speed
The major reason you may have installed a new RAM is probably to increase the RAM speed. So, once the RAM stick is seated, it’s also important to cross-check whether you’re getting the speed as desired.
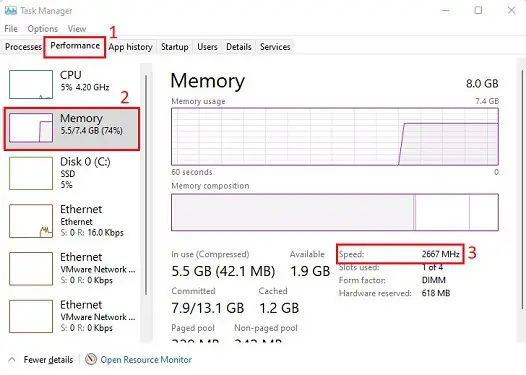
Interestingly, you can easily examine the RAM speed within Windows, and here’s how you can do that:
- Right-click on the Windows icon on your taskbar.
- Then, go to Task Manager.
- Next, navigate to the Performance tab.
- From the left panel, choose Memory.
- Move to the right panel and find Speed. There, you’ll see your RAM speed or frequency in MHz.

Well, you can go through our other article to learn how to change RAM speed in BIOS.
Examine RAM Latency
RAM Latency, often called CAS Latency (CL), is measured in terms of clock cycles. While RAM speed states how fast the RAM can fetch or send data to the CPU, the Cache Latency is about the time the RAM takes to respond to the CPU’s request.
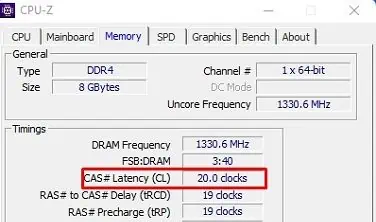
Unlike RAM speed, you require a RAM monitoring application. For demonstration purposes, we’ve used CPU-Z to examine the CAS Latency:
- Ensure you have downloaded the CPU-Z application from their official website.
- Once it is installed, launch the program. Moreover, we recommend creating a Desktop shortcut to access whenever you need it.
- Now, navigate to the Memory tab.
- Under Timings, you’ll find CAS# Latency (CL), where your current RAM Latency is indicated.

Enable XMP Profile
Enabling XMP is an easy and effective way to overclock your memory, enabling higher clock speeds that your RAM can actually support. However, this is only compatible with some motherboards.
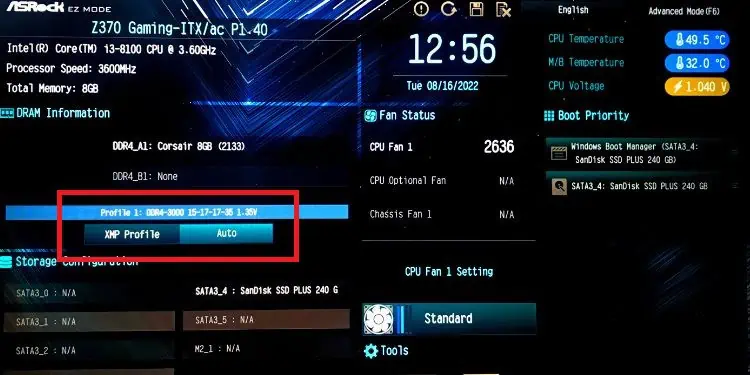
By default, these profile is disabled so that your RAM performs as per the standard DDR specification. So, you need to enable XMP from the BIOS. Here, we have demonstrated this on an ASRock motherboard:
- First of all, get into the MSI BIOS.

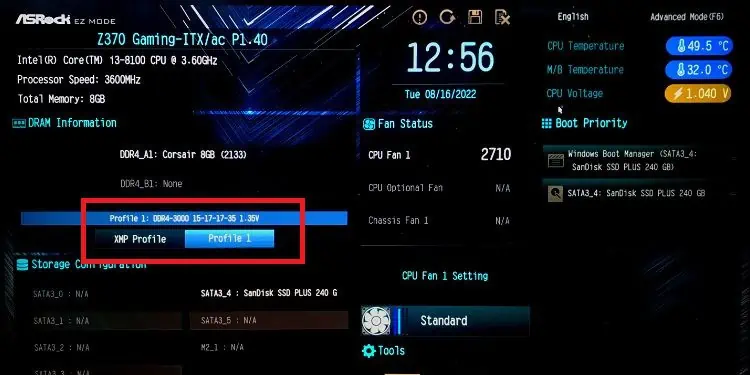
- In the DRAM Information section, find the XMP profile. By default, it is set to Auto. So, all you have to do is click on it, which will change to Profile 1.

- Save the changes, and your RAM will now have maximum performance.
Note: If you do not find XMP, you might find its alternatives like EOCP in Gigabyte and DOCP in AMD motherboards.
Ensure Dual Channel Mode is Working
Dual channel mode is available only on specific CPUs and laptops. So, before moving ahead, ensure your system is compatible with this.
Basically, when you get new RAM sticks, they are either numbered as A1, B1, A2, and B2 or have two different colors, usually blue and black. These multiple RAM chips have separate channels, so data transfer becomes much quicker.
Well, enabling the dual channel mode is based on how you have installed the multiple RAM chips. If the setup was done correctly, you do not need to disassemble the parts. Luckily, you can check whether the dual channel mode is working or not via CPU-Z:
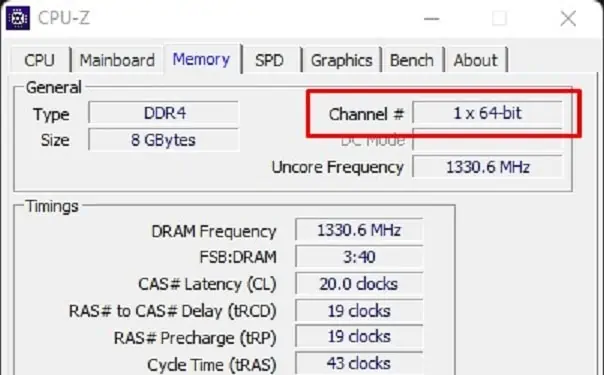
- Launch the application and select the Memory tab.
- Under General, you’ll find Channel#. If it shows Dual, it means that the mode is working just fine.

But if it shows Single and your system supports the dual-channel mode, you’ll have to make certain changes and reinstall the RAM sticks:
- Open up the laptop’s bottom base or PC casing.
- Locate the RAM stick slots and remove all of them.

- If you have four RAM sticks, check their labels or colors. Then, place A1 and B1 in the odd slots and A2 and B2 in the even slots. For two RAM sticks, you can install A1 in the first slot and B1 in the third slot.
- Now, reassemble all the parts and power on the CPU.
- Finally, navigate to the CPU-Z and ensure the Dual Channel Mode is now working.
Run a Benchmark Test
Running a benchmark test gives you an idea of how your RAM is performing and whether the upgrade has been successful. Moreover, you can also compare how your PC performs when the XMP profile is enabled and when disabled.
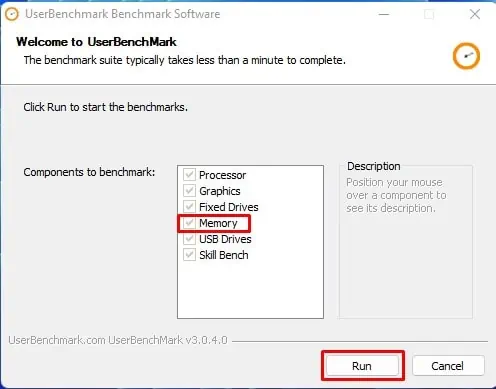
Well, you can use any reliable third-party application that lets you run a benchmark test. Some popular programs are UserBenchMark, Maxxmem2, AIDA64, and many more. For demonstration purposes, we’ve used UseBenchMark in the steps below:
- Firstly, download the free application from the official website.
- Next, run the program and ensure the Memory is checked in the Components to Benchmark option.

- Then, click on the Run button and wait for the benchmark to complete.
- Once the test is complete, the app generates your PC’s performance results, including the PC Status, Processor, Graphics, Boot Drive, Memory, and OS version.

