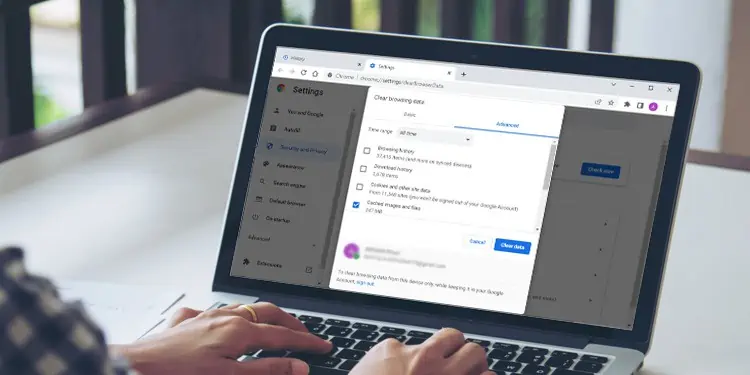
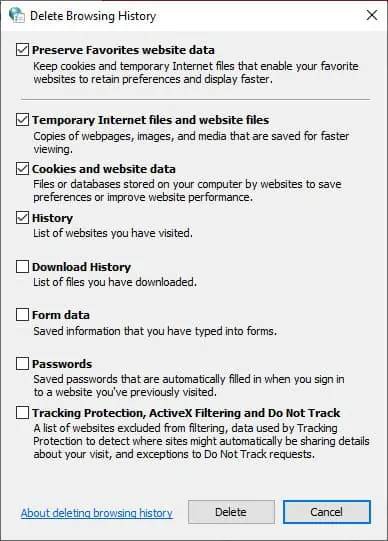
Sometimes, the option for clearing browser history may be grayed out. Or your browser may not delete its history even after selecting the option.
Some permission settings can force restrictions on the browsers. It gives the user very limited access to managing browser history.
Still, this issue is very simple to manage. You will likely need to tweak around a few settings or, worst-case scenario, reinstall the browser. Not that bad, right?
Why Can’t I Clear the History?
There are a few possible reasons for this issue, such as:
- Restriction due to permission settings.
- Configuration changes made unknowingly or by third-party programs.
- Unsolved bugs in the outdated browser.
- Syncing of browser data across devices.
Troubleshooting Can’t Clear History
The exact methods of fixing this issue may vary between different devices. However, the general process is the same.
First, try to close your browser and open it again. If you still can’t clear the history, try restarting your device. Your system may automatically fix the issue after a reboot. If not, move to the methods below based on your browser.
Fix for Safari
Turn Off Web Restrictions on iPhone
The Content & Privacy Restriction feature in iPhone might prevent you from clearing your browsing history. Turning off the restriction for web content or enabling access to all sites should solve this issue. Here’s how you can do so:
- For iOS 12 or later, launch Settings and go to Screen Time > Content & Privacy Restrictions.
- You can turn off Content & Privacy Restrictions by tapping on the option.

- The better way would be to only change the settings for web access. Navigate to Content Restrictions > Web Content inside the restrictions settings. Then enable the Unrestricted Access option.
- For iOS 11or earlier, the restrictions is present in the location Settings > General > Restrictions.
- And you can change the settings for web access at Allowed Content > Websites inside the Restrictions settings. Please set it to All Websites.
Disable Syncing Over iCloud
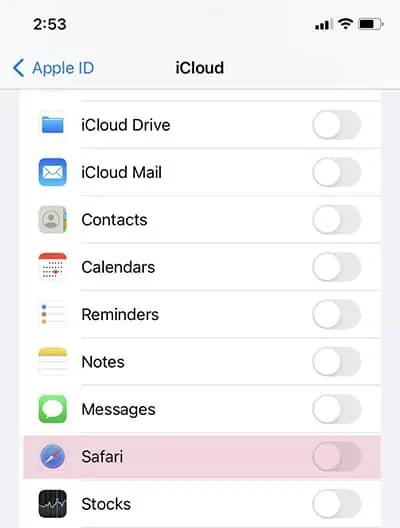
If you have enabled iCloud sync for Safari on an Apple device, your deleted data might still reappear in your browsing history. You can disable it by following these steps:
- Launch Settings and go to the iCloud option inside your Apple ID Profile.
- Here, toggle your browser Off. If it is already off, enable it, click merge and disable it.
- You must also disable it for all devices connected with iCloud.
- In Mac, right-click on the Apple icon. Then, navigate to System Preferences > Apple ID > iCloud or System Preferences > iCloud.
- Inside iCloud, locate and disable Safari.

- Finally, you should clear the history for each synced device.
You can use this method for all browsers, not just Safari.
Reset Settings on iPhone
You can reset the network settings in your iPhone if the previous solutions do not work. It will also make the device forget all WiFi connections and passwords. Follow these instructions to reset network settings:
- Launch Settings and go to General > Reset.
- Select Reset Network Settings. Then, confirm when prompted.
If resetting network settings do not work, you may try resetting all settings. It only impacts the settings. Apps and other files should remain untouched. To do so, follow these steps:
- Launch Settings and go to General > Reset.
- Select Reset All Settings. Then, confirm when prompted.
Delete Library History Files on Mac
Such issues should not happen on a Mac. Still, some hijackers may stop you from removing particular websites from history. You can scan your system with an antivirus in such cases.
You can also manually remove the history files from the library. We recommend creating a backup for those files as well. The process to manually remove the history files is as follows:
- Go to Finder on your Mac.
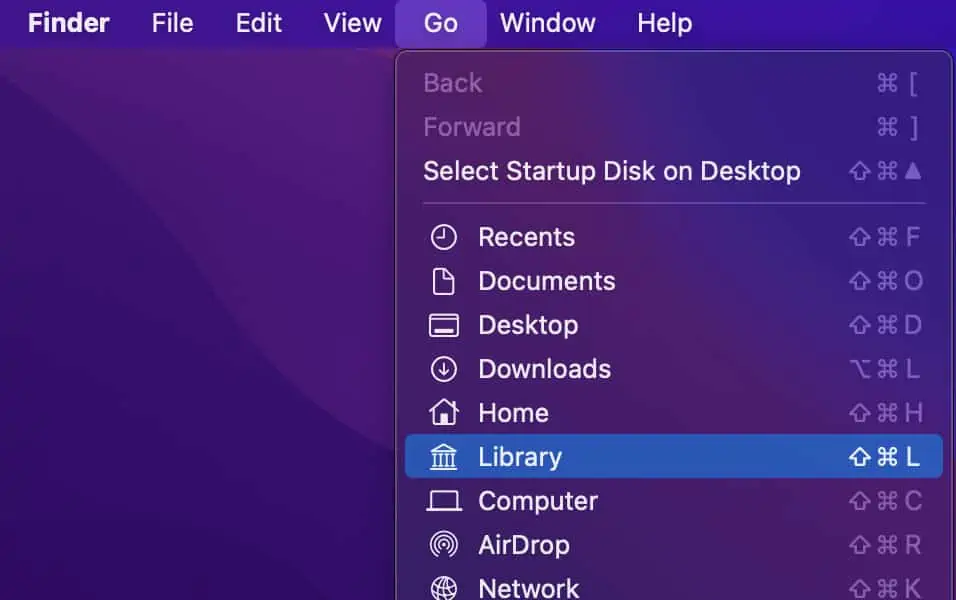
- Click on the Go menu while holding the option key and select Library from the drop-down list.

- Open Safari and locate files that start with History.
- Then, move these files to any other location or rename them to anything else.
- Restart your PC. After restarting, check if the issue remains.
If you can clear history, delete the files you moved. If not, move those files back and overwrite the new ones. If you renamed them, delete the newly created files and set the previous files to their original names.
The Library folder is in the hidden state by default. You can make it visible by enabling Show Library Folder in the Finder > View >Show View options.
Fix for Google Chrome
If you encounter a situation where the clearing process does not stop, it’s likely due to a bug present in the application. Chrome goes into a loop trying to clear the history but cannot complete the process.
Google has already fixed this issue in the later stable versions. So, make sure to update to the latest versions.
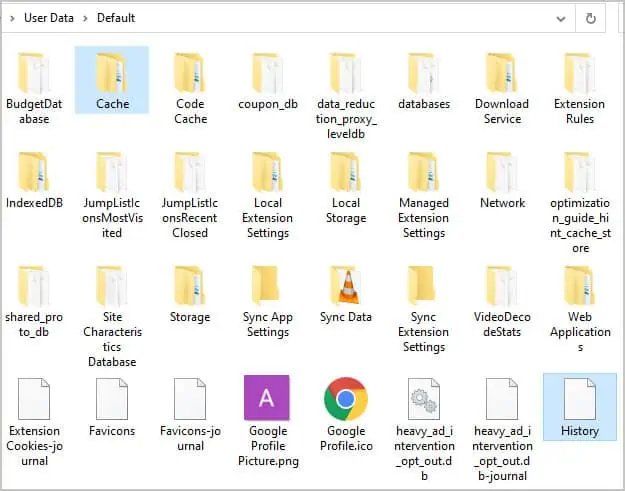
You can also delete the history files using the file explorer as an alternate way to clear it. Alternately, you can fix this issue by clearing the cache.
- Navigate to default. You can directly enter it in the address bar.
Windows:%localappdata%\Google\Chrome\User Data\Default
Mac:~/Library/Application Support/Google/Chrome/Default/ - Delete the History file in this location. Also, delete the contents of the Cache folder.

- Restart your PC.
- If the problem persists, delete History Provider Cache and History-journal files from the same location.
- Then, restart your computer.
Fix for Mozilla Firefox
Database Troubleshooting With Verify Integrity
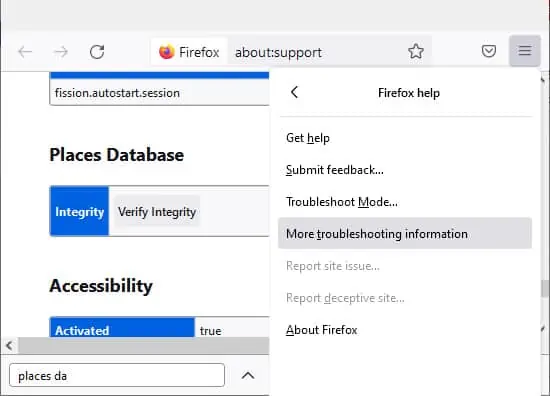
Mozilla Firefox has a troubleshooting option that scans for database files with errors. Your browser checks for these files and creates a default on when they are missing. Deleting those files may solve this issue. Follow these steps:
- First, enter
about:supportin the address bar. You can also click on the 3-bar menu button and go to Help > More Troubleshooting Information.
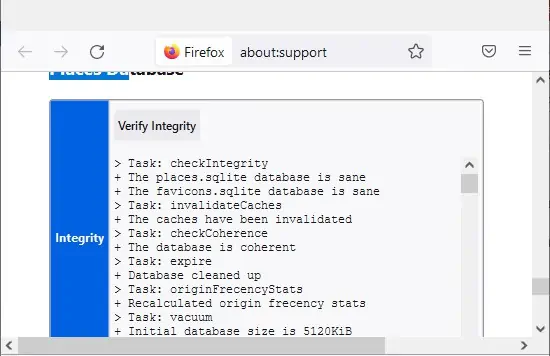
- Here, locate Places Database and click on Verify Integrity.
- In the report, check for files with errors. Most likely, the favicons.sqlite file or some other database file has some errors.

- Now, close the browser and open the location of this file.
- You can generally find the Mozilla profile folders at
%appdata%\Mozilla\Firefox\Profile. - Open your profile folder to access those files. Rename or delete the SQlite file with the error.
- Then, open Mozilla Firefox again and visit a bookmark if you deleted the favicons file.
- If the problem persists, move/rename/delete the places.sqlite file as well.
Disable Automatic Private Browsing
Your default window will be set to private mode if you enable automatic private browsing. In this case, the browser won’t record new sites in its history. However, you can only clear the old history from regular sessions on a regular window.
You’ll have to disable automatic private browsing to access a regular window. Follow these steps to turn this option off:
- Enter
about:preferenceson the address bar. You can also go to the 3-bar menu button > Preferences or Options or Settings. - Click on Privacy & Security from the left sidebar.
- Scroll down to locate History. In the drop-down box, select Remember history.

- Now you should be able to delete all the old history.
Fix for Microsoft Edge or Internet Explorer
Configure Local Group Policy Editor
Certain configurations in the Local Group Policy may prevent you from deleting data from your browser. To configure those settings:
- Press Windows key + R and enter
gpedit.mscto open the Local Group Policy Editor. - Click on Administrative Templates under Computer Configuration from the left sidebar.
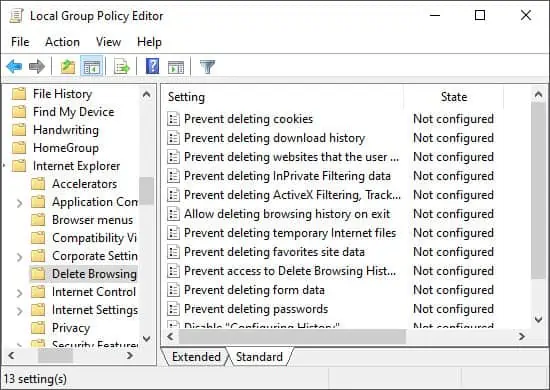
- Now, open Windows Components > Internet Explorer > Delete Browsing History.

- Ensure all the options related to preventing deletion of history have Not configured state. Double-click on them to access each.
Delete History Using Internet Options
You can use the Internet Options control tool as an alternate way to delete your browser history. Follow the instructions below to do so:
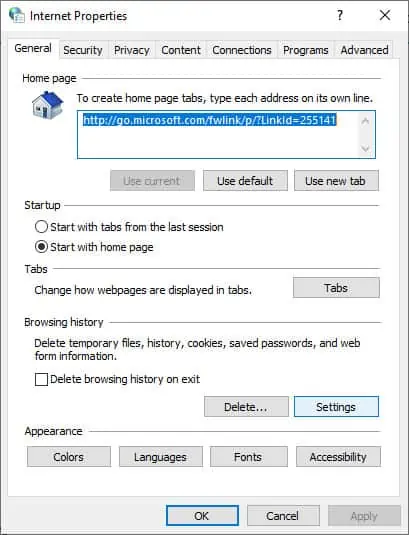
- Search for and open Internet Options using the search bar. You can also access it from Control Panel > Network and Internet.

- Navigate to Browsing history on the General tab.
- Select all the contents you need to delete and choose Delete.

- Now go to the Content tab and click on Settings under AutoComplete.
- Then select Delete AutoComplete History and Delete. After that, click Ok for all windows to close them and apply the changes.
Common Fixes for All Browsers
Change Setting in the Registry
Someone may have disabled the AllowDeletingBrowserHistory key in your browser policy registry. This key is enabled by default, and disabling it prevents clearing history. Make sure to check for and set it if required. The method to do so for Google Chrome policy is as follows:
- Press Windows key + R and enter regedit to open the Registry Editor.
- Navigate to:
Computer\HKEY_CURRENT_USER\Software\Policies\Google\Chrome - Here, search for AllowDeletingBrowserHistory.
- If you can’t find it, search for it at
Computer\HKEY_LOCAL_MACHINE\Software\Policies\Google\Chrome - If you still can’t find it, this key is enabled, and no changes need to be made.
- If not, double-click on the entry and set its value as 1.
You can similarly check the policies for any other browser.
Update Browser
If the above methods do not solve this issue, there may be bugs in the browsers. Updating them should solve this issue. If the updates are unavailable, report this issue to official support sites and wait.
You can use the official browser sites or app stores to search for and update them to the latest versions.
Reset User Profiles
You can also try to reset your user profiles. You can force your browser to create a new one by removing all your current profiles. It also erases the data of the old profile, including its history, and may enable clearing history from the new profile. You can perform this method by deleting the user profile folders using the file explorer:
For Chrome and MS Edge, delete the User Data folders in %localappdata%\Google\Chrome and %localappdata%\Microsoft\Edge\ respectively.
For Mozilla Firefox, go to %localappdata%\Mozilla\Firefox\ and delete the Profiles folder.
Reinstall Browser
You can likely reinstall your browsers to solve this issue. You will need to uninstall first to remove all data. It may not be possible for default browsers.
Reinstall Chrome/Mozilla/Other Browsers
The exact process varies between device operating systems.
For Windows
- Go to Settings > Apps & Features.
- Locate the browser, click on it and select Uninstall.
- Click Uninstall again and follow the on-screen instructions.
For Mac
- Go to Finder > Applications or press Command + Shift + A.
- Now locate your browser folder and open it.
- Run its uninstaller tool and follow the instructions.
- If you can’t find an uninstaller, drag the app to the Trash bin on your Dock. Then, two finger click on the Trash bin and choose Empty Trash.
For Android and iPhone
- Locate your browser on your app screen.
- Then, tap and hold on to it until you see some options, and select Uninstall or Delete.
- Confirm when prompted.
- You may have to go to Settings > Apps to uninstall your applications for older OS.
After uninstalling, download those applications from official websites or download stores.
Reset Microsoft Edge
If you have the new Chromium-based Microsoft Edge, you can download the latest version from the official page and install it.
If you use the legacy version, the method is slightly more complicated. We recommend creating a system restore point first. Follow the instructions below to uninstall and reinstall Edge:
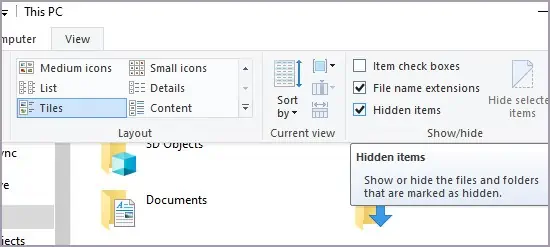
- Enable the option to view Hidden Files. To do so, first, click on View when on the File Explorer. Then, check the Hidden items option in the Show/hide group.

- Navigate to the location:
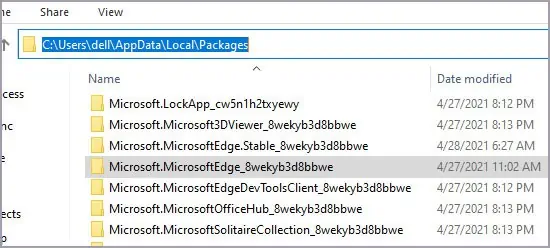
%localappdata%\Packages. You can enter it in the address bar of the file explorer or the Run dialogue box. - Search for and delete the folder
Microsoft.MicrosoftEdge_8wekyb3d8bbwe.
- It might take a long time to prepare for deleting. After that, choose Yes on the confirmation dialog. Click Yes for all other dialog boxes as well.
- Restart your PC.
- After restarting, search for powershell in the search bar. Right-click on Windows PowerShell and pick Run as administrator.
- Enter the command,
cd C:\users\“UserName”while replacing “UserName” with your username. - Type or copy and paste the following command and press Enter.
Get-AppXPackage -AllUsers -Name Microsoft.MicrosoftEdge | Foreach {Add-AppxPackage -DisableDevelopmentMode -Register “$($_.InstallLocation)\AppXManifest.xml” -Verbose}
- Restart your PC after the process completes.
