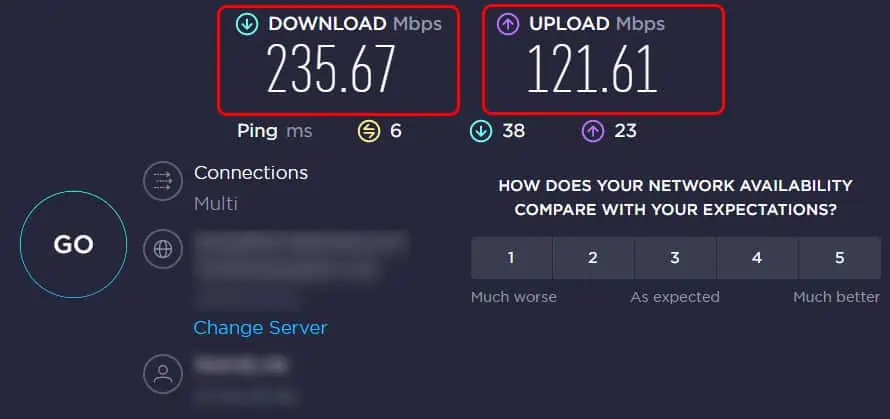
When it comes to the internet, most people are concerned with download speeds, while uploads are frequently overlooked. Upload speeds are just as important as download, and even more so when making seamless video calls or using cloud-based services.
ISPs, too, prioritize higher download speeds while limiting uploads. The download-to-upload ratio set by most ISPs is not symmetrical, implying that upload speeds are not prioritized. This is the major reason that makes the upload speeds slower.
Other possible causes behind the slow upload speeds are high internet congestion and data caps set by the ISP. Routers and other networking equipment may also be to blame. We will further examine the causes of the slow upload speeds and suggest some fixes in this article.
Reasons for Slow Upload Speed
- Multiple devices connected to the internet at the same time
- Outdated or damaged Router
- Weaker Wi-Fi Signals.
- Viruses and Malware using the bandwidth
- Issues in the Web Browser
- Restrictions in the Firewall
How to Fix Slow Upload Speeds?
As discussed earlier, the causes for the upload speeds getting affected are many, and the fixes for all those are discussed in detail in this article. However, before you begin with those fixes, try these basic troubleshooting ideas and see if it does the job for you.
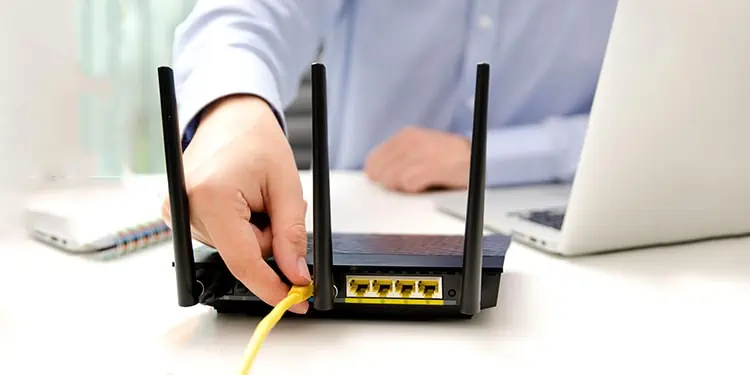
- The first thing you must do when the internet speed gets affected is reboot the router. Some functional glitches in the router causing the issue gets solved by doing just this.

Also, try testing the upload speeds with a different browser to make sure it’s not a browser issue. - Also, try connecting to the internet with a wired connection and check the upload speeds. There are a variety of CAT cables for this purpose that offer different transfer speeds. The max speed supported by the CAT 3 cables is a mere 10 Mbps, while the newer CAT 8.1, 8.2, can go up to 40 Gbps.

If you already have a wired connection, ensure that the cables are fine and have no defects on them. - Verify the actual upload speeds offered by your ISP. Generally, the upload speeds are compromised by the ISPs to maximize the download speeds.

Upload speeds can get slower in the evening and in areas with high internet traffic. This can happen if your internet is throttling, which is when your ISP reduces your bandwidth or internet speed without your knowledge. This is done to reduce internet congestion, and the speeds return to normal once the congestion is low.
Check for Latency
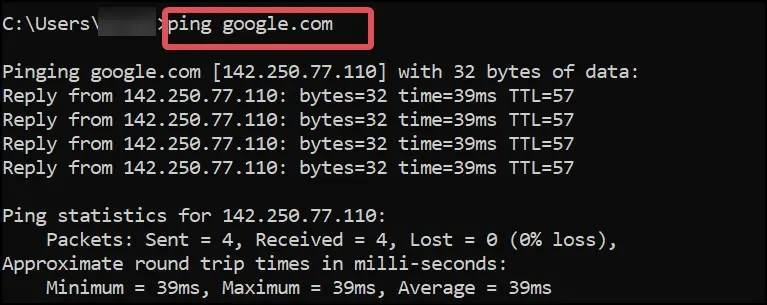
The ping command measures how fast the computer receives the packets or responses after the user has sent a request. It is a good indicator of the quality of your network connection. If you are experiencing low upload speeds, the ping response time will also be high.
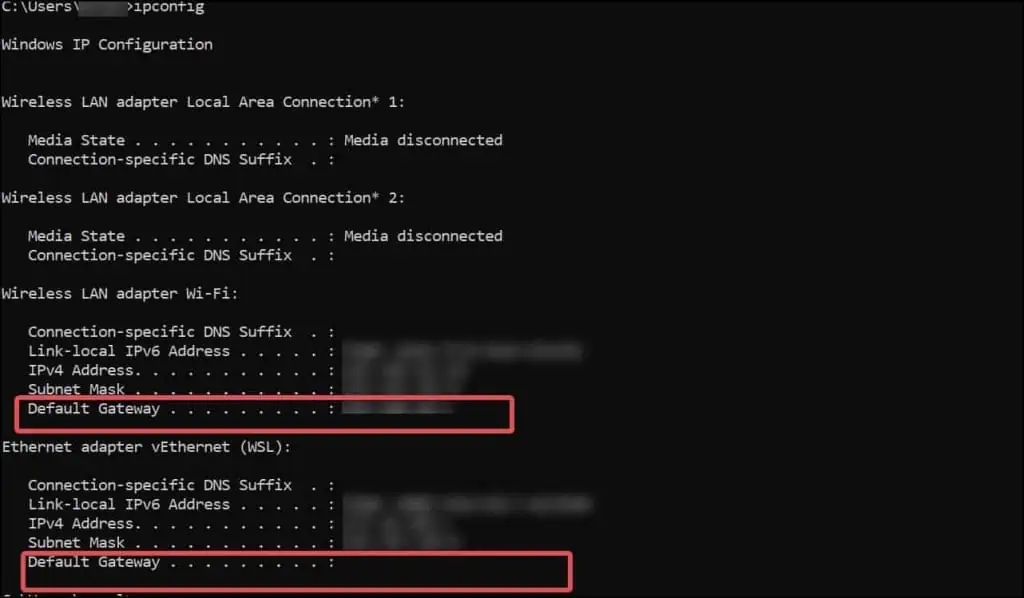
Pinging the router(default gateway) and your desired domain will help you figure out what’s causing the slow uploads. Here’s how you can do it on Windows.
- Press Windows Key + x.
- Open Terminal.
- Type
ipconfigand hit enter. - Note the IP address from the given Default Gateway.

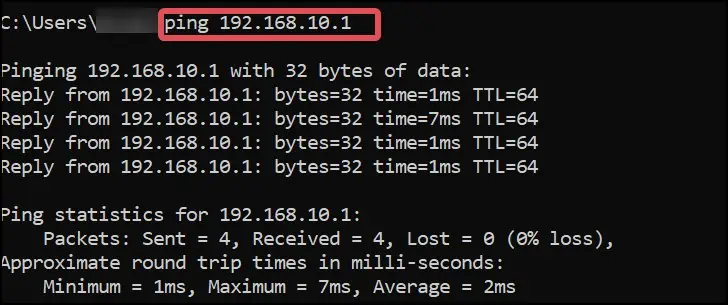
- Now, Execute this command. The use case of the command is shown in the image.
ping <ip Address of the Default gateway>
- Again, use the command to ping your desired domain’s IP or Name. For instance,
ping <IP Address or domain name>
Now, check the ping results. If the ping results of the router show an average time of below 15 ms, this indicates there is nothing wrong with the Router. In case the time is higher than 15ms, we suggest you follow the router-related fixes in this article.
Also, check the ping results for the domain and ensure the average time is within 100 ms. If the ping is higher, it can be concluded that there are some connectivity issues between the router and the ISP.
Getting Within Range of the Router
If you are connected to the internet through Wi-Fi, the signal strength decreases when the distance increases. This can result in slow internet, which also means slower uploads. You can get closer to the Wi-Fi router to get better signals and see if this improves the uploads for you.

Getting Mesh routers, too, can be used to extend the range of your existing wireless network. These routers have multiple nodes that interact with each other to distribute Wi-Fi signals over a wider range.
Reset the Router
Resetting the router reverts its network configurations to default. The network settings might have been misconfigured, which can lead to poor upload speeds on the network.

Routers come with a standard button or a pinhole that can be pressed to reset it easily. Using a paperclip or something similar, press down on the reset button for a few seconds. Make sure the router is powered on during this. The router will reboot after this and start operating with its default settings.
Disconnect the Devices from the Wi-Fi Network
The internet speed gets affected when there are many devices connected to the same network. When it comes to the upload speeds, it is possible that some user or a device connected to the Wi-Fi is using significant bandwidth to upload content. You can disconnect all other devices and then check the upload speed.
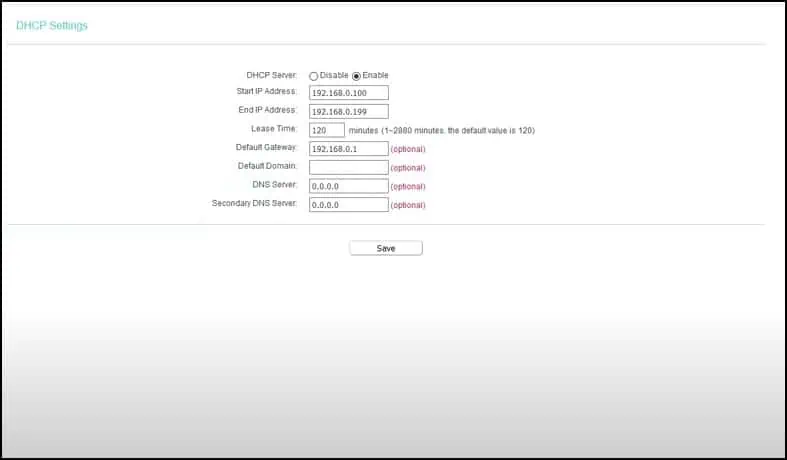
- Open the browser and log in to your router dashboard.
- Go to the DHCP Settings section. This section will give you a list of all the devices connected to the Wi-Fi.

- Locate your device and disconnect all other devices.
- Finally, see if this does some good to the upload speed.
Note: The section to check the list of connected devices might vary with the manufacturer. Some routers have a separate Devices section for this purpose.
Furthermore, to limit users and devices getting connected to the network, change the Wi-Fi password or use Mac filtering.
Monitor Network Activity
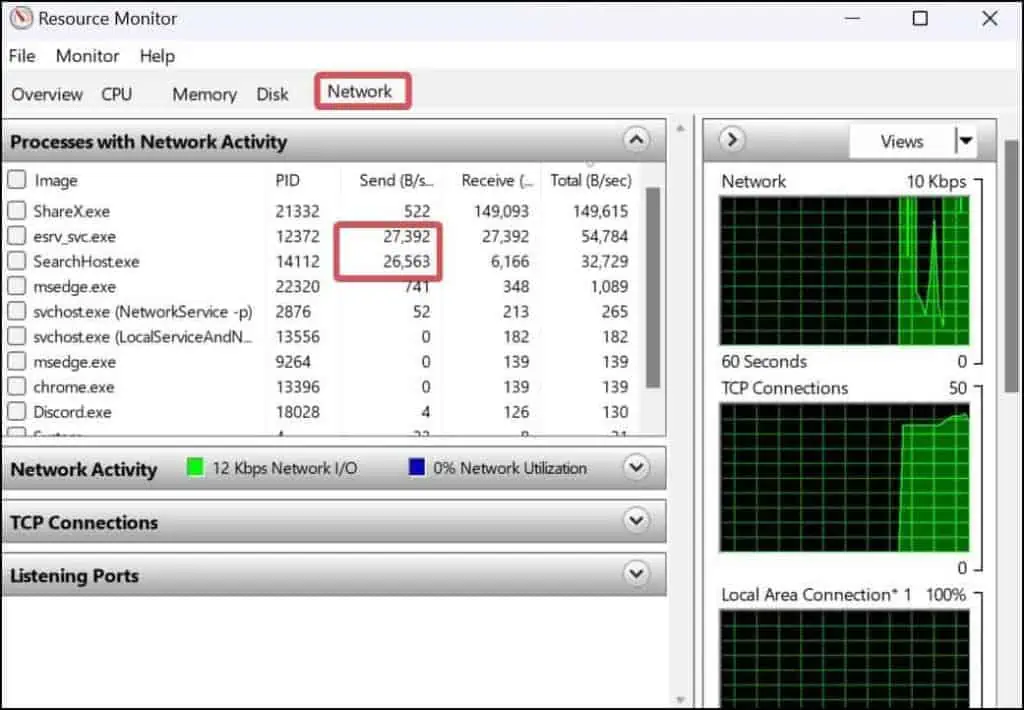
You can monitor the network activities of the process and check if there is some process that is using significant upload bandwidth and making it slow for you. You can use the resource monitor on Windows devices to check for such programs and end their processes.
- Press Windows Key + R, type
resmon, and hit enter. - Go to the Network Section.
- Go through the system processes and identify the program that is sending the packets in the network in an unusual manner.

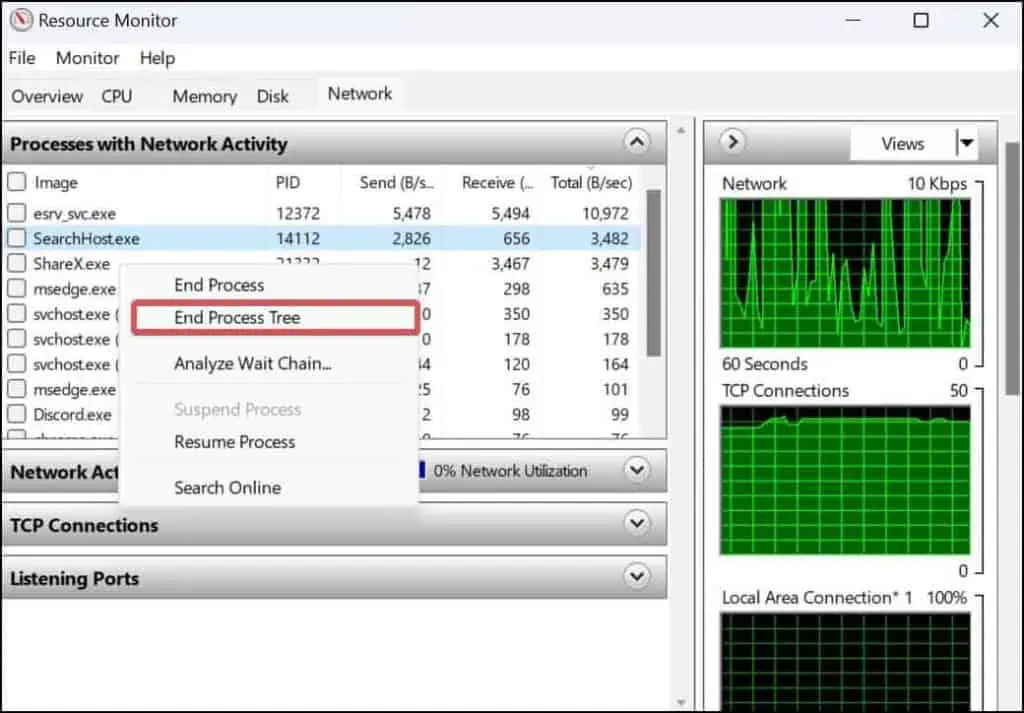
- Right-click on it and select End-process tree. This will end all the associated processes of the program that might be using the upload.

- Now, check for the upload speeds if you get any improvements in it.
Disable VPN
If you have been using a poor VPN service, this might be affecting the upload speeds as well. The encryption service provided by the VPN, along with the proximity of the server, affects the quality of the internet and, ultimately, the upload speed. See if disabling the VPN improves the speed.
Disable Metered Connection
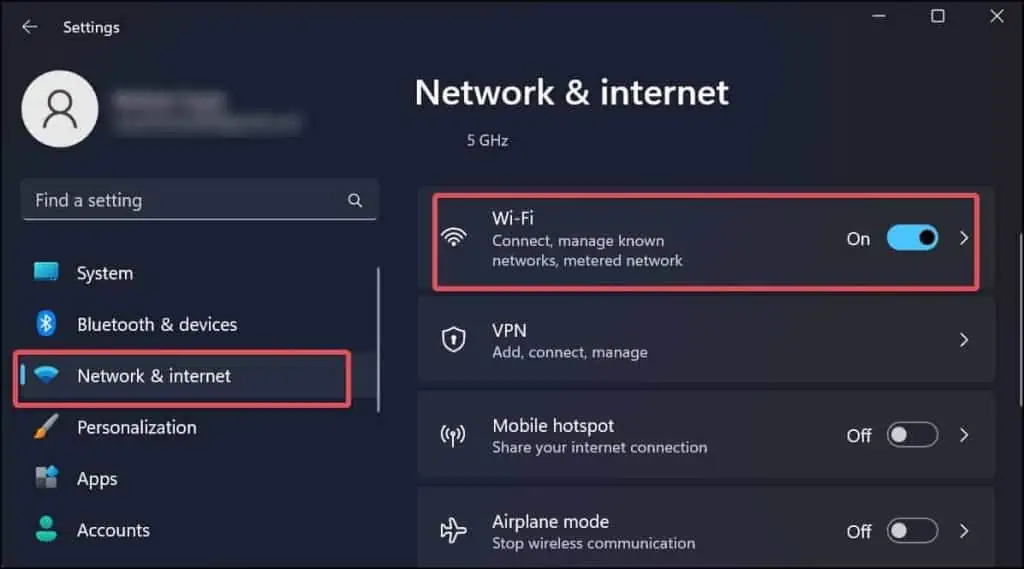
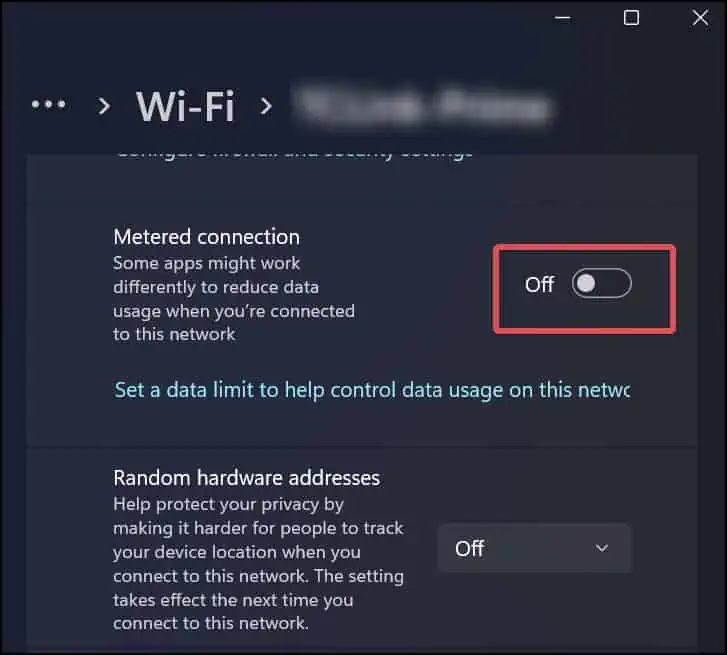
Another reason you may be experiencing slow uploads is if you have set your device to use a Metered connection. It imposes a data cap on the internet and prevents some apps from fully utilizing the upload bandwidth. Disabling this will remove the cap and can improve the uploads.
Follow these steps to disable the metered connection.
- Press the Windows key + I to open Settings.
- Go to the Network & Internet section.
- Go to Wi-FI.

- You will see the name of the connected Wi-fi. Click on it to access its settings.
- Scroll down to find the Metered connection section.

- If you see it enabled, click on the slider to turn it off.
If you have set a metered connection on the Wired connection, you can disable it as well. Go to Settings > Network & internet > Ethernet, and follow the same steps as suggested for the wireless connection.
Configure Router’s QoS
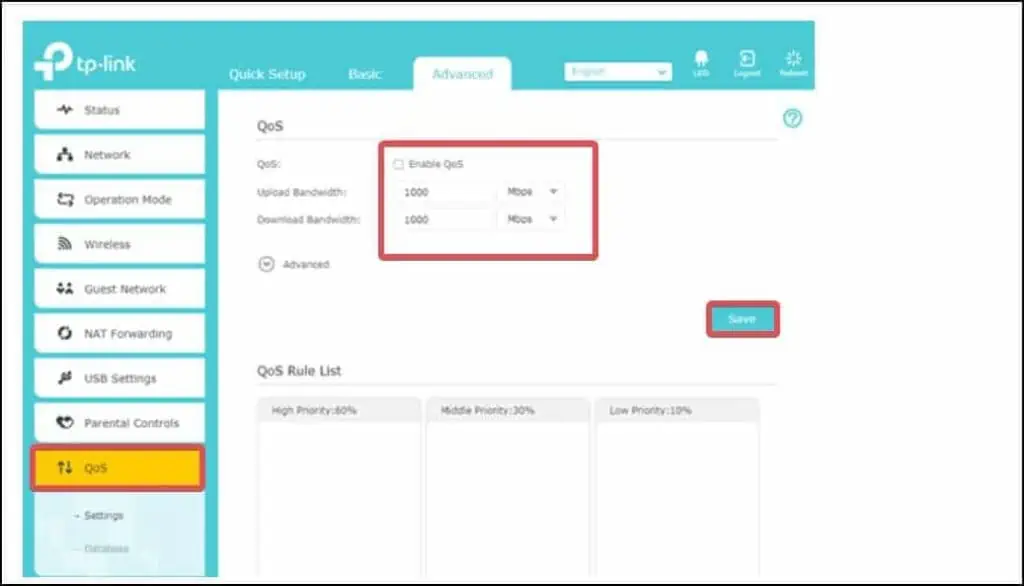
It is possible for the users to configure the Quality of Service (QoS) on most of the routers. By configuring QoS, users can set the maximum uplink, and downlink limit or the traffic volume for the connection.
You might be experiencing a slow upload, if the uplink limit is set for a lower value.
You can reconfigure it and remove the limit to gain better speeds on the uploads.
- Open the Browser and login to the router dashboard.
- Search a Section named QoS.

- If you see the QoS is enabled, uncheck the option to disable it completely.
- If you do not want to disable it, you can even change the values of the uplink to a higher limit.
- Finally, click on Save.
Note: Disabling the QoS can normalize the bandwidth access to all the applications and devices, including the unwanted and non-prioritized ones. It is advised that you proceed with caution before you configure QoS.
Scan for Viruses and Malware
Viruses and spyware are well-known troublemakers that can affect your internet speed. Particularly speaking about the uploads, these can be using up your upload bandwidth and stealing your data.
To prevent malware and viruses from affecting your system, install good antivirus software and perform manual scans at regular intervals.
Update the Router Firmware
Updating the firmware for the router isn’t a mandatory thing, but performing it, too, won’t cause any harm. You can’t rule out the possibility that the issue in the upload speed is generated by the firmware.
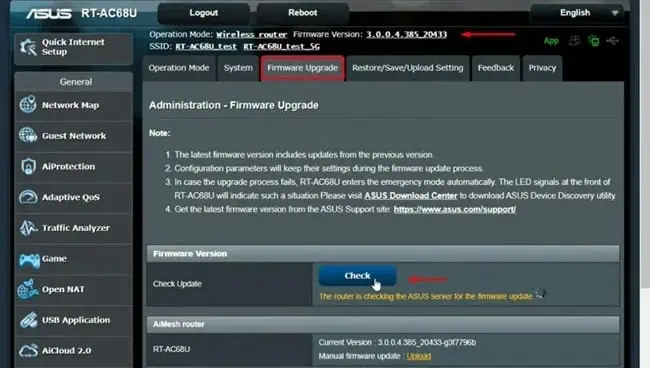
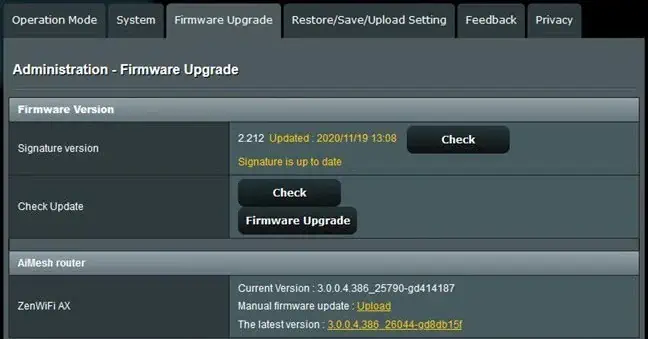
The interface of the router’s settings page for the firmware update might differ according to the manufacturer. However, the general process for its update is the same.
- Open the web browser and access the router’s dashboard.
- Find a tab named Advanced, Administration, or Firmware.
- Navigate to the Firmware Version section and click on the Check button.

- This will check the available updates for the router. You will see the Update Software or similar option if it finds one.

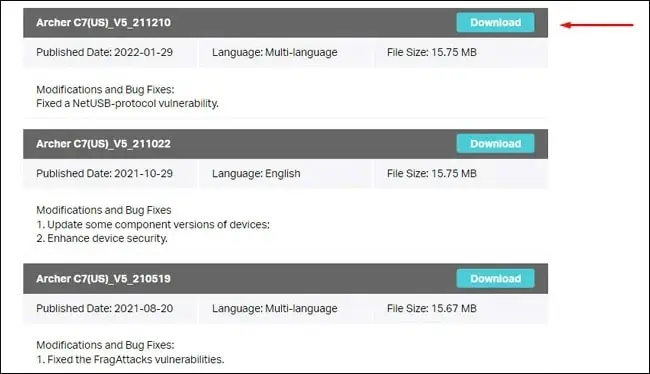
This process might not work for all routers. In these cases, you can manually download the firmware and install it.
- Note down the model number of the router.
- Go to the Download Center of the Router’s manufacturer and go to the firmware menu.
- Find the firmware update for the router according to the model number you noted earlier and download it.

- Go back to the Router’s dashboard and navigate to the update section again.
- You might see the manual firmware update option there. Follow the prompt and update the router’s firmware.
Replacing the Router or Modem
The network peripherals provided by your ISP are often of poor quality and even fail to provide you with better internet connectivity over time. Even your own routers wear off with time and show degradation in their performance. You can ask for a replacement of the modem or router from your ISP or purchase a new one on your own.
Change the Internet Plan or ISP
If the internet plan from your ISP offered slower speeds from the beginning, it’s time for you to change it. Usually, the upload speeds are slow in comparison with the downloads. Subscribe to a plan with a good download-to-upload ratio if your usage is upload intensive.
Data caps are another thing you must look into. The ISPs set a monthly limit to your internet, and after the passage of such limit, they drastically reduce the internet speeds. Upload speeds are generally lower than download speeds. Hence, such data caps affect the uploads the most.
Also, sometimes the reason behind the poor internet speeds can be the ISP itself. If you are frustrated with the internet quality, it’s time for you to change the ISP.

