Isn’t it frustrating when your Wi-Fi stops working? Or even worse, you notice that the wireless network adapter is completely missing from the system.
Generally, this type of issue is caused by the outdated device drivers and can be fixed by updating them.
However, your adapter could be missing or not working for a completely different reason. So, let’s get right into the article to learn in-depth about your issue and how to fix it.
What Are the Causes for Missing Wi-Fi Adapter?
There are various reasons why your adapter is missing or not working. Here are some of the most common ones.
- Corrupted or outdated device drivers
- Faulty NIC card Hardware
- Wi-Fi adapter hidden in Device Manager
- Issues with Power Management settings
How to Fix a Missing Wi-Fi Adapter
Before you lose hope completely and think of replacing the Wi-Fi adapter with a new one, here are some methods that can fix this issue.
Unhide the Devices
Even though the Wi-Fi adapter is physically connected to your system, it’s rather not showing up because it is hidden in the device manager. Here’s how to find and unhide it.
- Press the Windows + X key.
- Select the Device Manager option.
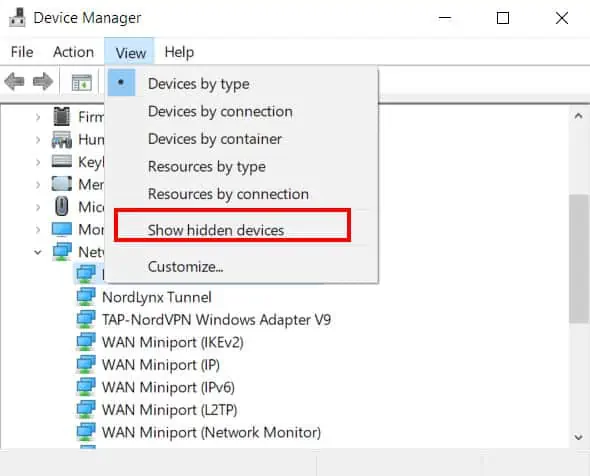
- Under the View menu, select the Show hidden device option.

- Select the Network Adapter option.
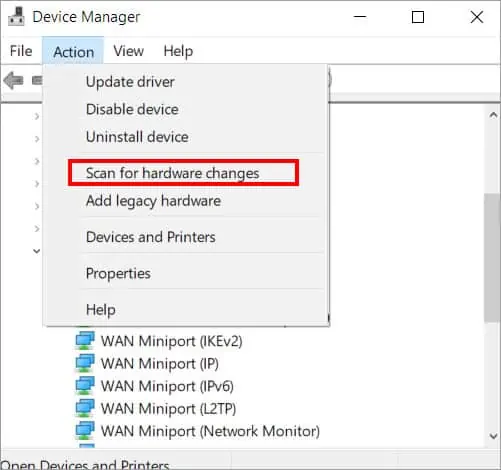
- Go to the Action menu on the top and click on Scan for hardware changes.

- Expand the Network Adapters dropdown and see if your wireless adapter is listed there.
Furthermore, you can right-click the device and select the Properties option. Under the General tab, you can view if the device is working properly below the Device status section.
If the above fix doesn’t work then you can go through fixes like updating the device driver, resetting the network and various others as discussed in this article.
Update the Wireless Adapter Device Driver
The wireless adapter may be missing or not working due to an outdated device driver. Here’s how you can update it to resolve the issue.
- Press Windows + R key and type
devmgmt.msc. - Scroll down to the Network Adapters.
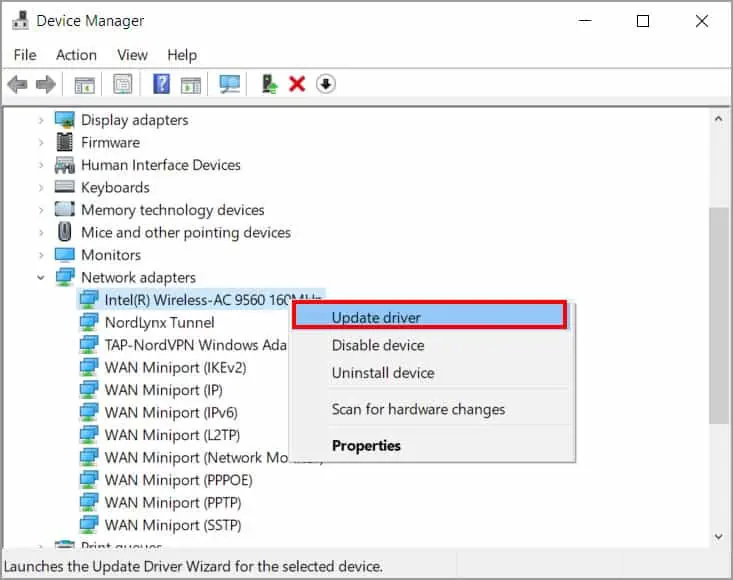
- Select your wireless adapter and right-click on it.
- Click on Update driver.

- Choose Search automatically for drivers option to download and install it online and choose Browse my computer for drivers to search it on your own system.
After the driver has been installed, you can select Scan for hardware changes from the Action menu at the top. Check if the Wi-Fi Adapter is now visible.
Reinstall Network Driver
Alternatively, you can try reinstalling the device driver from the device manager. Here’s how you can do it.
- Press Windows + R key and type
devmgmt.msc. - Expand the Network Adapters option from the list.
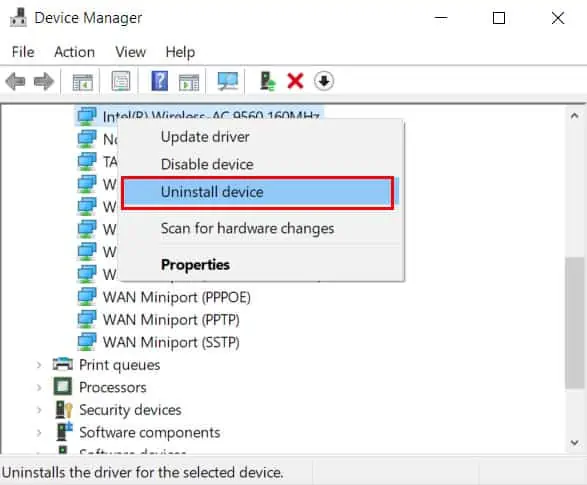
- Right-click on your device and click on Uninstall device.

- Click on Uninstall to confirm. Then, the device will be removed from the system.
- Restart the PC.
After you restart the PC, your operating system will automatically reinstall the device.
Run the Network Troubleshooter
You can try the Windows network troubleshooter and resolve the issue by following its instructions. Here are the steps to run the network troubleshooter.
- Press Windows + R key and enter control to open the control panel.
- Navigate to Network and Internet > Network and Sharing Center.
- On the left sidebar, click on Change adapter settings.
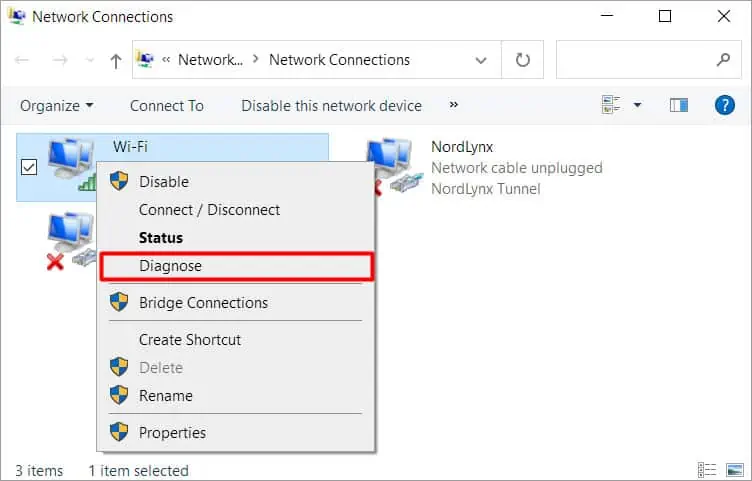
- Choose your wireless adapter, right-click on it and select Diagnose option.

- If the troubleshooter finds any problem, follow the steps according to it.
You can also run the network troubleshooter for all the network devices in general. For this, navigate to Network and Internet > Network and Sharing Center and under the Change your networking settings, click on Troubleshoot problems.
Perform a Winsock Reset
This method includes resetting Winsock using cmd command. Resetting WinSock will basically restore important network configurations to default which helps in resolving many network connection issues.
- Press Win+R and type cmd.
- Press Ctrl+Shift+Enter key at once open cmd as an administrator.
- Upon the User Account Control(UAC) prompt, click on Yes.
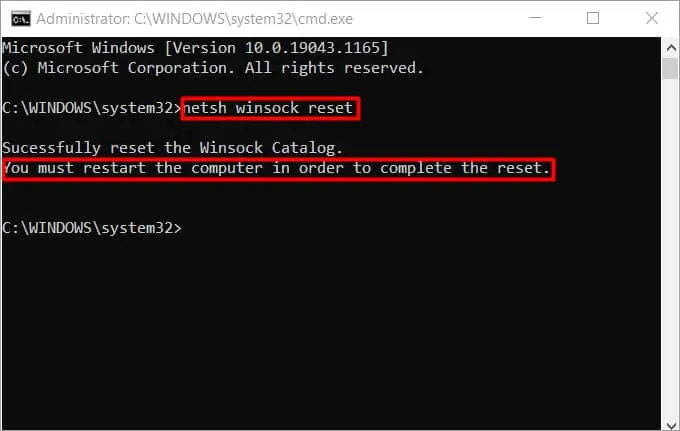
- Type the command
netsh winsock resetand press Enter.
- Restart the computer for the effect to take place.
Perform a Network Reset
A network reset ejects all the installed network adapters along with their settings on the system. Once the system is restarted, the adapters are re-installed and their settings are set to default
- Press Windows + I key to open the Settings app.
- Select the Network & Internet option.
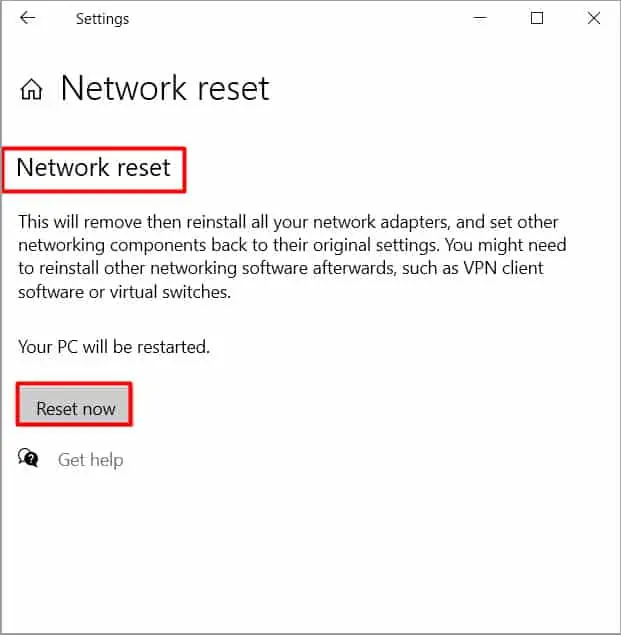
- On the right pane, click on Network reset.
- Then click on the Reset now button.

This will restart the PC so make sure to save all your important works before pressing the Reset now button.
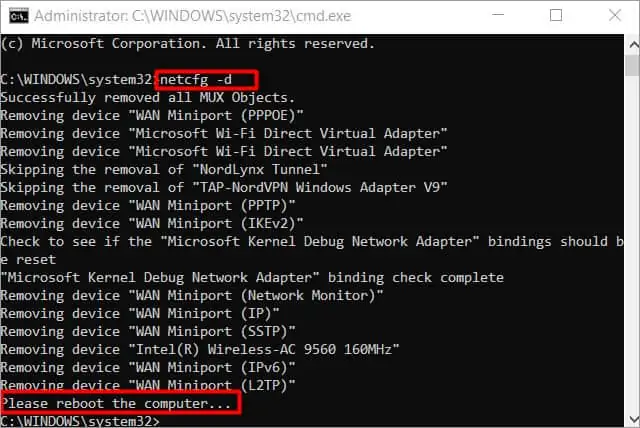
Perform a Cleanup Operation for Network Devices
This method includes cleanup for network devices.
- Press the Windows + R key and type cmd.
- Press Ctrl + Shift + Enter key at once to open cmd as an administrator.
- Type
netcfg -dand press Enter.
You may require a reboot so please save all your necessary work before running the command.
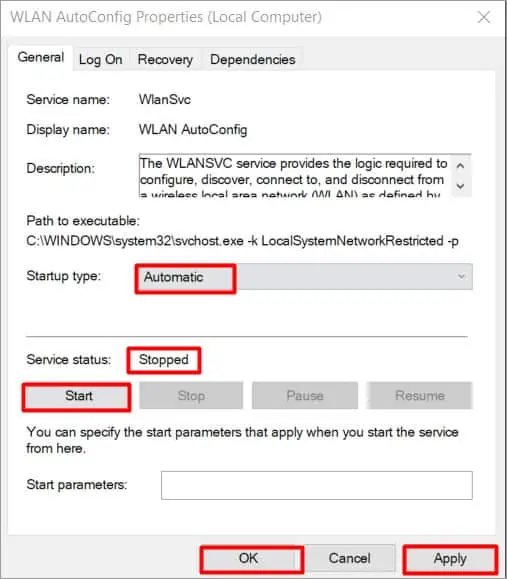
Check Windows 10’s Background Services
Your Wi-Fi adapter could be not showing up or missing due to a background service which stopped working. You can follow the steps below to configure it properly.
- Press Windows + R key and enter the command
services.msc. - In the services windows, scroll down to the WWAN AutoConfig and open it.
- If the Service status shows Running then leave it as is. Otherwise, click Start.
- Choose the Automatic option in Startup type.
- Click Apply and then OK to save the changes.

- Restart the system and check if the adapter shows up and works now.
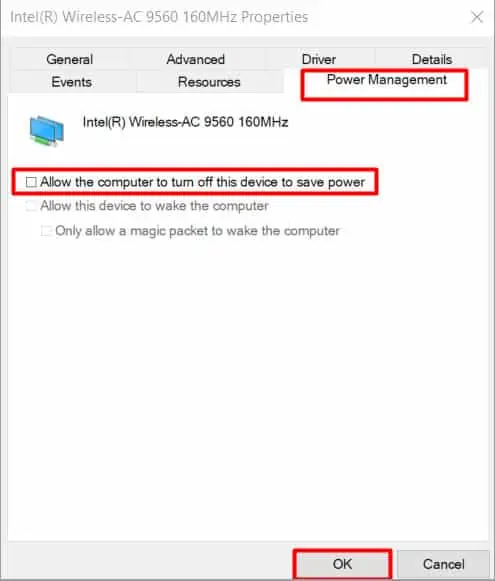
Check Your Power Management Settings
If you are using a laptop, it could have turned off the adapter because of a configuration in Power Management. Your system does this to save power. Here’s what you can to disable the system from turning off the adapter.
- Press Windows + R key and enter the command
devmgmt.msc. - Expand the Network adapters dropdown and select your wireless adapter device.
- Right-click on it and click on Properties.
- Under the Power Management tab, uncheck the Allow the computer to turn off this device to save power option.
- Click on OK.

Update the Router Firmware
Sometimes, it may be the router that is causing problem than the Wi-Fi adapter not working or missing. In this case, you can try updating the router firmware. Generally, you can find the necessary instructions to update the router firmware on its manufacturer’s website.
Check the NIC Card
There can be instances where you applied all the fixes above but were unable to see the adapter listed in the device manager. In these cases, your NIC card hardware is likely to be damaged or faulty. So your only option now is to either repair it or replace it with a new one.

