Clean installing Windows 10 is a great idea to reformat your computer if you no longer need your previous files or want to sell it to someone else. You can also clean install your system if you encounter serious system issues or want to boost your computer’s performance.
Doing so is not that difficult and there are only a few things you need to care about during the process. In this article, we discuss all these matters and provide you with a detailed guide to clean install Windows 10 on your PC.
How to Do a Clean Install of Windows 10
There are a few things you need to keep in mind before performing a clean install of Windows 10, which include:
- It’s better to disable Secure Boot and Fast Boot in your BIOS/UEFI during the process as some motherboards don’t allow you to boot using an installation media if these options are On.
- You need to disconnect the internet (through Ethernet) while undergoing the setup process if you want to create a local account. If the computer has internet access, it will force you to create or use a Microsoft account.
- Clean installing Windows 10 will delete all the data in all of your partitions, so make sure to backup any necessary files or folders.
Now, you can follow the step-by-step guide below to perform a clean install of Windows 10.
Step 1: Create Installation Media
The first step is to create a Windows 10 installation media. You can either use a third-party app or use one of the following built-in methods to do so.
Using Media Creation Tool
If you don’t have an ISO file for Windows 10, it’s better to use the Media Creation Tool to create its installation media. Here’s how you can do so:
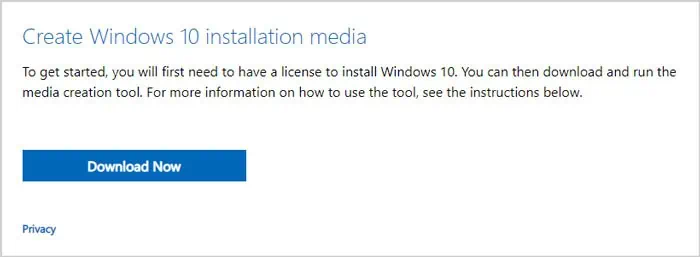
- Visit the Microsoft’s Windows 10 download web page.
- Click Download Now below Create Windows 10 installation media.

- Insert a USB flash drive with at least 5 GB space into your PC.
- Open the setup file and confirm the User Account Control (UAC) prompt.
- Click Accept on the license agreements page.
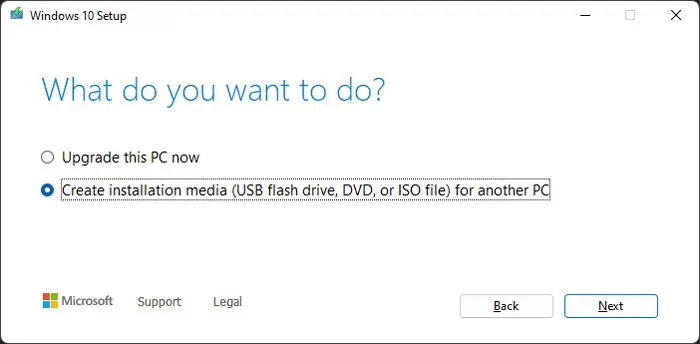
- Check Create installation media (USB flash drive, DVD, or ISO file) for another PC and click Next.

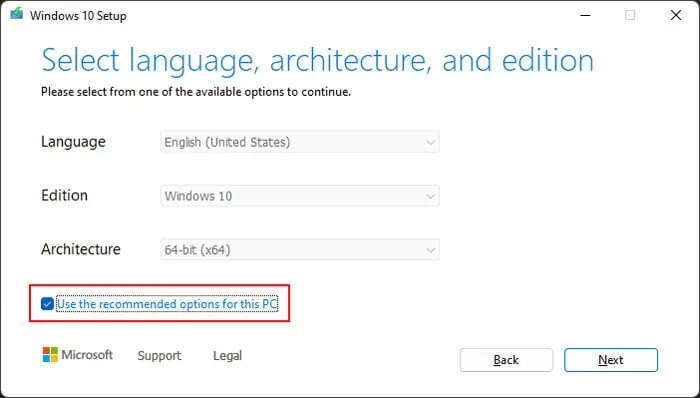
- Check Use recommended options for this PC and click Next.

- Check USB flash drive and click Next.
- Select the drive you wish to use as the installation media and click Next.
- Click Finish after the process completes.
Using Diskpart
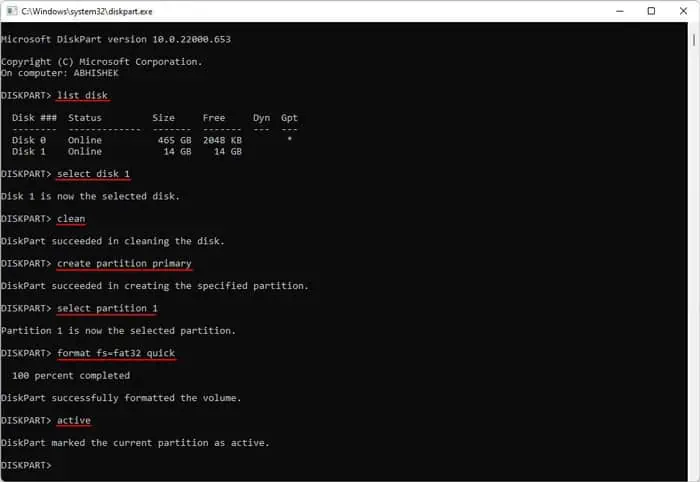
If you already have an ISO file for Windows 10, the easiest method to create the installation media is to use the Diskpart command line interface (CLI). Here’s what you need to do:
- Insert the USB flash drive into your PC.
- Open Run by pressing Win + R.
- Type
diskpartand press Enter to open this CLI. - Enter the following commands:
list disk(check the disk number of the USB drive)select disk #(replace # with the above disk number)cleancreate partition primaryselect partition 1format fs=fat32 quickactiveexit
- Extract the contents of the ISO file to the USB drive. You can double-click on the file to mount it to a virtual drive. Then, copy all of the files and folders inside it and paste them to the USB drive.
Step 2: Boot Using the Installation Media
After creating the USB installation media, you need to configure your boot priority on BIOS/UEFI and boot using this media. Here’s what you need to do:
- Press and hold the Shift key while clicking on the Restart button on the power options. It loads the Windows Recovery Environment.
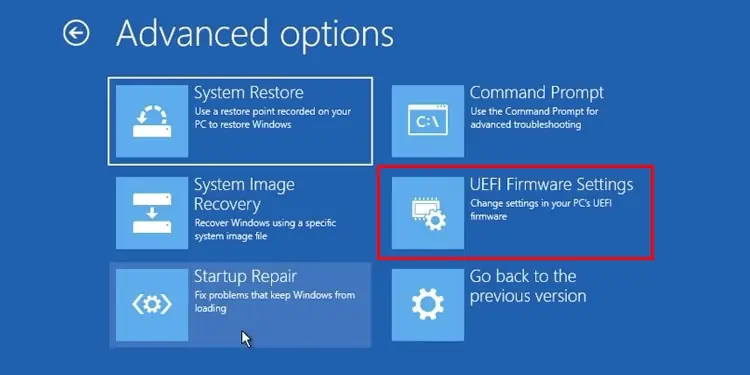
- Here, go to Troubleshoot > Advanced options > UEFI Firmware Settings > Restart to boot into UEFI.

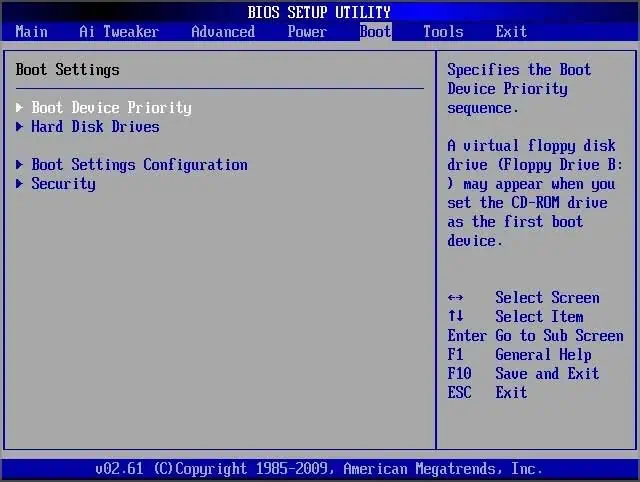
- Go to Boot Order or Boot Priority or similar options. You can usually find it under Boot tab.

- Make sure USB is at the top of your list using the instructions on the BIOS interface.
- Save the changes and exit BIOS.
- On the next boot, boot using the USB flash drive. If your system asks you to press a key to boot using the media, do so.
Step 3: Clean Install Windows 10
Now, follow the steps below to clean install Windows 10:
- Select the language preferences and click Next.
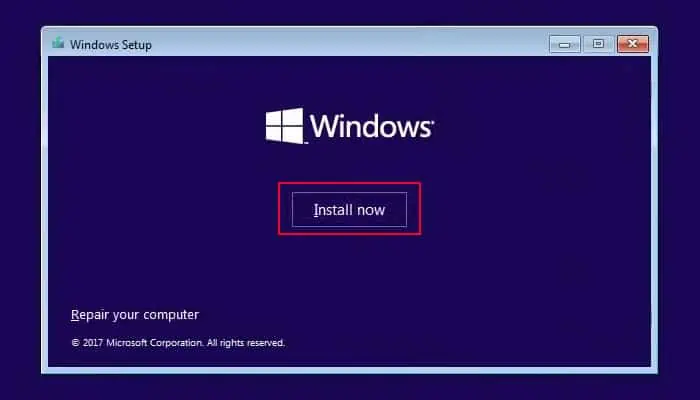
- Click on Install now.

- Type the product key for Windows Home or Professional edition and click Next. Alternatively, you can click on I don’t have a product key if you don’t have a key or want to activate Windows 10 later.
- If you don’t enter the product key, you need to choose a Windows version and click Next.
- Accept the license terms by checking the option, and click Next.
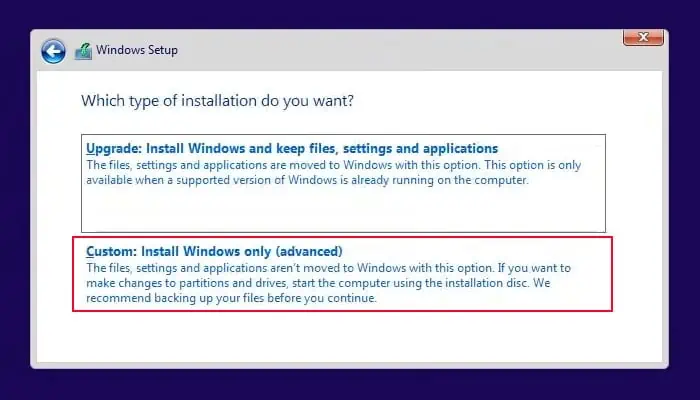
- Select Custom: Install Windows only (advanced).

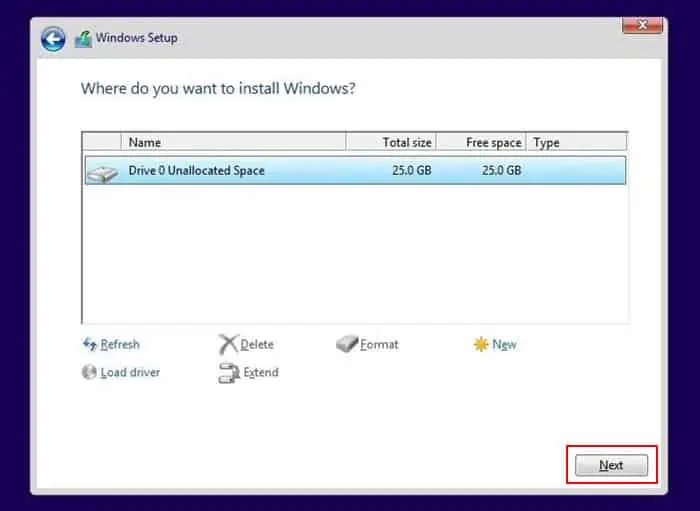
- Delete all the partitions by selecting them and clicking Delete. If you have more than one disk, you only need to do so for the disk where you want to install Windows. You can distinguish the different disks by checking the number next to Drive.
- You should be left with just unallocated space for the drive. Select it and click Next.

- Don’t worry if you receive a warning. The setup will just create necessary additional partitions by itself.
- Then, select the Primary partition and click Next.
- Wait for the process to complete and click Restart Now.
Step 4: Finalizing the Installation
After the reboot, Windows will start the initial setup. Here, you can force shut down your PC by pressing the power button for a few seconds or following the steps below to avoid setting the initial preferences if you want another user to use this computer:
- Press Shift + F10 to open the Command Prompt.
- Enter
C:\Windows\System32\shutdown -s -t 0 -fto force the shut down.
If you are setting up your PC for yourself, follow the instructions below instead:
- Select your Region and click Yes.
- Similarly, set your Keyboard layout and click Yes. We recommend both of these to be United States if you don’t have a specific preference.
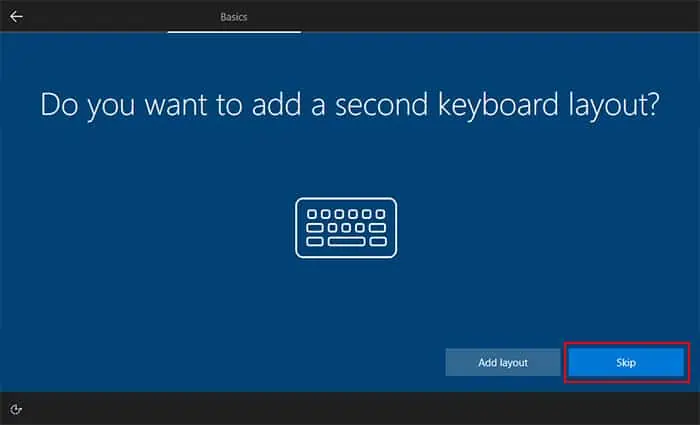
- You can then click Add layout if you want to add another language and layout for your computer. However, you can do this later after setting up your PC, so you can click Skip to avoid the process.

- If you have an internet connection ready or wish to create a Microsoft Account,
- Insert an Ethernet cable or connect to a Wi-Fi network and click Next.
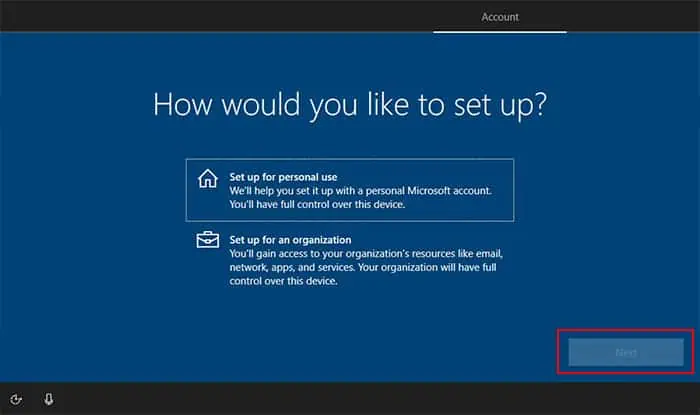
- If you are using Windows Pro or Enterprise editions, click How would you like to set up or Choose how you’ll connect and hit Next.
- Choose whether you want your computer to be part of a domain (organization) or not (personal use) and click Next.

- If you want the PC to be part of a domain, follow the instructions on the setup (they are self-explanatory) until you reach the account creation page.
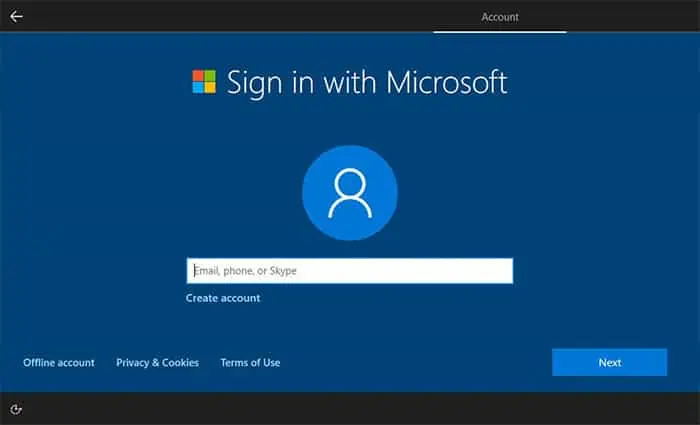
- Here, enter your Microsoft account’s email address, phone number, or Skype username and click Next.

- Then, enter your password, hit Next, and follow the Microsoft account creation process till you reach the privacy settings.
- Otherwise, follow these steps:
- Click on Skip for now or I don’t have internet and then Continue with limited setup.
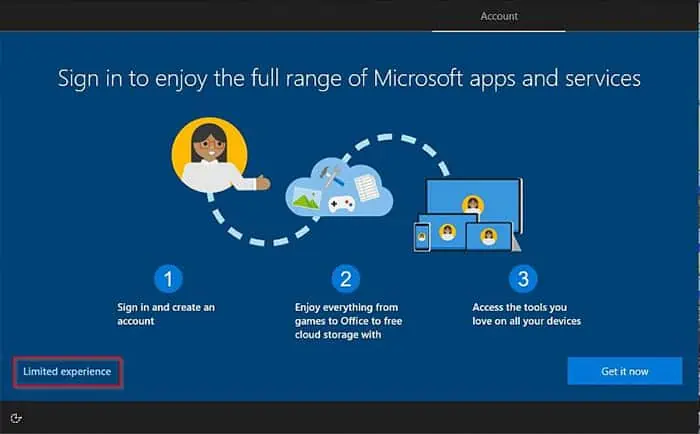
- Select Offline account > Limited experience. If you installed an older Windows Home, you need to type something random on the account text box and click Next before selecting Offline account. For Windows Enterprise editions, select Domain join instead.

- Type the local user account name you want and click Next.
- Enter a password and select Next. You can leave it blank if you don’t want a password. Then, confirm it in the same way.
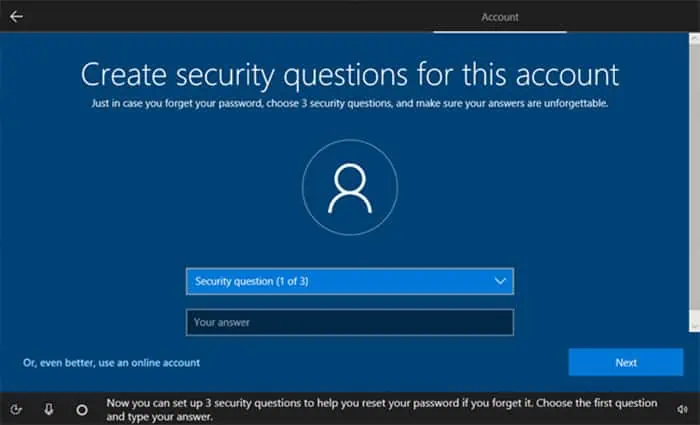
- Select the security questions and pick your answer. Then, hit Enter. After setting three questions, you should get to the privacy settings.

- You can enable/disable the privacy settings according to your preference. Then, click Accept.
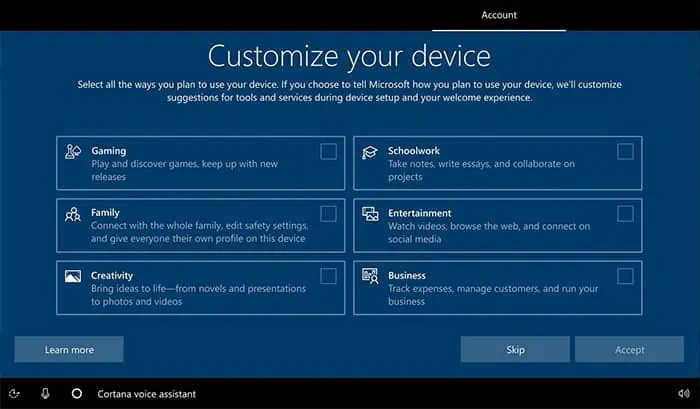
- On the Let’s customize your experience or Customize your device page, select your preferred option and click Accept. Alternatively, you can select Skip and perform this process after finishing the setup.

- For other options, we recommend selecting No or Do it later and performing those actions later. However, you can go through them as you please.
- Then, Windows should log in to your account after everything is ready (It may take some time).
Step 5: Install Updates, Drivers and Optimize Your PC
After setting up Windows, there are a few things you need to do, such as installing Windows Updates and drivers. Here’s what you need to do:
- Open Settings by pressing Win + I.
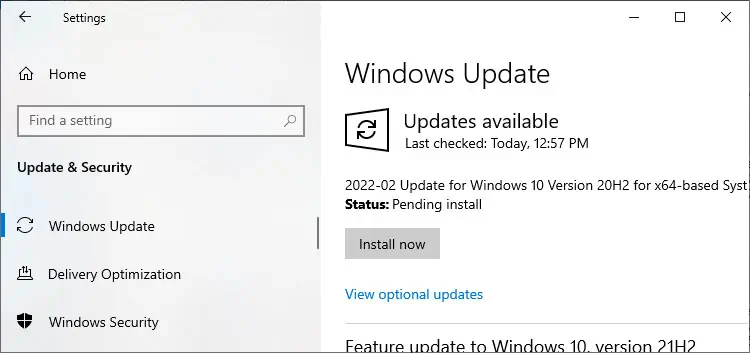
- Go to Update & Security > Windows Update
- Click Install now or Check for Updates > Install now.

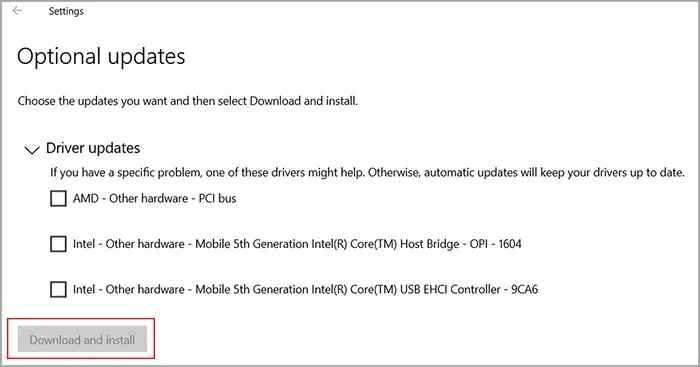
- After installing all the updates (you may have to restart your PC a few times), go to the Windows Update Settings again and select View optional updates. Optional updates also include the drivers uploaded to Microsoft Driver’s catalog.
- Expand the Windows updates and Driver updates categories and check all options.
- Click Download and install.

Doing so may not install all your drivers. You need to go to the manufacturer’s website for your Processor and get to the Drivers and Support.
- For AMD: Go to AMD Drivers and Support and click Download Now below Auto-Detect and Install Windows Driver Updates. Then, run the installer and follow the on-screen instructions.
- For Intel: Go to Intel Download Drivers & Software and select Get started > Download now. Then, run the installer and follow the instructions.
Then, if you use a dedicated GPU, you need to go to its official website and download the latest driver for the GPU.
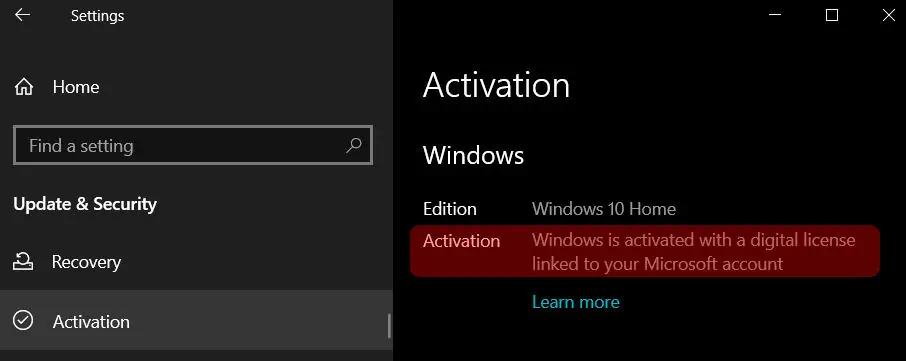
If you haven’t already activated your Windows, you can go to Settings > Update & Security > Activation and do that now.
Then, we recommend you optimize your PC for user experience and performance by following our guide on How to Optimize Windows.
