There can be several internal issues for your Windows 11 to restart in loops without warning. This can be quite frustrating as you can lose your unsaved work during sudden restarts.
Turning off the automatic restart from system settings has fixed this issue for most users. Likewise, running SFC, DISM, and CHSDSK scans can also help.
If these do not help, it’s possible that you’re having these issues due to memory failure. In fact, Windows restarting frequently can be a sign of a failing PSU or motherboard too.
Let’s try to solve this problem step-by-step.
Turn Off the Automatic Restart
Under advanced system settings, there is an option that allows Windows to automatically restart in case of system failures. Thus, make sure to disable that option if you have it turned on.
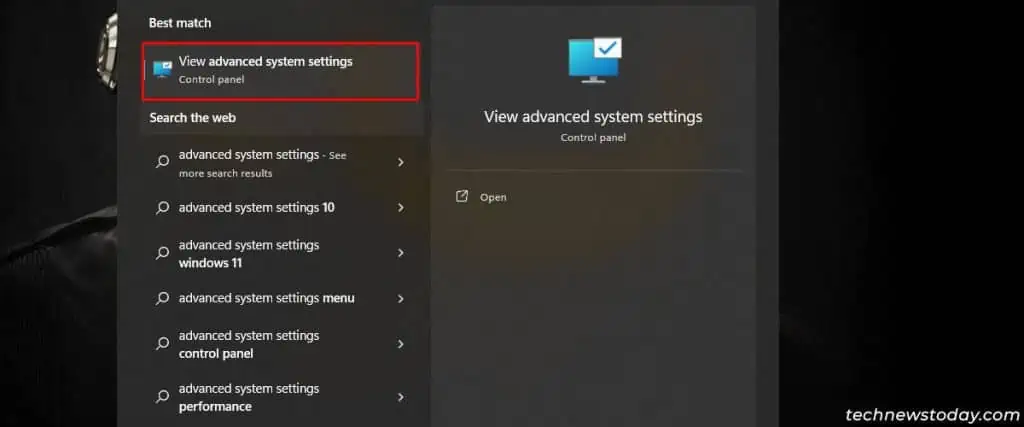
- Search and open Advanced system settings from the search bar.

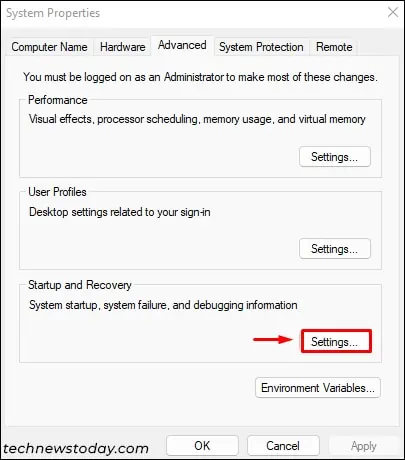
- In the Advanced Tab click on Settings under Startup and Recovery.

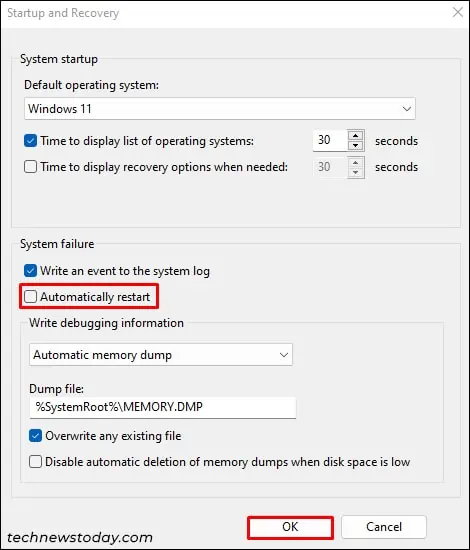
- Under System Failure, uncheck the Automatically Restart option.
- Click OK to apply changes.

Use SFC, DISM, and CHKDSK
You can run a DISM, CHKDSK, SFC scan to check for potential faults in your hard drive.
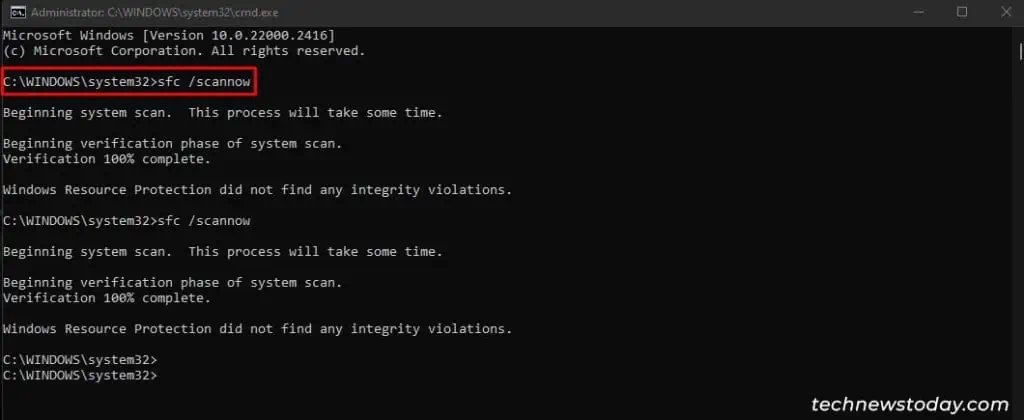
SFC(System File Checker) scans for any corrupted system files and repairs them. This command can be run when any protected files or services don’t work. Here’s how to do it from Command Prompt.
- Press
Win + Rto open the Run prompt. - In the command prompt, type
cmdthen pressCtrl + Shift + Enter. It will run Command Prompt as Administrator. - Type the command
sfc /scannowand hit enter to repair corrupt files.
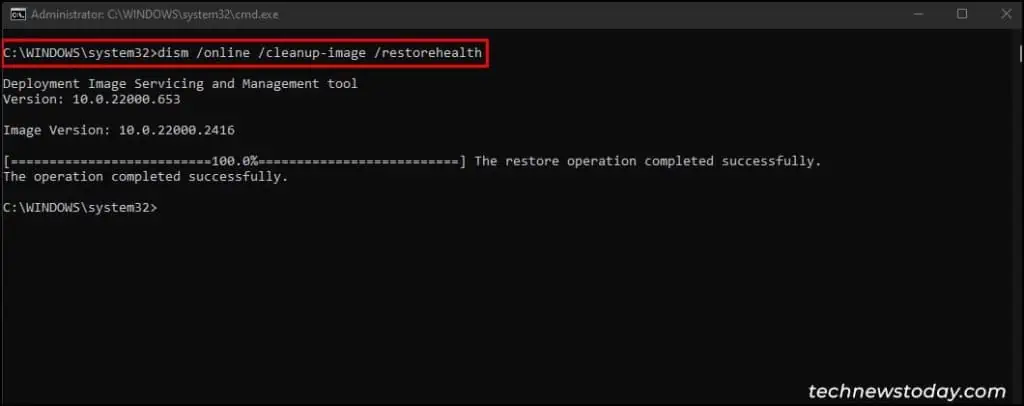
The DISM (Deployment Image Servicing and Management) tool repairs the system image by replacing the damaged files from that system image.
You should run DISM if SFC can’t resolve the existing system issue. However, DISM will only repair the Windows image. Thus, to fix additional system files you will have to re-run SFC after DISM. Here’s how you can run DISM.
- Press
Win + Rto open the Run prompt. - In the command prompt, type
cmdthen pressCtrl + Shift + Enter. This will open it as administrator. - Type the command
dism /online /cleanup-image /restorehealthand hit enter.
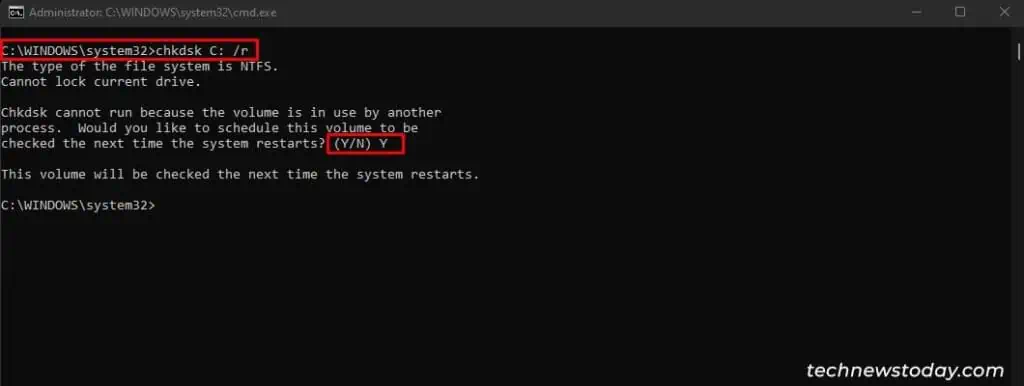
The CHKDSK utility on the Windows Operating System performs a scan on your hard disk and repairs any bugs on its system. Follow these instructions to perform the CHKDSK scan on Command Prompt.
- Search for Command Prompt in the Windows search bar.
- Right-click on it and select Run as Administrator.
- In the Command Prompt Window, type in the command
chkdsk C: /rthen hit enter. Now, pressYand hit enter, this will automatically scan for disk corruption on the next restart.
Update/Reinstall your Corrupted Drivers
Although it is rare, an outdated or corrupted driver can also sometimes cause Windows 11 to restart. Follow these instructions to update and reinstall your drivers and check if it resolves your issue:
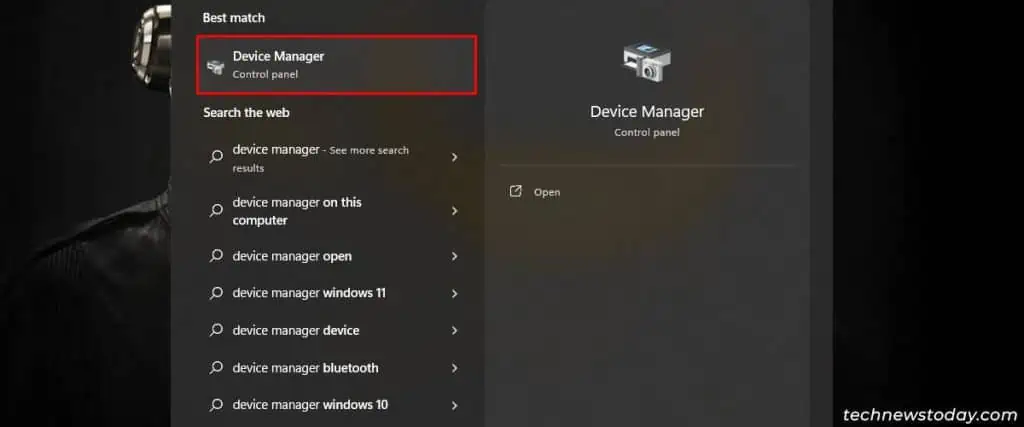
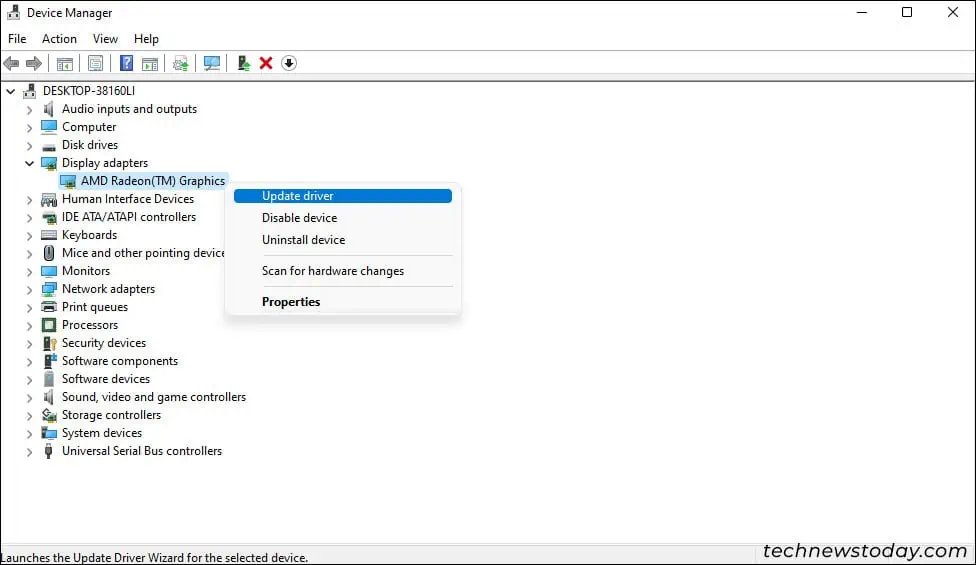
- Type Device Manager on the Windows search bar, then open it.

- Click on the arrow icon beside the Display Adapters icon to expand it.
- Right-click on your GPU and select Update Driver.

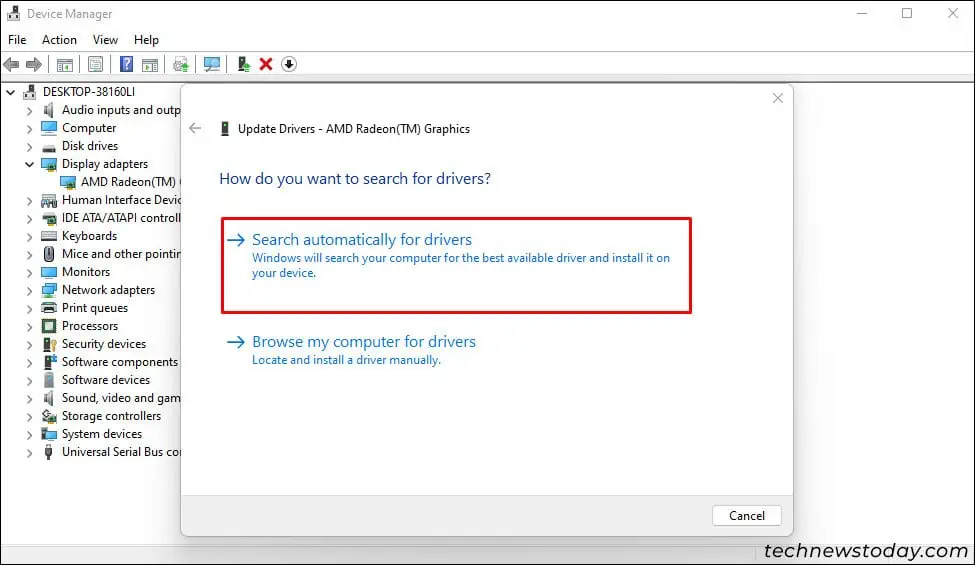
- Then, select Search Automatically for drivers to update the drivers automatically.

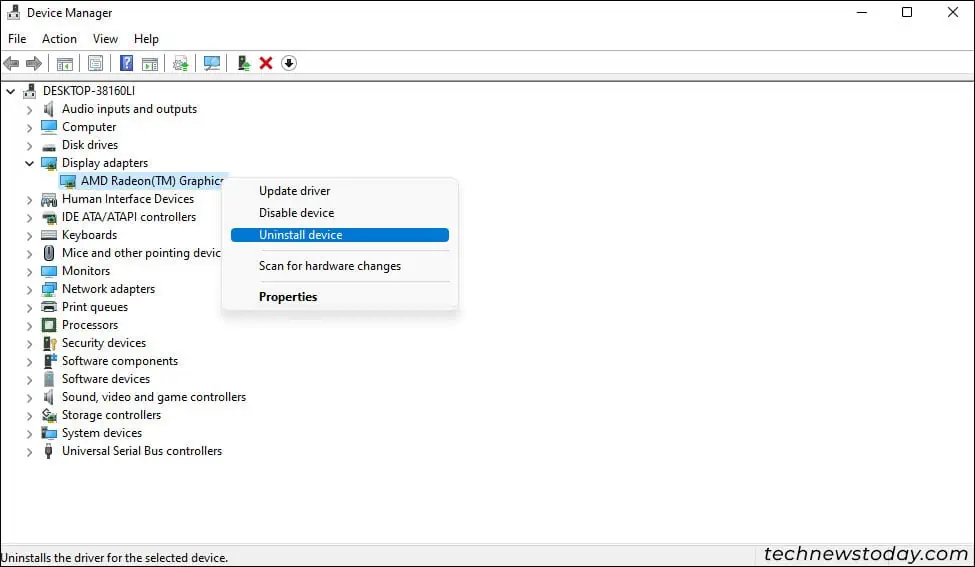
- If updating didn’t help, right-click on your GPU and select Uninstall Device.

- Hit Uninstall in the on-screen dialogue and reboot your PC.
3. If nothing helps, inspect your Device Manager. If you find any exclamation marks in any of the drivers, try updating/reinstalling them as well. Chipest drivers are ones to keep an eye on!
Run Memory Diagnostic
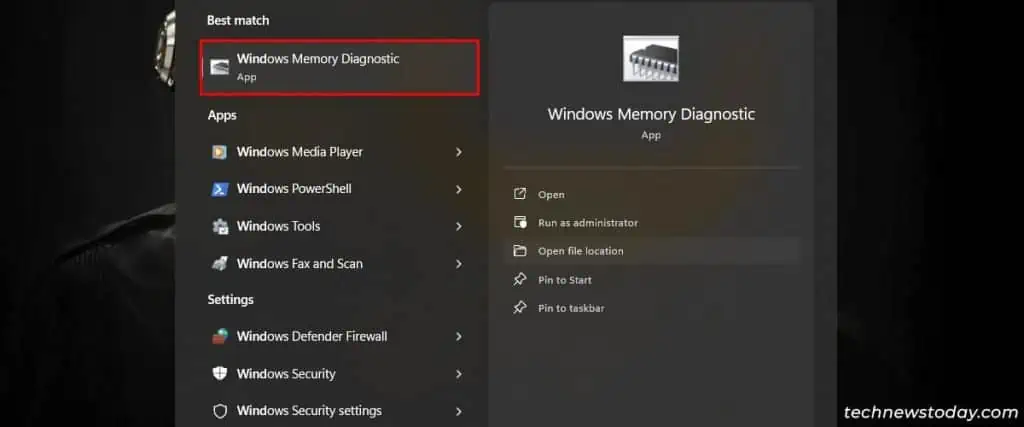
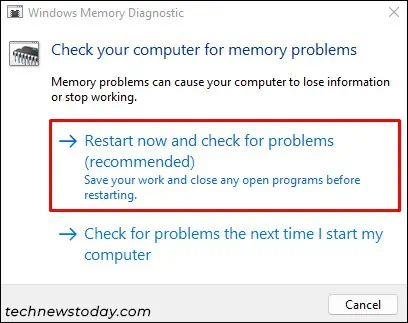
Another reason to encounter random restart issues is due to a failing memory (RAM). Your PC’s memory in Windows 11 can be diagnosed by running the Windows Memory Diagnostic. Here’s how:
- Type Windows Memory Diagnostic in the Windows search bar and open it.

- Select Restart now and check for problems.

- Now Windows will automatically run the diagnostic on your memory.
Delete Recent Windows Update
Due to some glitches in the Windows update itself, your OS could be encountering abrupt restarts. Hence, rolling back the update could fix this issue in such cases. Here’s how you can do it.
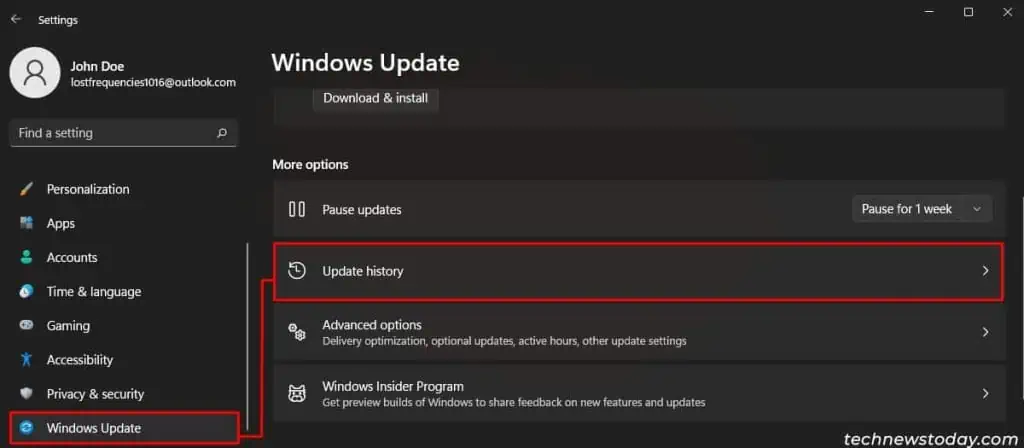
- Press Win + I to open Windows settings and navigate to the Windows Update.
- Now, click on Update History.

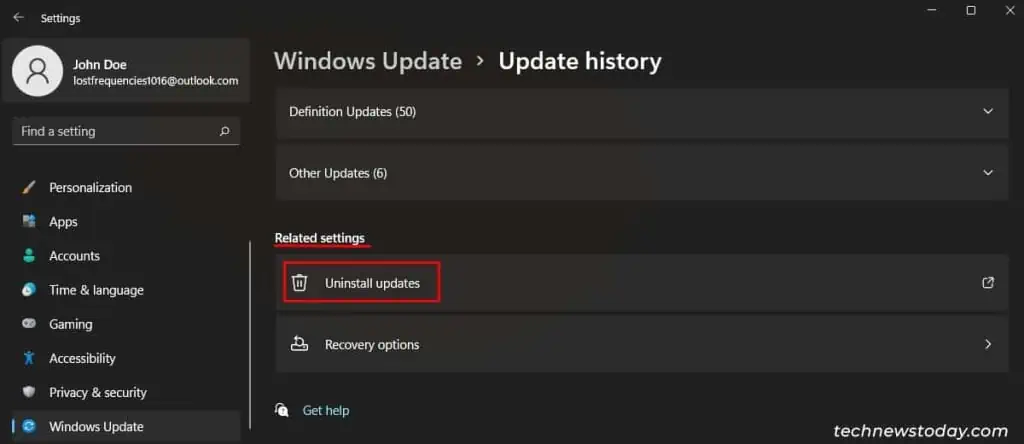
- Under Related Settings click on Uninstall Updates.

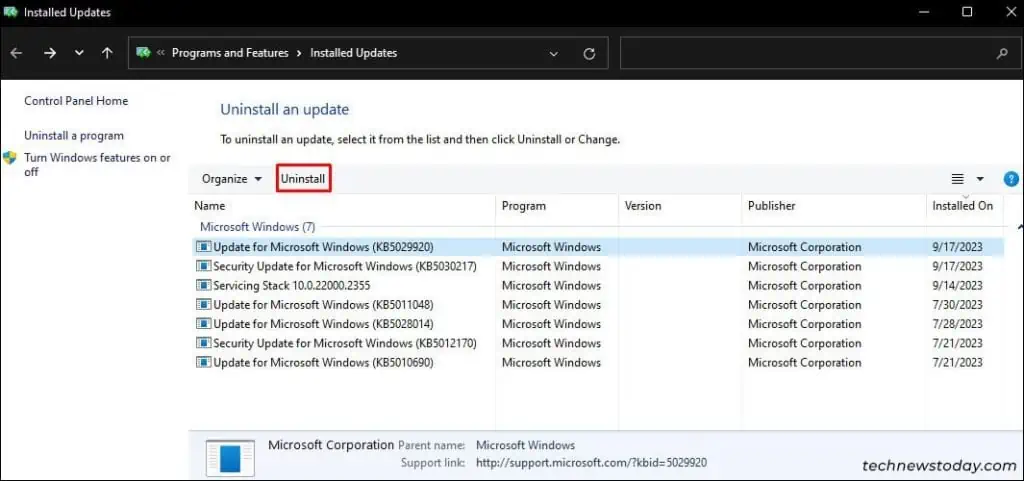
- Select the latest update and click on Uninstall. Select Yes in the confirmation box that follows.

- Windows will now roll back the update to a previous date.
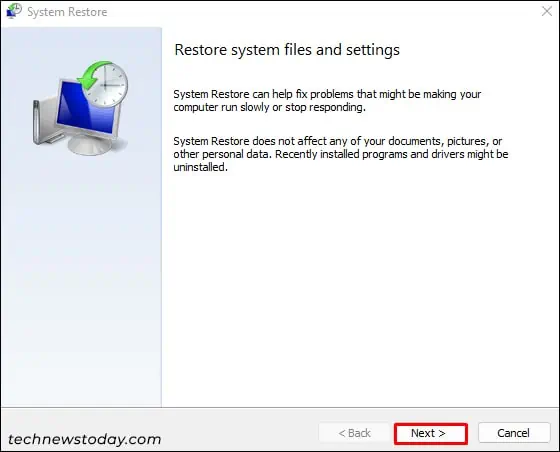
Alternatively, you can opt for system restore which monitors system changes and saves the system state as a restore point. It can oftentimes fix certain issues after an update.
- Open Win Run, input the command
rstrui.exe, and hit enter. - Click Next on the System Restore tool.

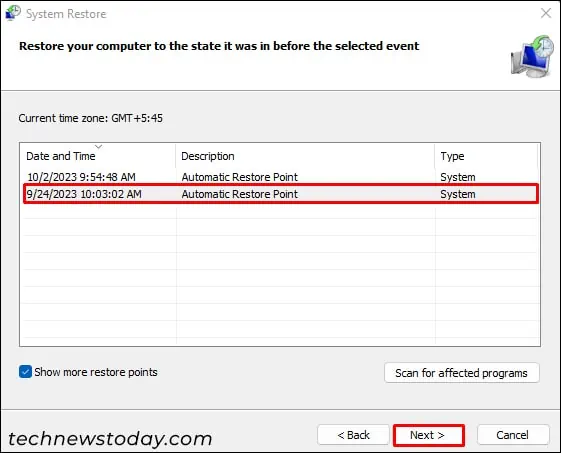
- Select a date to System Restore and click Next.

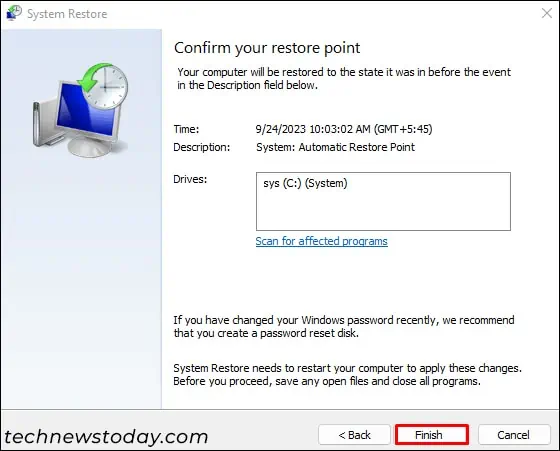
- Lastly, click Finish to apply your changes.

Addressing Hardware Issues
Your PC could be experiencing sudden restarts if there are issues with the internal hardware components. Thus, try these additional fixes to address this issue.
- First, reseat RAM and graphics card. Confirm they are installed properly on your motherboard.
- Make sure your system is not overheating. This could occur while using CPU/GPU-intensive programs.
- Ensure your CPU cooler is working properly. Check the header connection or reinstall it.
- Try updating your system’s BIOS. This should fix system instabilities.
- Check for a failing PSU or motherboard as this could also cause your PC to restart.
Final Verdict
If you have ruled out the hardware fixes as well and if the problem still persists, I’m afraid the only solution is to roll back to Windows 10. This should be relevant for users who have recently switched to Windows 11.

