The native backup tools in Windows have a reputation of being unreliable and prone to errors, and it’s not without reason.
Some users are unable to set up automatic backups, while others can’t even backup manually because of various errors. Even in many initially successful cases, the backups turn out to be useless as you can’t recover anything from them.
- File system errors
- Conflict with old backups
- Reparse point problem
- Access issues
- Interference by other programs
As there are numerous such scenarios, we’ve divided this article into two sections dealing with backup and recovery errors for ease of reading.
Fix Windows Backup Not Working (Case 1)
If you face any errors (ex. 0x807800C5) during the backup process, or the backup seems to go well but fails at the end, the solutions in this section will be helpful.
Check File History Log
Before you start troubleshooting, checking the File History logs should give you a deeper insight into the problem. Here’s how you can check this:
- Press Win + R, type
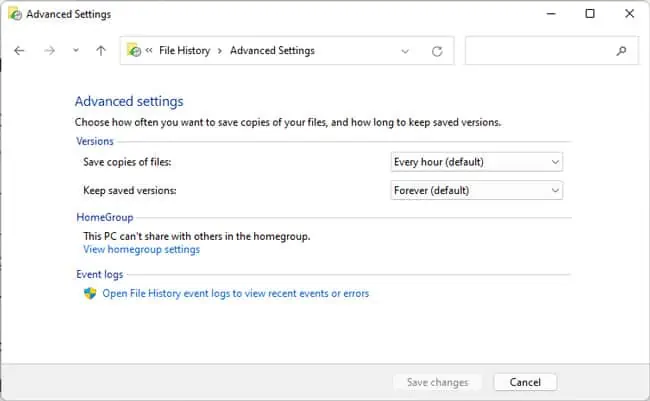
control, and press Enter. - Go to System & Security > File History > Advanced Settings.

- Click on the Open File History Event Logs option.
- Check the description of the event logs.
Delete Old Backups
The aforementioned error generally occurs because of a naming conflict with the previous backups or because the target volume is inaccessible. In such cases, users have had success with deleting the MediaID.bin and the <ComputerName> from the backup folder. If this doesn’t work, you can try deleting the WindowsImageBackup folder entirely.
If these fixes don’t work, it’s worth trying to resolve some access issues. Here are the steps to do so:
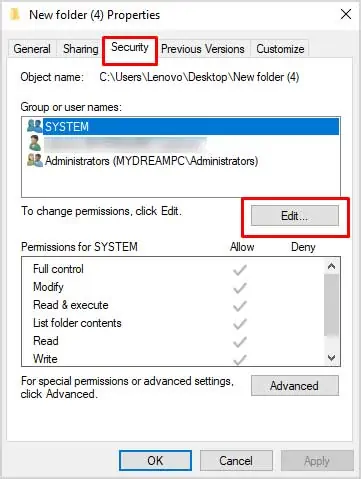
- Right-click the backup folder and select Properties.
- In the Security tab, click on Edit.

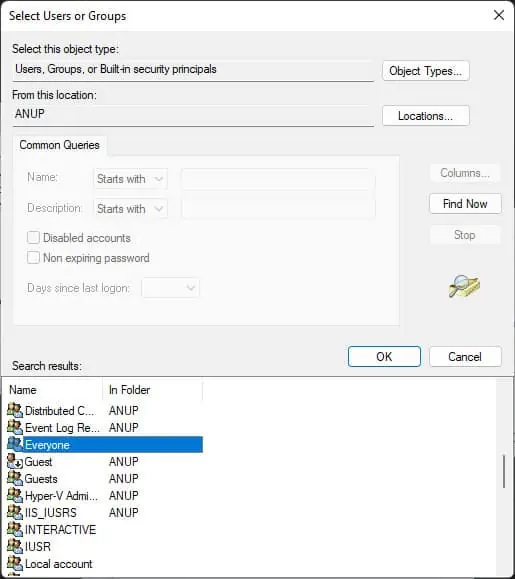
- Select Add > Advanced > Find Now.
- Select Everyone from the search results and press Ok.

- Allow Full Control and press Ok.
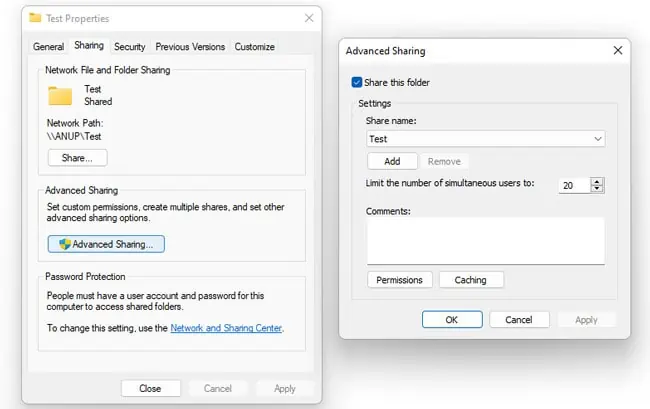
- Switch to the Sharing tab and click on Advanced Sharing.
- Enable the Share this folder option and click on Permissions.

- Select Everyone, allow Full Control, and press Ok > Ok.
Check Backup Services and Dependencies
You could also be facing problems with the backup process because the necessary services or dependencies aren’t running. You can ensure that this isn’t the issue with the following steps:
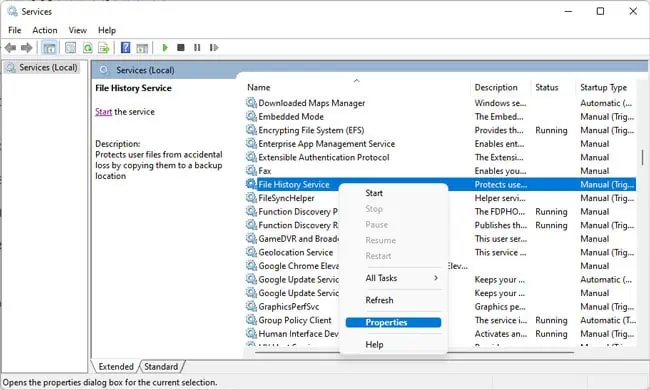
- Press Win + R, type
services.msc, and press Enter. - Right-click the File History service and open Properties.
- Start the service if it isn’t already running.

- Switch to the Dependencies tab and ensure that the services listed are running as well.

- Repeat Steps 2-4 for the Volume Shadow Copy service.
Remove Reparse Point
When trying to backup compressed files or backing up to a FAT volume, you may encounter backup errors with the codes such as 0x80070001 and 0x81000037. Removing the reparse point from the library will be helpful in such cases. Here are the necessary steps for this:
- Press Win + R, type
cmd, and press Enter. - Enter
dir /al /sand go through the JUNCTION entries until you find the entry for the FAT or mounted volume.
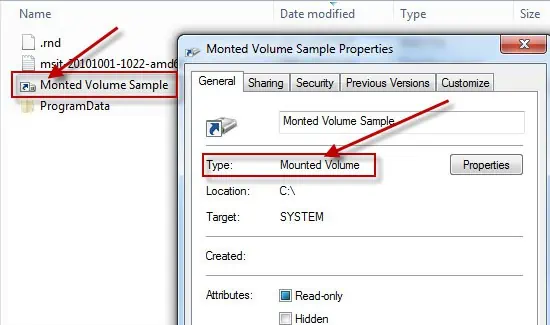
- Navigate to the displayed location, right-click the reparse point icon, and select Properties.
- After you confirm that the folder type is Mounted volume, delete this folder.

Clean Boot and Use Diagnostic Utilities
If you encounter the 0x80070020 error, it’s likely due to interference from some program or process. Generally, this will be your antivirus. A clean boot will be helpful in such cases. Here are the necessary steps:
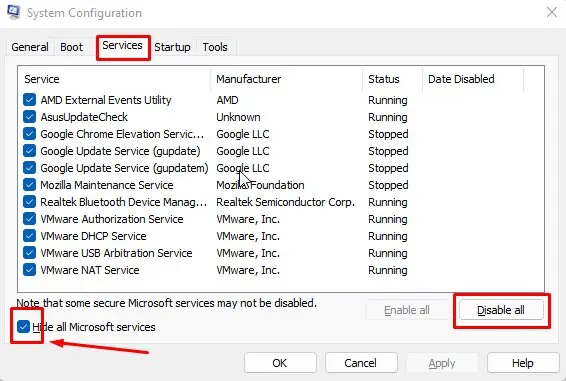
- Press Win + R, type
msconfig, and press Enter. - Switch to the Services tab and enable the Hide all Microsoft services checkbox.

- Click on Disable all and press Ok.
- Reboot your PC and check if you can backup now.
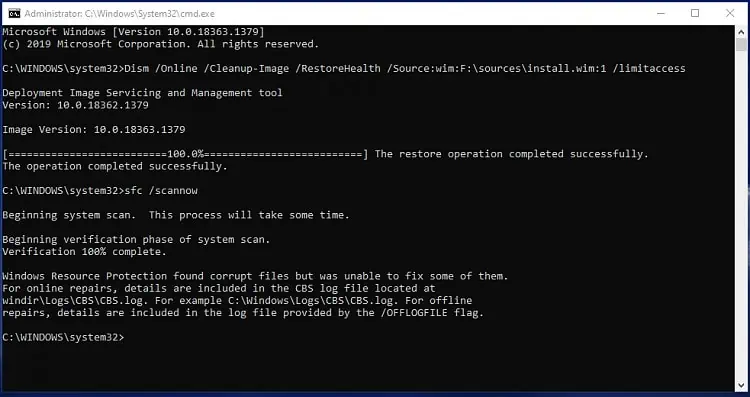
- If you still can’t backup, it’s worth checking for system corruption. To do this, press Win + R, type
cmd, and press CTRL + Shift + Enter. - Execute the following commands:
chkdsk C: /f /x /r
DISM /Online /Cleanup-image /Restorehealth
Sfc /scannow
Use System Image Backup
While this isn’t much of a fix for the application, we recommend using system image to backup your system to an external drive if the other backup options don’t work. Here are the steps to do so:
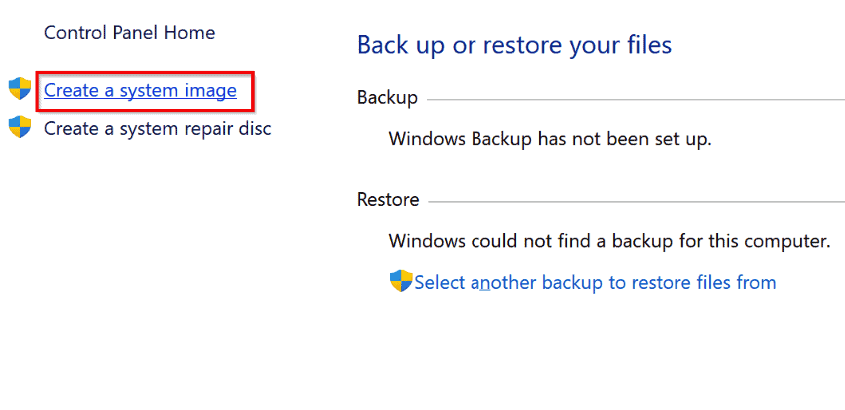
- Open the Control Panel and click on Backup and Restore.
- Click on Create a system image from the left panel.

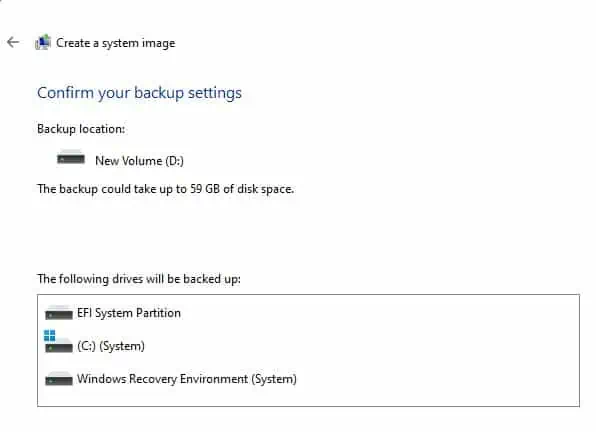
- Pick the target drive for the backup.
- Aside from the system partitions, choose any additional items you wish to include in the backup.

- Confirm the selections and press Start backup.
Fix Backup Restore Issues (Case 2)
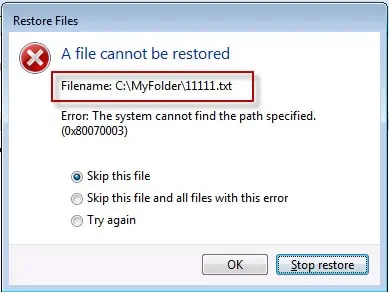
When restoring from a backup, you may encounter the 0x80070003 error if the reparse point directory is deleted. You can fix this error by recreating the missing directory. Here are the steps to do so:
- The error message should denote the missing file’s path as well. Navigate to this path and create the corresponding folder.

- Run the restore wizard again and ensure you’ve enabled the Restore the files to their original subfolders option. The error should be resolved now.
Users have also reported cases where they could only restore part of the backup’s contents. This is likely because the backup was corrupted either from the outset or at some point afterward. Unfortunately, there’s really not much you can do in such cases.
As we’ve stated earlier, most of the native backup tools in Windows are simply not reliable. Our best recommendation is to create a system image or use a reputable third-party backup tool and store the created backup on an external drive. A third copy on the cloud would be ideal.

