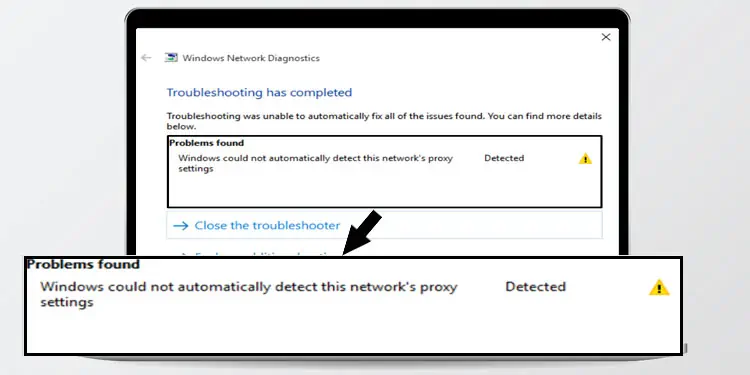
If you are encountering the error message “Windows Could Not Automatically Detect This Network’s Proxy Settings,” there are a few steps you can take to try and fix the issue. Here are some potential solutions to this problem:
Set Appropriate Proxy Settings
If you use a proxy server to access the internet, the proxy settings, such as the proxy address and ports, should be set accordingly. If you apply the wrong settings, the OS cannot access the proxy server.
Please follow these steps to set appropriate proxy settings.
- Press the Windows + I key to open Settings.
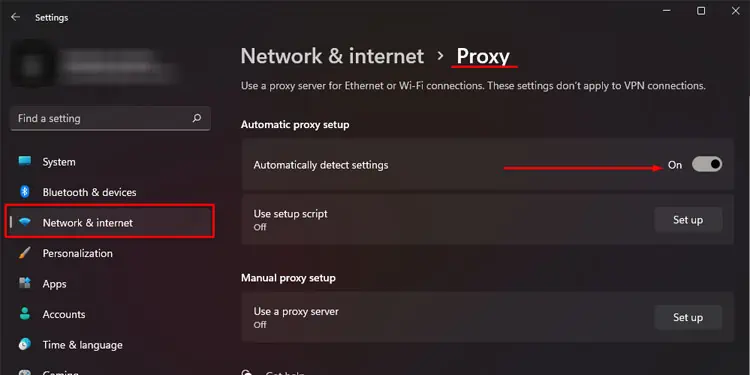
- Go to Network & Internet > Proxy.
- Under Automatic proxy setup, enable Automatically detect settings.

Alternately, you can follow these steps to detect proxy settings automatically.
- Press the Windows + R key to open Run
- Type
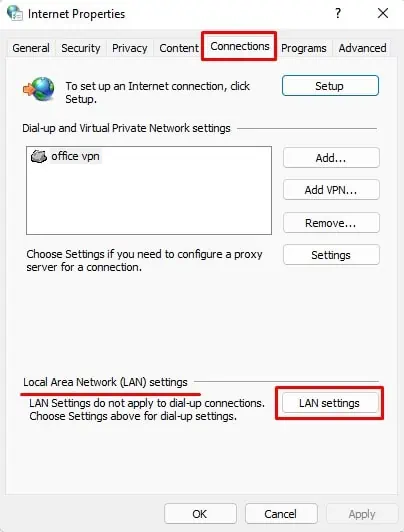
inetcpl.cplto open Internet Options. - Go to the Connections tab. Under Local Area Network (LAN) settings, click on LAN settings.

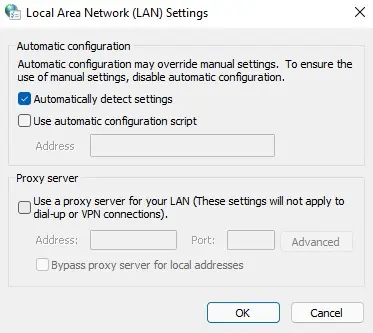
- Here, check the Automatic detect settings.

Disable Proxy Server
Since this is an issue with the proxy server, disabling it as a whole can also fix the issue that you face.
Please follow these steps to disable the proxy server.
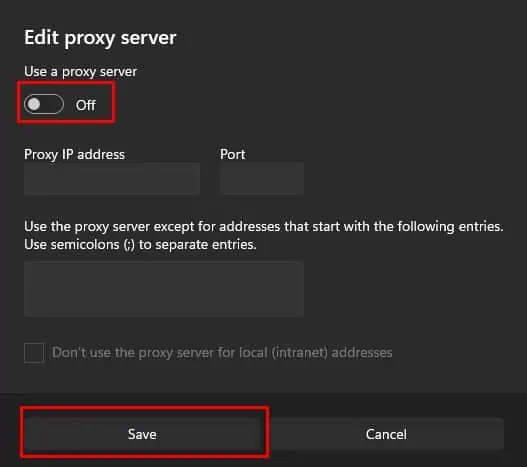
- Open Settings and go to Network and Internet > Proxy.
- Under Manual proxy setup, click on Set up.
- Here, toggle using a proxy server to off.

Alternately, you can also follow these steps to disable the proxy server.
- Press the Windows + R key to open Run
- Type
inetcpl.cplto open Internet Options. - Go to the Connections tab.
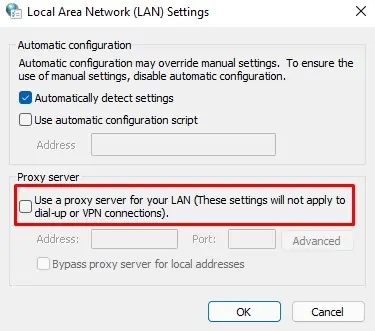
- Under Local Area Network (LAN) settings, click on LAN settings.
- Under Proxy Server, Uncheck Use a proxy server for your LAN.

Restart Network Adapter
If you leave your PC unattended or do not turn it off for too long, its components may start to malfunction. This can be the case for Network adapters as well. If you cannot access the internet or Windows cannot detect proxy settings, you can restart your Network Adapter.
Please follow the steps mentioned below to restart Network Adapter.
- Press the Windows + R to open Run.
- Type
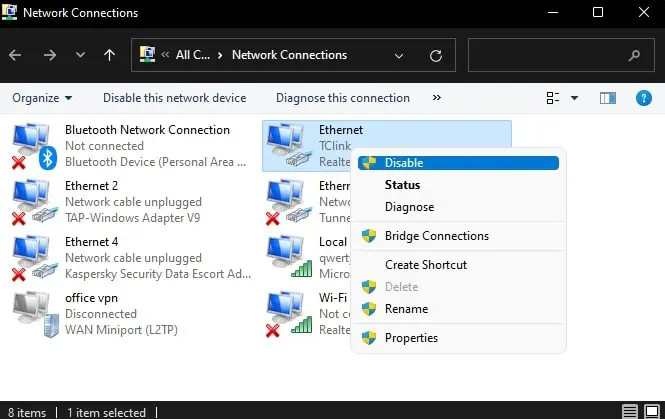
ncpa.cplto open Network Connections window. - Here, click on the device from which you are accessing the internet. It can either be the Ethernet or Wi-Fi.
- Right-click on it and select Disable. Wait for the device to be disabled.

- Once disabled, its icon will be black-in-white colored.
- Now, right-click on this lightly colored icon and click on Enable.
- It can take some time to start again. Once the device starts, try using the internet to see if it fixed the issue.
Obtain IP Address Automatically
When you connect a device to a network, your network adapter, by default, automatically sets said device a certain IP address. However, you can also set the IP address manually.
If there is some error in the address when setting it manually, your device won’t be able to access the internet. Therefore, Windows also cannot access the network’s proxy server.
To use the IP address automatically, follow the steps mentioned below.
- Press the Windows + R to open Run.
- Type
ncpa.cplto open Network Connections - Double-click on either the Ethernet or the Wi-Fi, whichever your computer is using at the moment.
- Click on Properties.
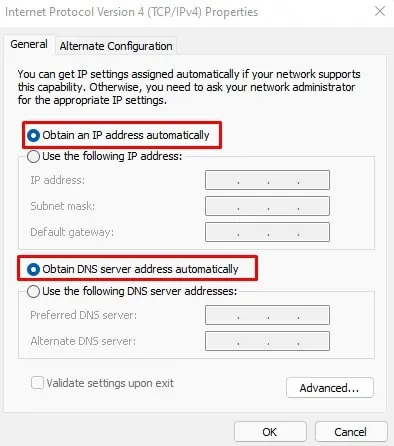
- Double-click on Internet Protocol Version 4 (TCP/IPv4).
- Here, make sure that you check Obtain an IP address automatically.

- Click on OK.
Update/Roll Back Network Drivers
When a driver is not up-to-date, the Operating System and the device may not have smooth communication. This can result in the device itself not functioning properly.
Therefore, you can try updating the driver to fix the issue with the network’s proxy settings.
- Press the Windows + X key simultaneously and select Device Manager.
- Expand Network adapters.
- Here, double-click on your Network Chipset.
- Click on Update/Roll Back driver according to your requirement.

Reset TCP/IP stack and Clear DNS
Resetting the network adapter will clear all saved network addresses and settings. So, if an incorrect address was causing the issue, a simple network reset might solve the problem you face.
You can either use Command Prompt or Windows setting to reset the network settings.
Using Command Prompt
Since the following command work for both LAN and Wi-Fi adapters, it may display some error message, but this is not a cause for concern.
Open Command Prompt
- Press the Windows + R key to open Run.
- Type CMD and press Ctrl + Shift + Enter to run Command as administrator.
Run Commands
Type the following command in Command Prompt. Press Enter after each command.
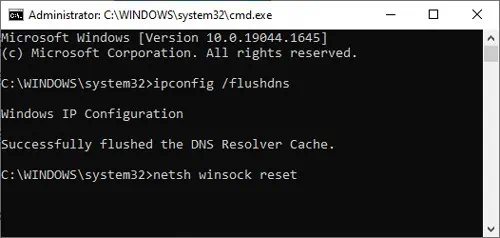
Netsh winsock reset-> resets components that handle network requests
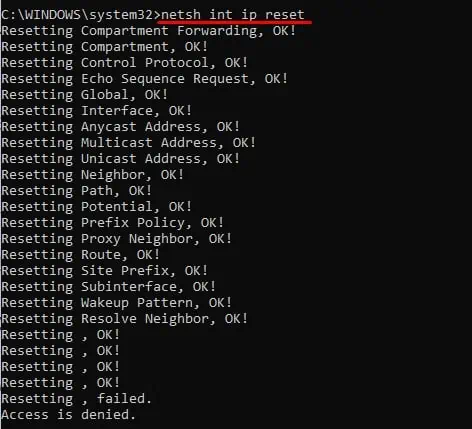
Netsh int ip reset-> resets both IPv4 and IPv6 stack
Ipconfig /flushdns-> clear DNS details
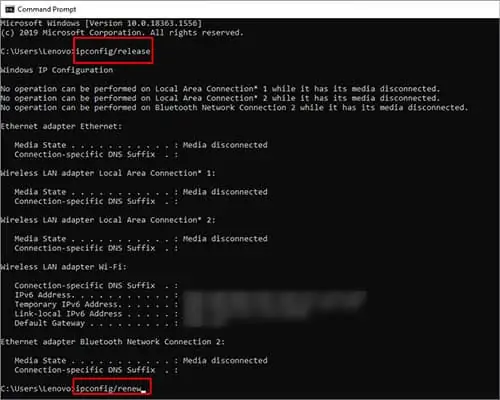
Ipconfig /release-> clears networking configurationIpconfig /renew-> reconfigure network setting
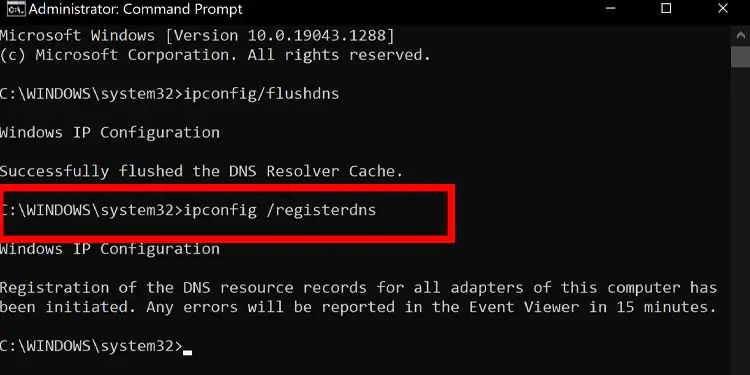
Ipconfig /registerdns-> re-register DNS configuration
Using Windows Settings
Alternately, you can use Windows settings as well to reset your network.
- Press the Windows + I key simultaneously.
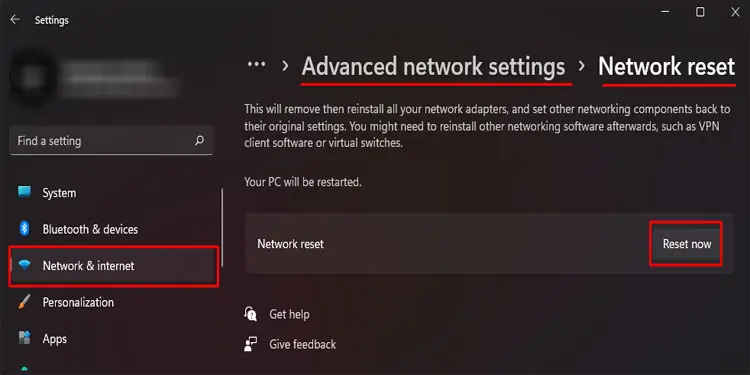
- Go to Network & internet > Advanced network settings > Network reset.
- Here, click on Reset now.

Scan PC using Windows Defender
Another reason your network troubleshooter gives the error message may be because of malicious software installed on your computer. To scan your computer for viruses, you can run the Windows Defender.
Here are the steps to scan your PC using Windows Defender.
- Press the Windows + I key simultaneously to open Settings
- Go to Privacy & security > Windows Security.
- Click on Open Windows Security.
- Now, click on Virus & threat protection.
- Here, click on Scan options. Then, select Full Scan.
- Click on Scan Now.
- Once the scan process is complete, you can see if your computer has any malware.
- Remove these threats by clicking on the Start Actions button.
If you have an antivirus installed on your computer, you can also scan and use them to find and delete any malicious software.
Restart Router
If none of the above solutions work, try restarting your router. Rebooting the router cleans its cache, including IP addresses and other network settings. This makes the router perform much smoother than before, solving any issues with it.
Contact ISP
You can also try contacting your ISP (Internet Service Provider) if you cannot solve the issue. Your network’s ISP will have a lot of details about the problem and resources to fix them.
Furthermore, it can also be that the problem you face with the network’s proxy setting started from the ISP. So, they, most likely, will be able to solve the issue if you inform them.

