Windows Remote Assistance allows you to receive or provide assistance via remote connection. It basically lets someone take remote control of your PC. This way, you both can work on the computer to fix the problems.
Microsoft first introduced this feature in Windows XP. Windows 10 also introduces a new feature, Quick Assist, that provides similar functionality. However, you can still access Remote Assistance on Windows 10 & 11.
Windows normally enable Remote Assistance by default. Nevertheless, a few of the settings may not be configured correctly for most users, thereby disabling this feature.
So, without further ado, let’s take a look at how you can enable this feature.
How Do I Enable Remote Assistance on Windows 10
You need to enable Remote Assistance before you can use this utility to give or get any help. Please ensure that you follow all of the steps outlined below.
Enable Remote Assistance With System Properties
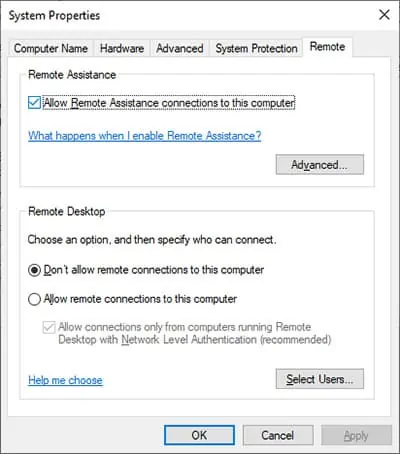
You can find the option to enable Windows Remote Assistance in your System Properties. Follow the steps below to enable this feature:
- Launch the Run Command (Windows + R) and enter
systempropertiesremote. - Under Remote Assistance, check Allow Remote Assistance invitations to be sent from this computer.

- Click on Apply and Ok.
Enable Remote Assistance With Registry Editor
Even if you have enabled remote assistance in the system properties, sometimes you can’t use this feature. The problem may be due to incorrect values in the relevant registry entries.
Please follow the instructions below to set correct values for those entries:
- Open Run and enter
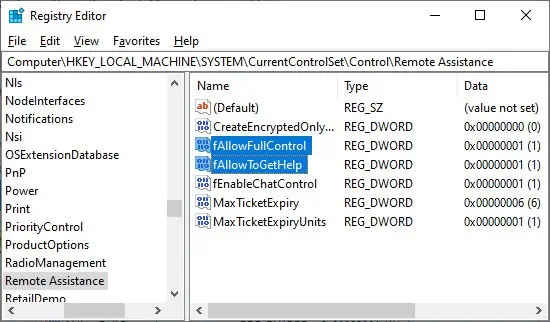
regedit. - Navigate to
Computer\HKEY_LOCAL_MACHINE\SYSTEM\CurrentControlSet\Control\Remote Assistance - Look for the entries, fAllowFullControl and fAllowToGetHelp. Make sure to set their data value to 1. Double-click on them to change their values.

It is also possible to use the command-line interface to execute this method. Please enter the following commands in the elevated Command Prompt to do so:
reg add "HKLM\System\CurrentControlSet\Control\Remote Assistance" /v fAllowToGetHelp /t REG_DWORD /d 1 /freg add "HKLM\System\CurrentControlSet\Control\Remote Assistance" /v fAllowFullControl /t REG_DWORD /d 1 /f
Allow Remote Assistance in Windows Firewall
Windows Firewall will block any unauthorized remote connection. To prevent this issue, you need to allow the Remote Assistance feature in the Firewall settings. Here’s how you can do so:
- Search for Command Prompt in the search bar.
- Right-click on it and select Run as administrator.
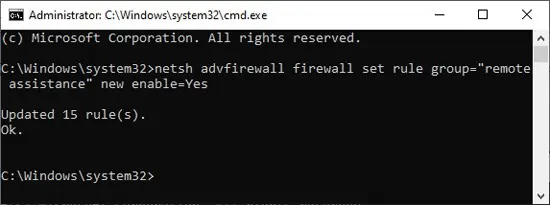
- Paste the command
netsh advfirewall firewall set rule group="remote assistance" new enable=Yesand press Enter.
Enable Remote Assistance in Local Group Policy Editor
There are a few policies related to Remote Assistance. Disabling one of them will prevent you from setting up a connection for remote access. Follow these directions to enable this policy:
- Enter gpedit.msc in the run command to open the Local Group Policy Editor.
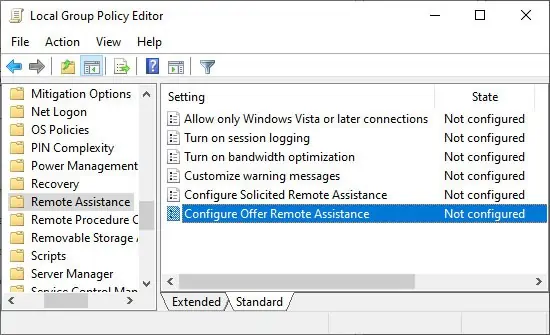
- Navigate through Computer Configuration > Policies > Software Settings > Administrative Templates > System > Remote Assistance.
- Double click on Configure Offer Remote Assistance.

- Check Enabled.
- Then, on the Permit remote control of this computer, choose Allow helpers to remotely control the computer.
- Then, click on Show…
- Enter the helper user or group on the new window and click Ok.
- Click Ok on the policy settings.
Configure Security Policies in Local Group Policy Editor
Sometimes some security policies will stop remote devices to connect to your system. The default policy settings should allow Remote Assistance. However, some unknown factors may have changed your policies.
You need to add appropriate users in the User Rights Assignment settings for security policies to resolve this issue. Please perform the steps below:
- Open the Local Group Policy Editor.
- Now, go to Computer Configuration > Windows Settings > Security Settings > Local Policies > User Rights Assignment.
- Look for Allow log on through Remote Desktop Services. Its Security Setting should include Remote Desktop Users. If not, double-click on it.
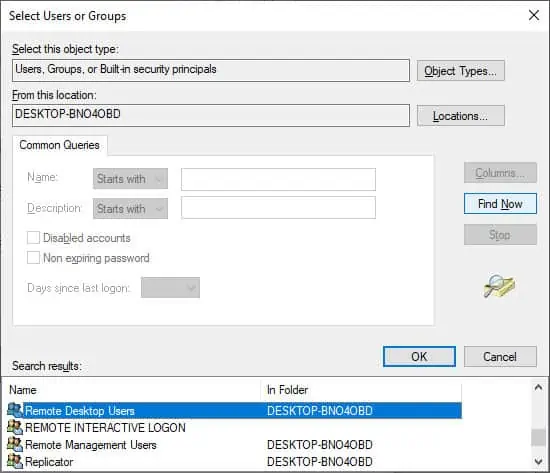
- Select Add User or Group. Then, click on Advanced.
- Click Object Types, check all options and choose Ok.
- Now, click Find Now to see a list of users and groups. Select Remote Desktop Users and click Ok. Click Ok again.

- Select Apply and then Ok to apply the changes.
- Now took for Access this computer from the network. Its Security Setting should include Everyone, Administrators, Users, Backup Operators.
- If not, follow the same steps to add these users.
How to Use Remote Assistance
Having enabled Remote Assistance, let’s see how you can set up a remote connection as well. In brief, you send an invitation to the technical support and they accept it to set up the connection. You need to approve the connection as well.
Follow the instructions below to execute the Remote Assistance:
- Enter
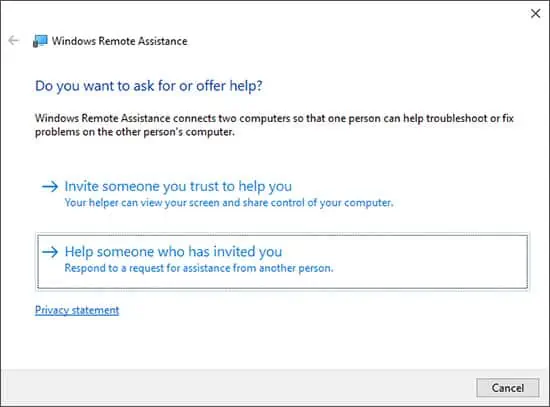
msrain the Run command to launch Windows Remote Assistance. - Click on Invite someone you trust to help you to seek help.
- Or, select Help someone who has invited you to provide the technical aid.

- Follow the on-screen instructions to carry out the invitation and acceptance procedures on both ends.
Is Remote Assistance different from Remote Desktop?
Remote Assistance and Remote Desktop are very different features used for separate purposes.
Remote Desktop is the utility to remotely access and controls your own computer. Unlike Remote Assistance, controlling the PC is only possible from the remote end. The local computer is locked during this process.
Should I use Remote Assistance or Quick Assist
Quick Assist is an improvement to Remote Assistance. The main differences include the following:
- Quick Assist is cloud-based and needs connections to the cloud server on both ends.
- The user can only cancel the remote session during Remote Assistance actually Quick Assist also allows pausing.
There are no other major differences so you can pick one according to your need.

