Ever had your Windows PC restart when you try to shut it down? It’s annoying when you shut down your PC and it immediately restarts. It shouldn’t be a battle between you and your PC, in my opinion.
Hard resets and unplugging the power cord should not be a regular thing. Force shutdowns increase the risk of file corruption.
When my PC started acting up, I dug around to find a fix. But later realized there’s no one-size-fits-all solution. I have listed each approach and explained the targeted fix. Once you apply the method, restart your PC to see if it worked. If that doesn’t, try the next one.
How to Fix When Windows Restarts After Shutdown
Disabling Fast Startup
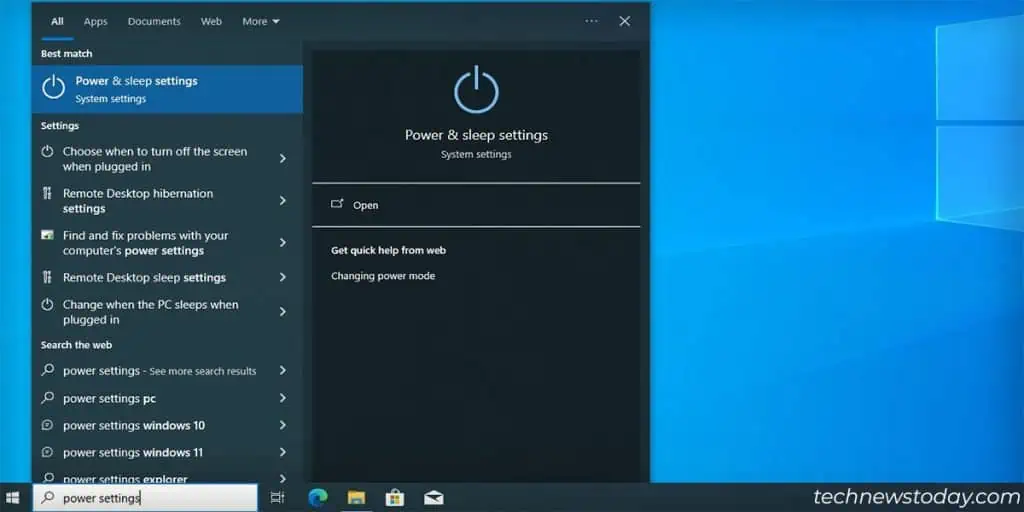
- Go to the Start Menu. Type power settings and press Enter to bring up the Power & sleep settings window.

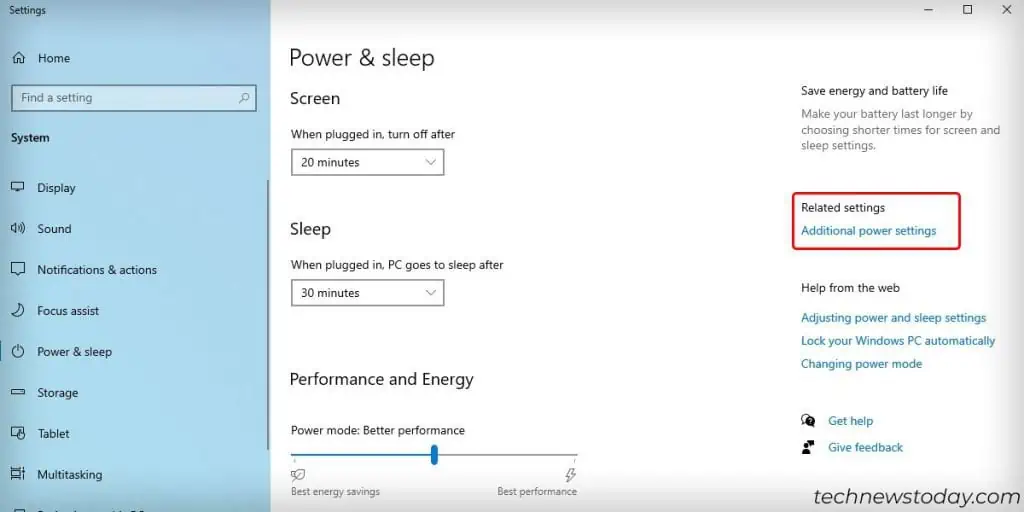
- Under Related settings click on Additional Power Settings to bring up the Power Options window.

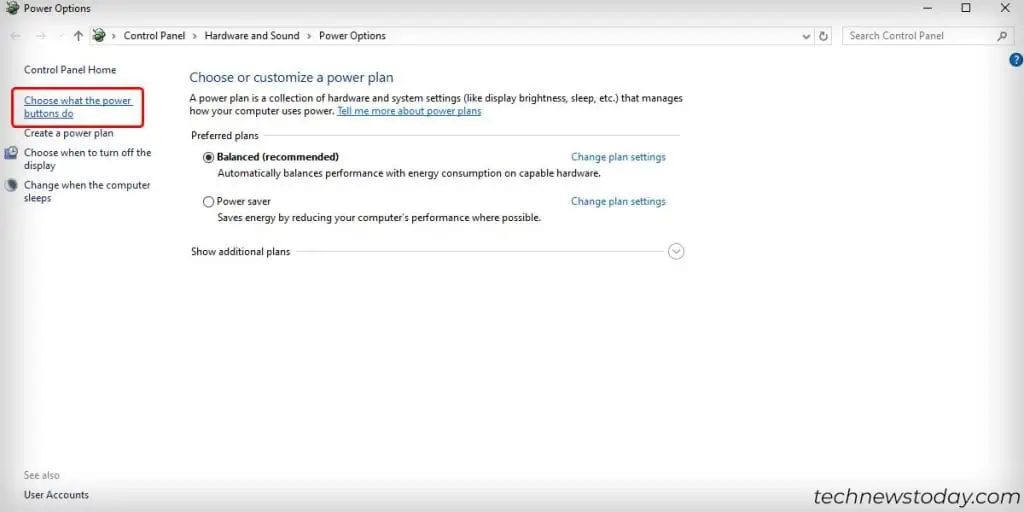
- On the left navigation pane, click on Choose what the power buttons do.

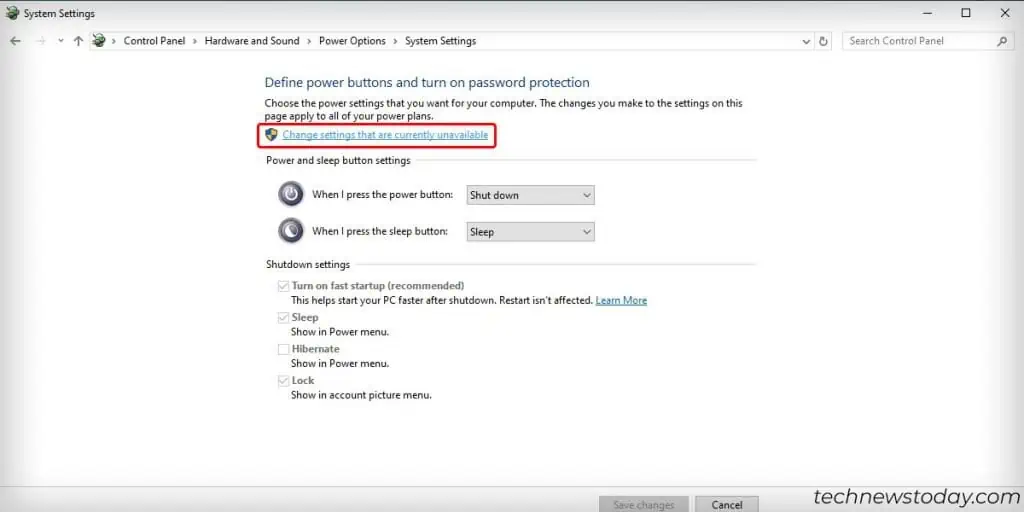
- Click on Change settings that are currently unavailable as shown below. This unlocks the disabled shutdown settings.

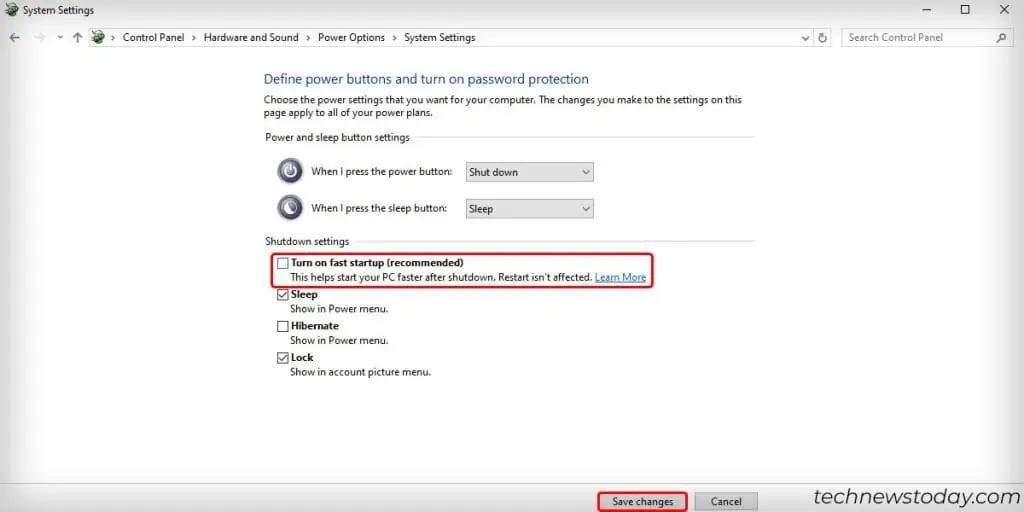
- Under Shutdown settings, click on the checkbox next to turn on fast startup to uncheck it.
- Click on Save changes and try to shut down your PC.

When you disable fast startup, it is normal to experience longer bootup times than usual.
Disabling Automatic Restart Due to Crash
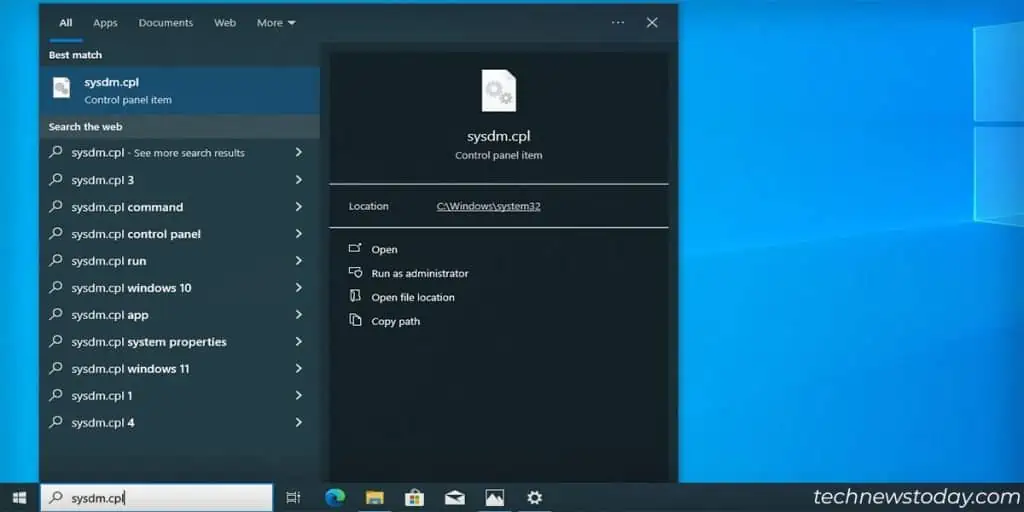
- Go to the Start Menu. Type
sysdm.cpland press Enter to bring up the System properties window.
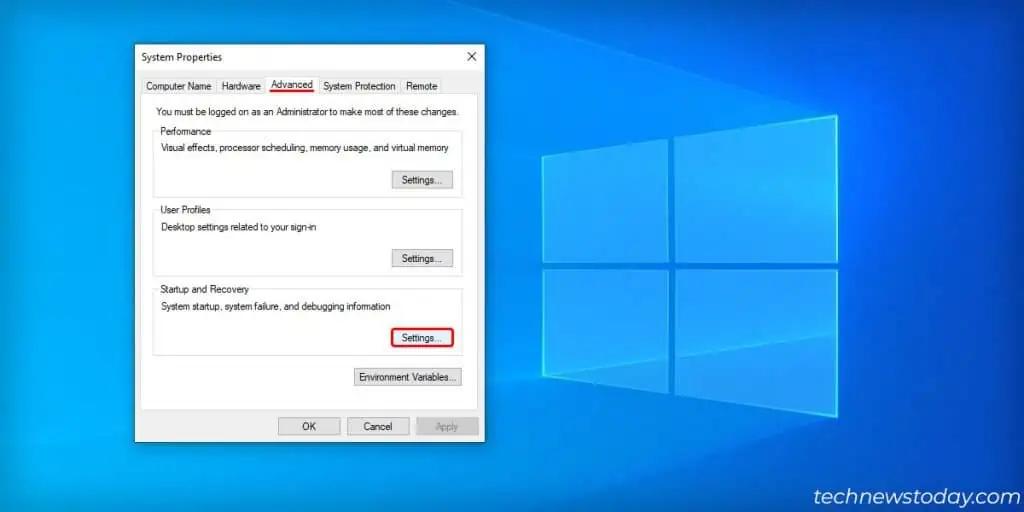
- Click on the Advanced tab.
- Under Startup and Recovery, click on Settings to bring up the Startup and Recovery window.

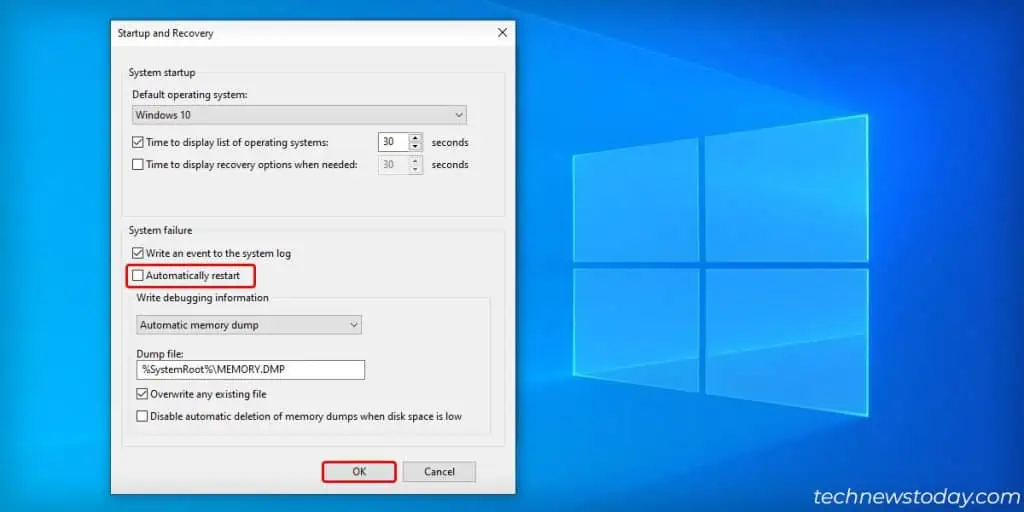
- Under the System failure section, uncheck the Automatically restart option.
- Click on OK to save settings.

The issue that we are trying to fix here is the windows crashing when attempting to shut down. When you click on power off, windows may be crashing without displaying any message. Due to this option, the PC attempts to restart which looks as if the PC restarts when powered off.
Enabling Powerdownaftershutdown Option in Registry Editor
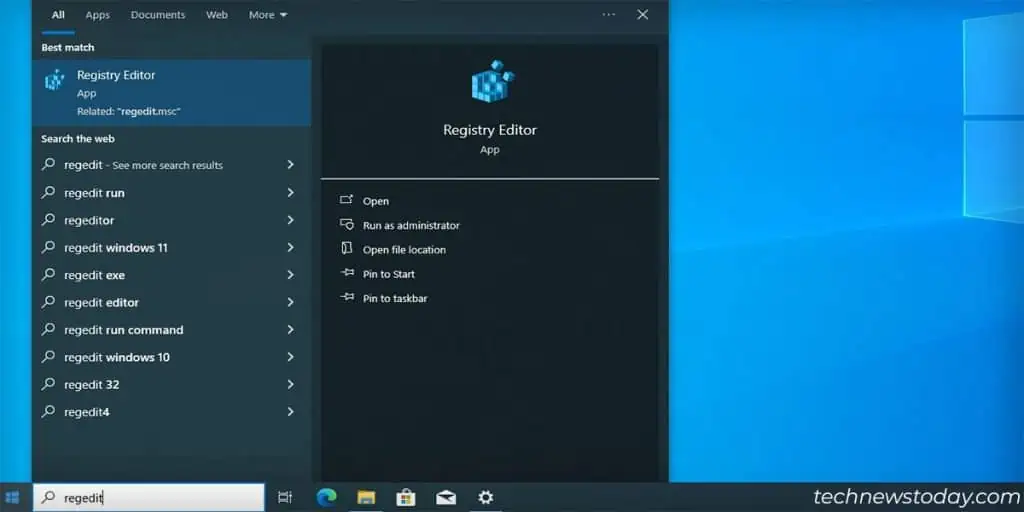
- Go to the Start Menu. Type regedit and press Enter to bring up the Registry Editor window.

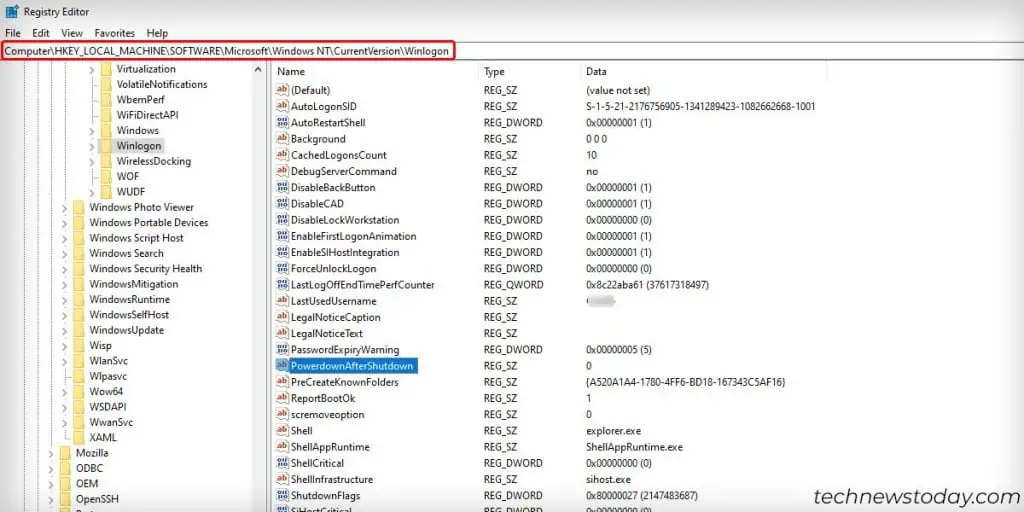
- Using the navigation pane or location browser at the top, locate the following page : Computer\HKEY_LOCAL_MACHINE\SOFTWARE\Microsoft\WindowsNT\CurrentVersion\Winlogon

- Locate the following config PowerdownAfterShutdown and double click on it.
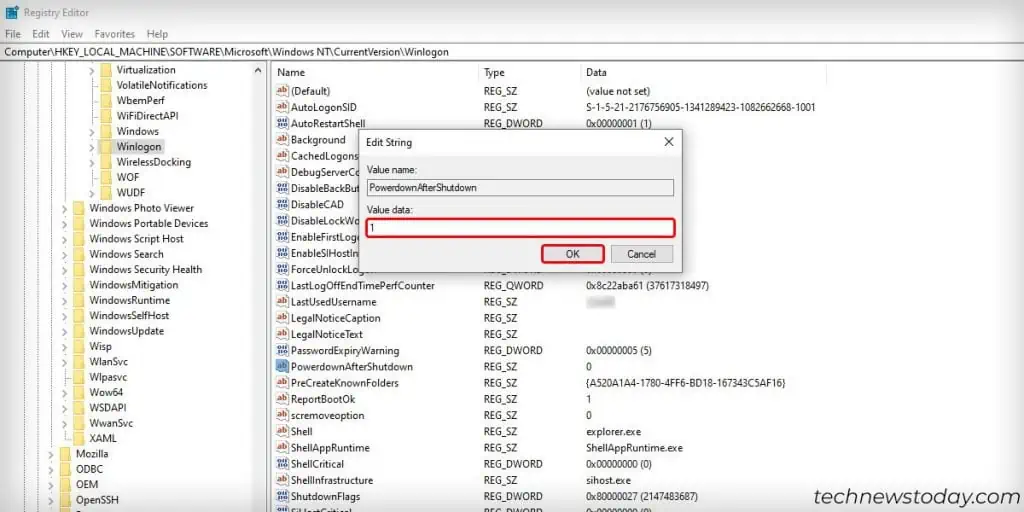
- In the Value data field, change the existing 0 to 1 and press OK.

- Restart PC to apply changes.
Using System File Checker
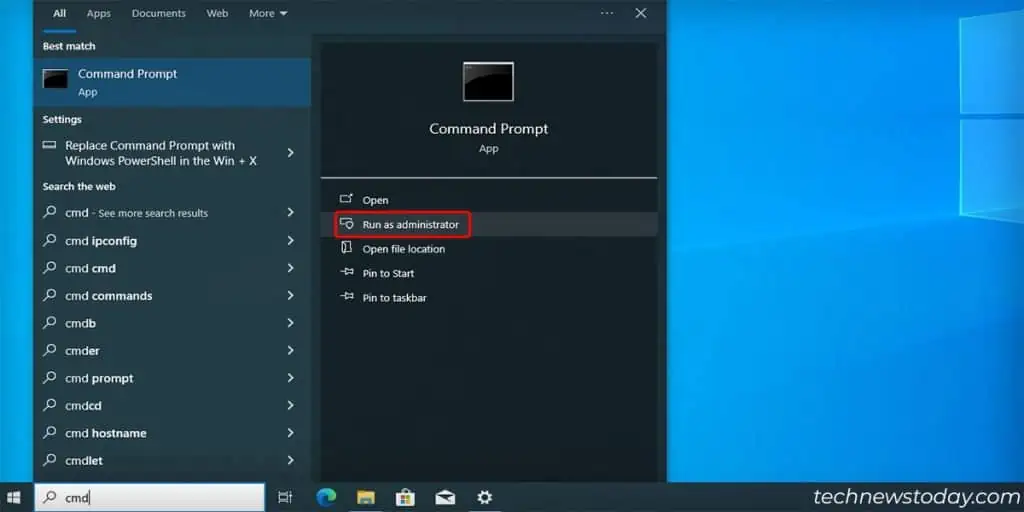
- Go to the Start Menu. Type cmd and select Run as administrator to bring up the Command prompt in elevated mode.

- Type the following command
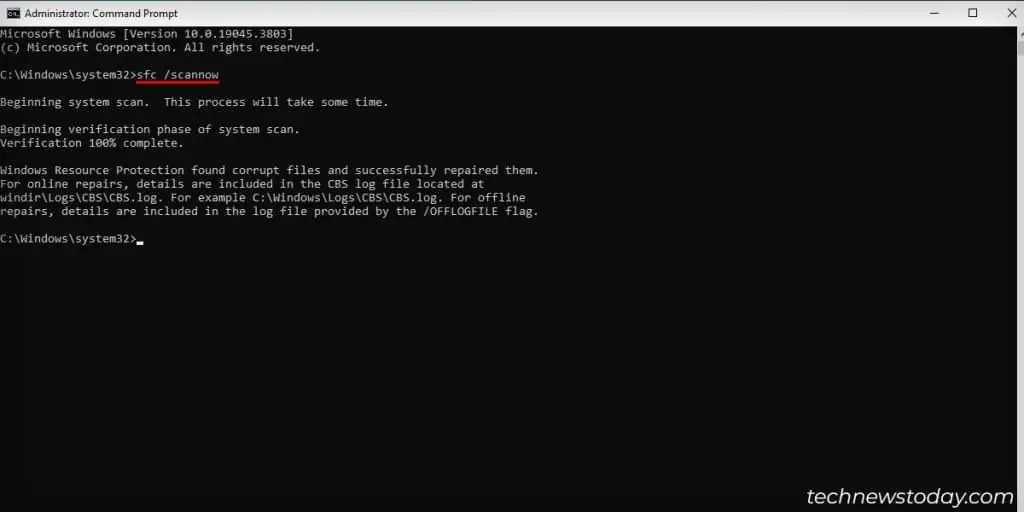
sfc /scannowto start and fix corrupted system files. - Wait for the Verification to complete to 100%.

Sfc(System File Checker) tool scans all protected system files for errors. It then replaces any corrupted ones with its cached copy. At the end of the process, it generated a log file that tells you if it found any corrupted files. If these corrupted files were causing the system to restart, sfc should have it fixed.
If sfc did not find any corrupted files, it shows the same message as seen in the screenshot above.
Disabling Network Adapter From Waking Up the Computer
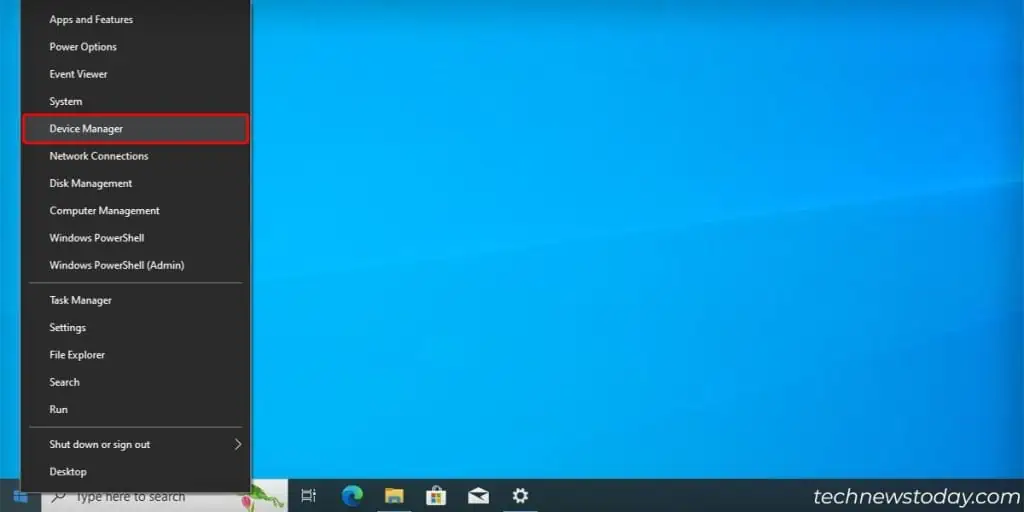
- Right-click on the Start Menu and select Device Manager to bring up the Device Manager window.

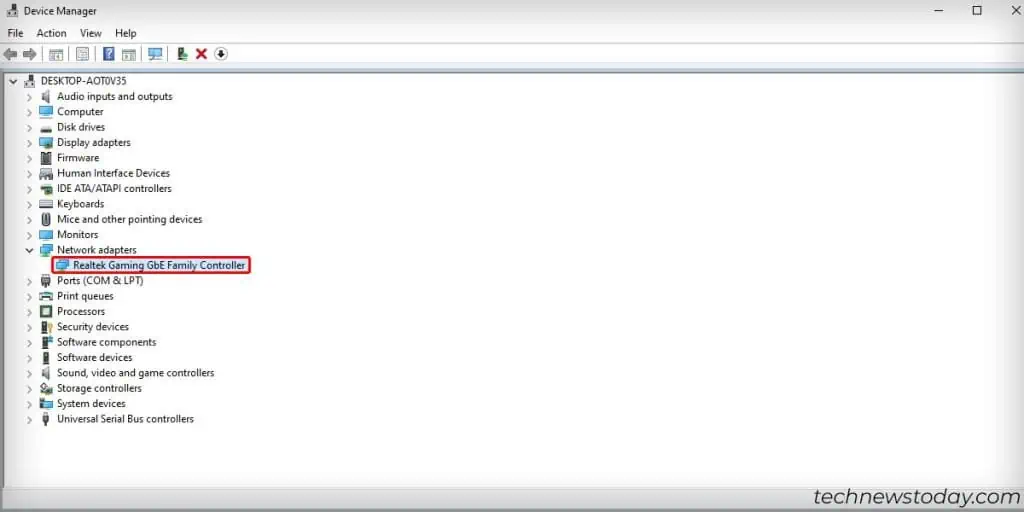
- Expand the Network adapters list and look for the network adapter connected to the PC.
- If it’s a wired connection, look for Ethernet Connection. If it’s a wireless connection, look for Intel Wireless.

- Double click on the adapter to bring up its properties window.
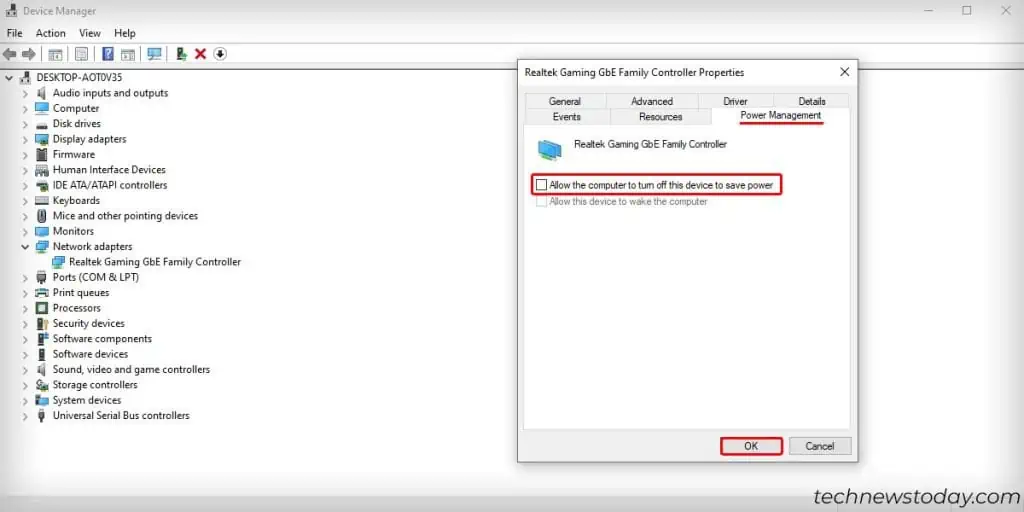
- Go to the Power Management tab and uncheck Allow this device to wake the computer option.
- Click on OK to exit and save changes.

- Repeat for any other network adapter(s).
Updating Windows
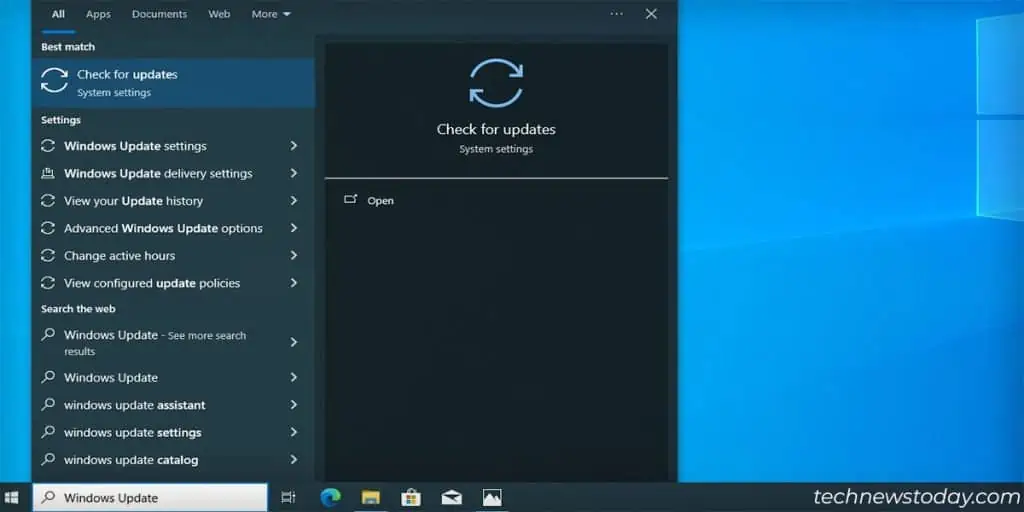
- Go to the Start Menu. Type Windows Update and press Enter to bring up the windows update settings window.

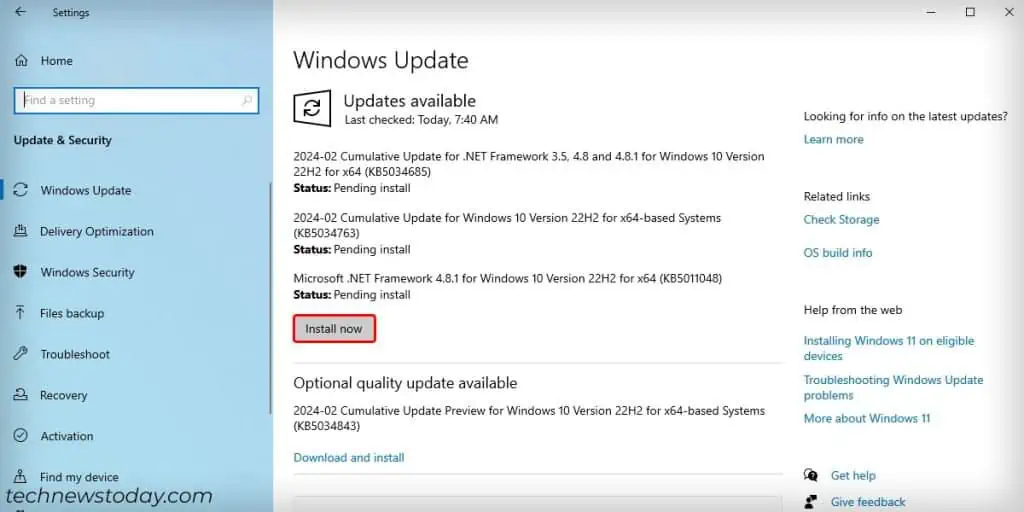
- Let Windows check for updates and click on Install now.

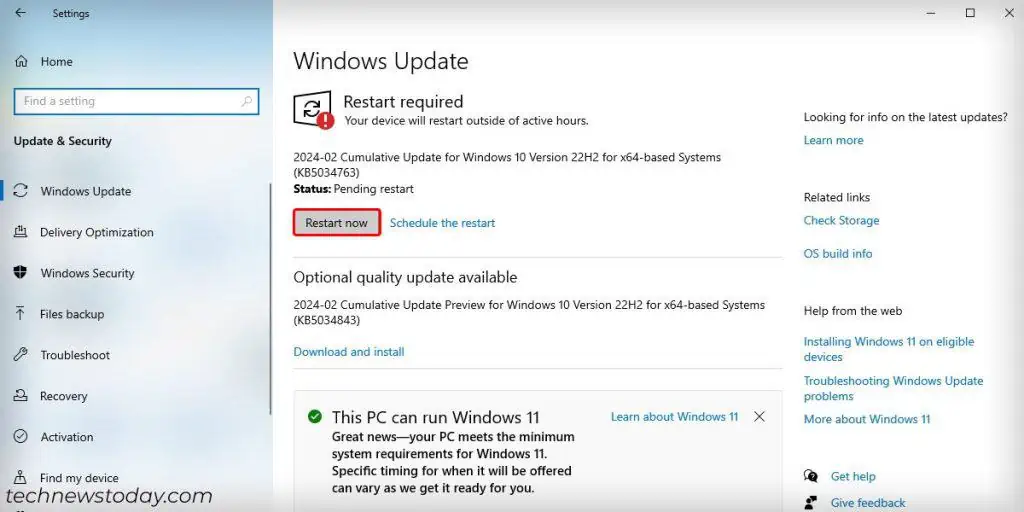
- Restart your computer by clicking on Restart now.

Sometimes, a bug in the operating system can cause the PC to restart after shutdown. Staying up to date on Windows updates is a sure way to protect the system from any known bugs and crashes. Not only this but any corrupted drivers or system crashes are also fixed by software updates.
Forcing a Shutdown
- Go to the Start Menu. Type cmd and select Run as Administrator to bring up the Command prompt in elevated mode.
- Type the following command
shutdown /s /f /t 0to shut down the computer immediately.
Sometimes trying the regular shutdown option from the start menu may not work. In such cases, forcing a command-line shutdown generally prevents windows from restarting.
Going Into Safe Boot Mode
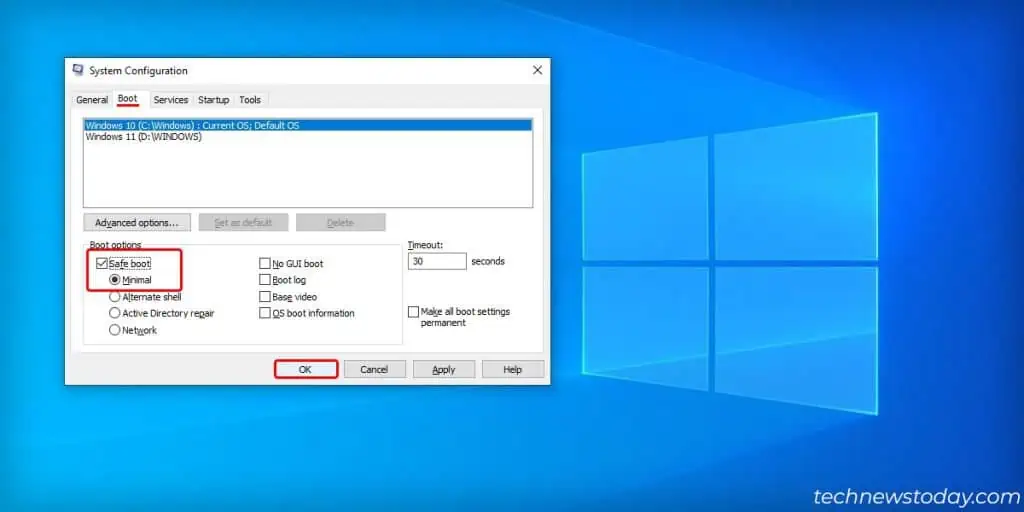
- Go to the Start Menu. Type msconfig and press Enter to bring up the System Configuration menu.
- Click on the Boot tab.
- Under Boot options, check Safe boot and set option to Minimal.
- Click OK and restart the computer.

- Shut down the computer from inside the safe mode.
A safe mode isn’t technically a fix. It will help you identify if a background service or process is causing your system to restart. The safe boot option does two things. One, it boots the PC with minimal configuration required.
Two, it disables all installed third-party drivers and services. If you can safely shut down from safe mode without having an issue, it’s likely a problem with a startup process. Use the next approach to identify and fix the issue.
Performing a Clean Boot
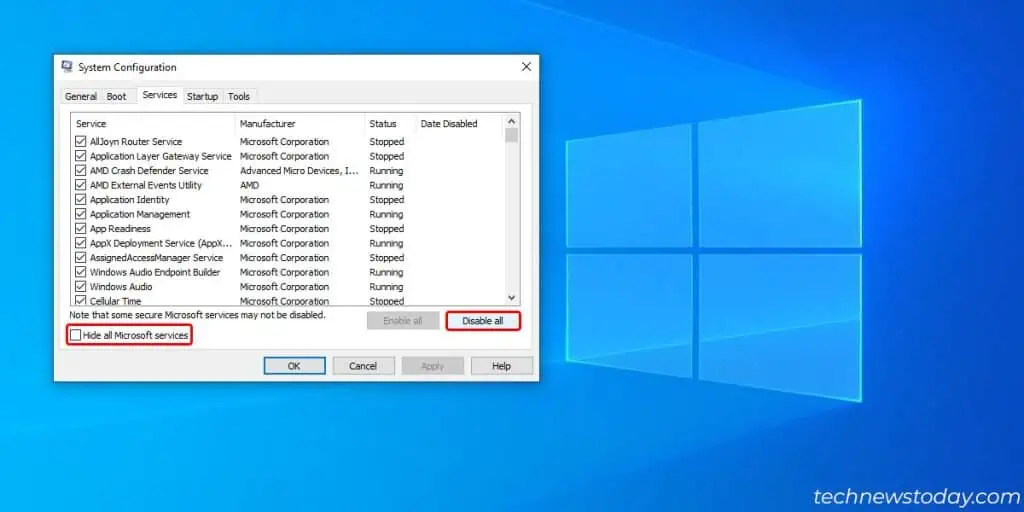
- Go to the Start Menu. Type msconfig and press Enter to bring up the System Configuration menu
- Click on the Services tab.
- Uncheck the Hide all Microsoft services option as shown below.
- Click on the Disable all button to disable active services.

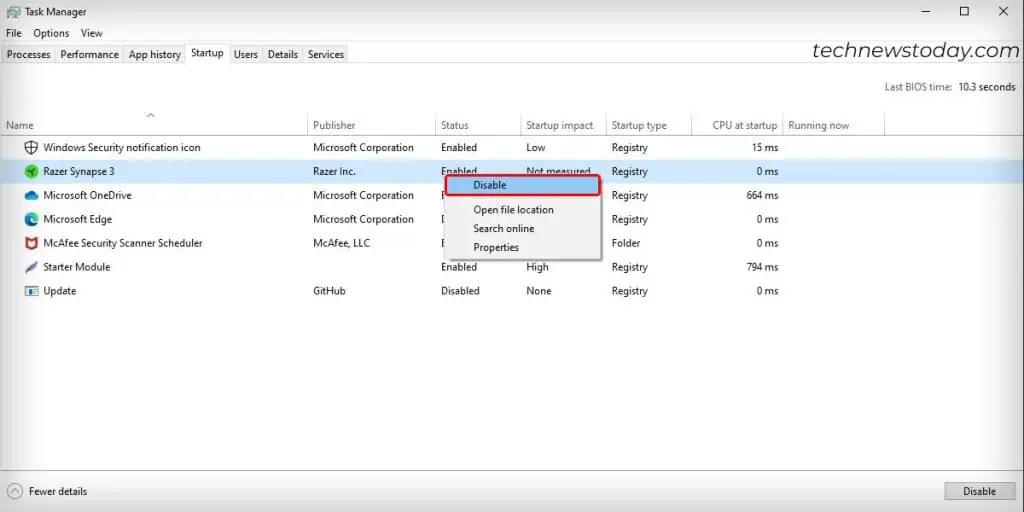
- Click on the Startup tab and click on Open Task Manager to open the Startup page in the Task Manager window.
- Right-click an application process and click disable.

- Repeat for all application processes in the list.
- Restart PC to perform a clean boot.
- Shut down the computer from inside the clean boot.
Same as safe mode, the clean boot isn’t a complete fix. But it will help you identify if any third-party vendor apps are causing a system fault. If shutdown works from the clean boot, enable one or few applications at a time and try again.
Repeat until you identify the application that’s been giving you a headache this whole time.
Performing System Reset
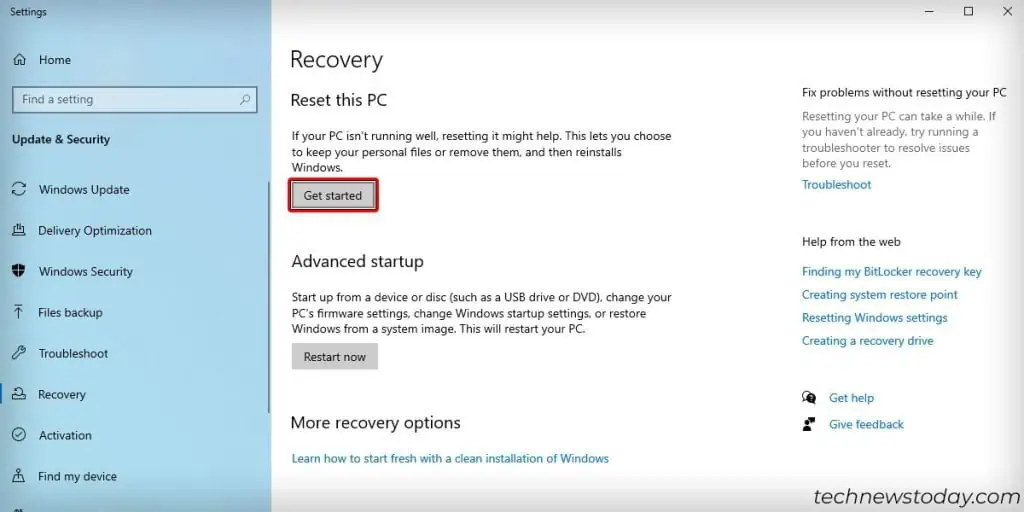
- Go to the Start Menu. Type System Reset to bring up the Recovery Settings window.
- Under Reset this PC section, click on Get started.

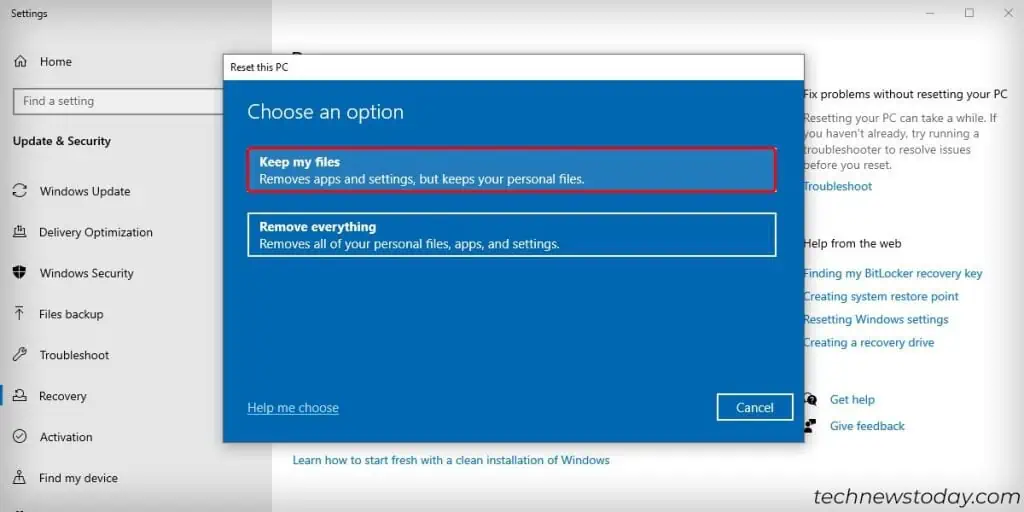
- Click on Keep my files and wait for a while.

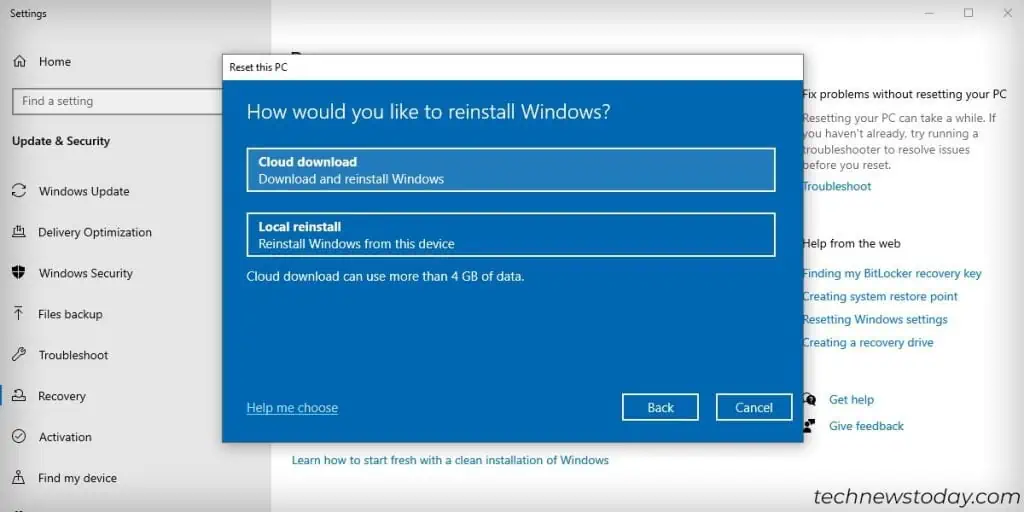
- If you have an active Internet connection, click on Cloud download.
- If you don’t have an active Internet connection, click on Local reinstall.

- Wait for the reset process to finish and PC to restart.
If you were unable to identify the problem, you always have an option to roll back or reset your PC using this process. Once done, verify if it worked by shutting down your PC. If not, try again by selecting Remove everything in Step 3 above and continuing the rest of the steps.

