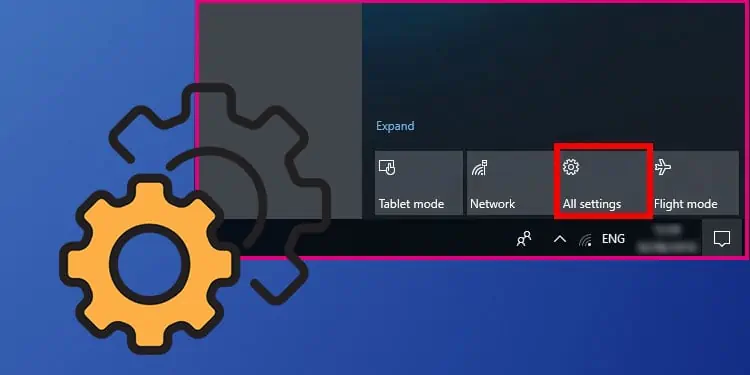
The ‘Settings’ feature of the Windows can get faulty and it just won’t open or flashes for a few seconds before crashing. Since it is a vital part of Windows and without it, users won’t be able to make any changes to their computer, it is essential to find a proper fix for this issue.
The newer version of Windows (i.e. Win10 & Win11) often have these issues that won’t let you access the Windows Settings but fortunately, fixing this error won’t take up much of your time.
Causes for Windows Settings Won’t Open
Everything from buggy files to system errors could lead to this error. If you have recently installed any new software, we recommend removing it to see if it fixes the issue for you. Anyhow, these are the most common reasons why Windows won’t let you open its settings.
- Corrupted OS file: A deteriorating hard disk could corrupt important OS files that could lead to this issue. In most cases, corrupted application data stops a certain program from running and it could also be the case here.
- Windows Update: A recent Windows update could’ve caused some system bugs that are not allowing you to access the Windows settings. In such a case, rolling back to an earlier version of Windows is likely to solve the issue for you.
- Emerging Issue 67758: Microsoft itself addressed this issue that was causing apps including settings to not open properly. It was an OS error that occurred during an update and caused Windows to not recognize many applications. Fortunately, a solution was made available.
- Malware: Malware could be restricting certain Windows features to work properly including the Windows Settings. If you haven’t scanned your computer for a malware scan, it is advised to do so before trying any fix. Hopefully, running the anti-malware scan would solve the issue for you.
- Clear the Cache: Files sitting in your cache could also be the cause of this. Before proceeding to any complex fix, it is advised to clear the temp folder. It is likely to remove all the conflicting files as well as free up a lot of space on your drive. Type
%temp%in the run box and remove all the files from the folder.
Fixes for Windows Settings Won’t Open
Windows Settings not opening on Windows 10 was experienced by many users. And Microsoft even launched a toolkit to fix the issue. However, it is not available anymore but thankfully, the following are a few methods that worked for many users, and hopefully, they’ll work for you as well.
Run System File Checker (SFC) and DISM Tool
The first thing you should do when the Windows isn’t working properly is to run the SFC command in the Command Prompt. This command will scan the computer for any corrupted files and will repair it to restore any lost data. To run the system file checker on your computer, perform these steps:
- Press the start button and type CMD.
- Right-click on CMD and press Run as Administrator.
- Type:
sfc /scannowand hit Enter.
- Once the process is completed, type Exit.
In case the SFC has failed to fix the issue, you can also try running the DISM commands in the CMD to repair any corrupted OS files. Perform these steps to use the DISM tool:
- Open an elevated version of CMD (Run as Administrator).
- Type
DISM.exe /Online /Cleanup-image /Restorehealthand hit Enter.
- After the process is concluded, type Exit.
- Reboot the computer.
Use Windows Powershell
Windows Powershell is a powerful tool that can be used to make changes in the system settings. If you’re facing the emerging issue 67758 and cannot access the ‘Settings’ feature of Windows, try using Windows Powershell to troubleshoot the error. To use Windows Powershell, perform these steps:
- Press the start button and type Windows Powershell.
- Right-click on Windows Powershell and select Run as Administrator.
- Copy this command and hit Enter.
Get-AppXPackage -AllUsers -Name windows.immersivecontrolpanel | Foreach {Add-AppxPackage -DisableDevelopmentMode -Register “$($_.InstallLocation)\AppXManifest.xml” -Verbose}
- Wait for the process to complete.
- In case the command mentioned above has failed or not working, type this command and press Enter.
Get-AppXPackage | Foreach {Add-AppxPackage -DisableDevelopmentMode -Register "$($_.InstallLocation)\AppXManifest.xml"}
Boot in Safe Mode
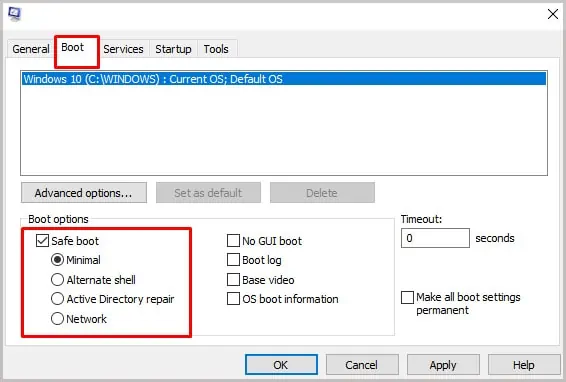
Any 3rd-party applications could be conflicting with the OS files and causing certain features to stop working. In such a case, the Settings feature of Windows won’t work either. Try booting the computer in safe mode to access the Windows Settings, hopefully, you’ll be able to resolve the issue. To boot in safe mode, follow these steps:
- Press Windows + R and type
msconfigand press Enter. - Navigate to the Boot tab.
- Check the box for Safe Boot and press Apply.

- Reboot the computer.
- Try to open Settings.
Use CMD to Open Settings
There are various methods of accessing the Windows settings including “CMD” and “RUN”. In case the standard methods aren’t working, try using CMD or Run. Although they only seem to work on Windows 10 and above. To use alternative methods, follow these steps:
- Open an elevated version of the Command Prompt (CMD).
- Type
start ms-settingsand hit Enter.
In case this didn’t work out for you, try the ‘Run’ option as well.
- Press Windows + R.
- Type
ms-settingsand hit Enter.
Alternatively, users can press the ‘Windows + I” button to access Windows Settings.
Perform Windows Update
Installing the latest version of Windows is likely to solve the issue for you and for that, you will have to download and install a Windows update. Now, with settings not working, you’re not likely to access the Windows updates settings. In this case, you will have to manually download and install the updates. To manually perform a Windows update, perform these steps:
- Find out the latest version of Windows Updates available and copy its name.
- Go to Microsoft Catalogue and paste the version of the Windows Updates.
- Download and install the Windows Updates.
- Reboot the computer.
Enable Windows Settings Through Group Policy
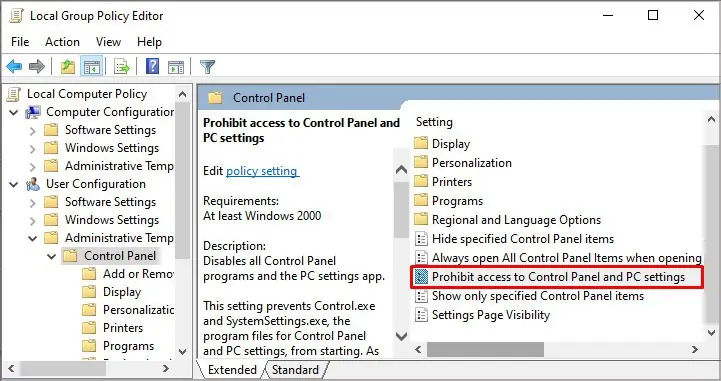
In an unlikely scenario, something has disabled the Windows settings on your computer and you cannot seem to access it. In this scenario, ensure that the feature is not disabled and if it is not, make sure to enable it. Follow these steps to verify that Windows Settings are enabled in the OS settings.
- Press Windows + R.
- Type
gpedit.mscand hit Enter. - Expand User Configuration and navigate to Administrative Templates > Control Panel.

- Open Prohibit Access to the Control Panel and PC Settings and check the box for Disabled.

- Press Apply and reboot the computer.
Create a New User
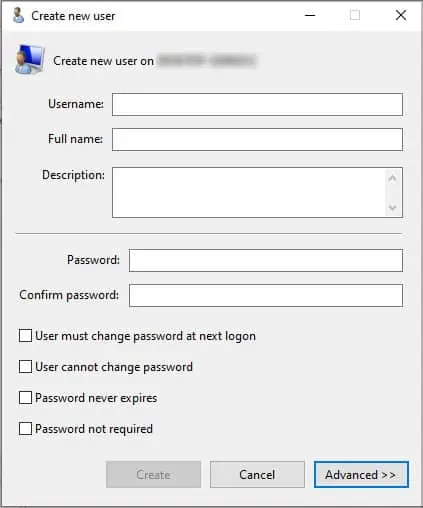
Creating a new user with administrator privileges is another method that worked for many users. And since you cannot access the Windows Settings, you will have to use an unorthodox method to create a new user. To do that, perform these steps:
- Press Windows + R.
- Type
lusrmgr.msc:and press Enter. - Double-click on Users.

- Right-click on the right side of the window and press New User.
- Input the details and click on create.

- Log off the computer and click on Switch Users.
- Select the new account.
- Now you can edit the Windows Settings.
Restore to an Earlier Time
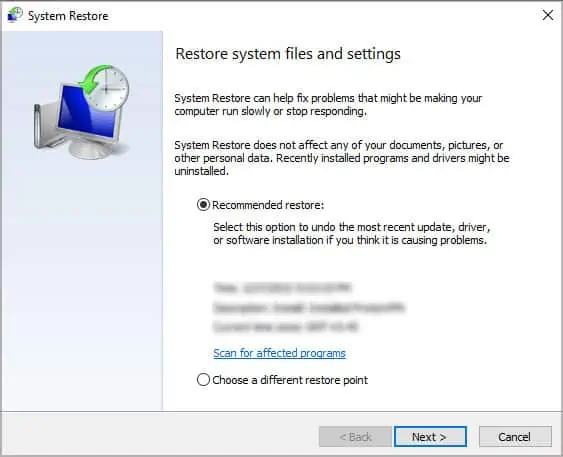
In case the Windows Settings is not opening after installing Windows Updates or some 3rd-party application, it is a viable option to restore the computer to an earlier time. But since the settings cannot be accessed, you will need the Run box to start the recovery process. To perform a system restore, perform these steps:
- Press Windows + R and hit Enter.
- Type,
rstruiand press Ok. - The Windows Recovery will pop up.

- Follow the on-screen instruction to restore the Windows to an earlier time.
Perform a System Reset
In case of none of the troubleshooting methods mentioned above are working out for you, the last resort is to perform a complete system reset. And since the settings aren’t opening, entering the Windows Recovery Environment through the standard methods isn’t possible. Thus, you can use CMD and a hard reboot to access the Windows Recovery Environment to perform a system reset.
To access the Windows RE through CMD, follow these steps:
- Open an elevated version of CMD.
- Type this command and hit Enter:
Shutdown /f /r /o /t 0
The system would boot into Windows Recovery Environment next time it boots up. However, if this method doesn’t work, you will need to perform a hard reboot. To do that, perform these steps:
- Shut down your computer.
- Press the power button.
- Press the restart button right after pressing the power button.
- Repeat the process 3 times.
- After that, the Windows will perform a self-diagnose and offer you the option of entering Windows RE.
- From Windows RE, navigate to Troubleshoot > Reset your PC.

- Follow the on-screen instruction and wait until the process is complete.
- The error would be resolved.

