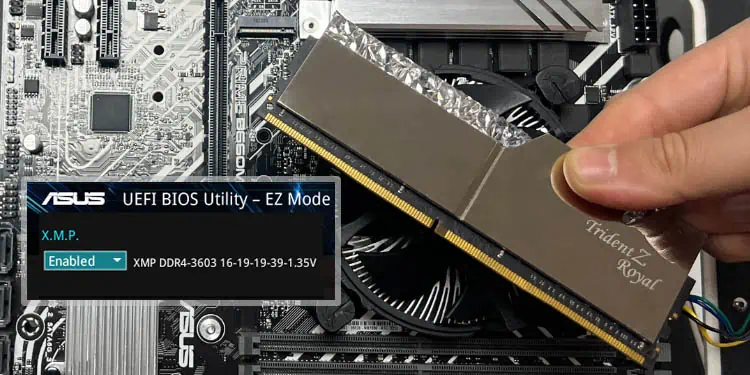
Manually increasing your RAM’s clock speed to go beyond the JEDEC specifications can be challenging, especially for novices. If you own an Intel ASUS motherboard, enabling XMP (eXtreme Memory Profile) introduces a factory-validated configuration that will offer stable and reliable overclocking.
While this feature allows you to increase your DDR4/DDR5 frequency simply by clicking a mouse button, it’s essential that you check the compatibility first. Once that’s confirmed, you can select a profile from the X.M.P. section (in ASUS EZ mode) or the Ai Overclock Tuner option (in Advanced mode).
For some, the XMP profile has been a sweat-free option for overclocking but others seem to have mixed feelings. When our TNT team tested and monitored the related settings using different RAM models on the PRIME B660M-K D4 motherboard, we were successful in achieving the rated speed with no system instabilities, whatsoever.
Compatibility Check
Enabling an XMP profile from ASUS BIOS might sound easy but there are a few things to consider beforehand. Your motherboard, processor, and memory module(s) should all be XMP-compatible.
- First things first, identify whether your RAM stick(s) supports XMP. While most modern ones do, you could be using an older stick that might not have included any profiles in its SPD (Serial Presence Detect) chip.

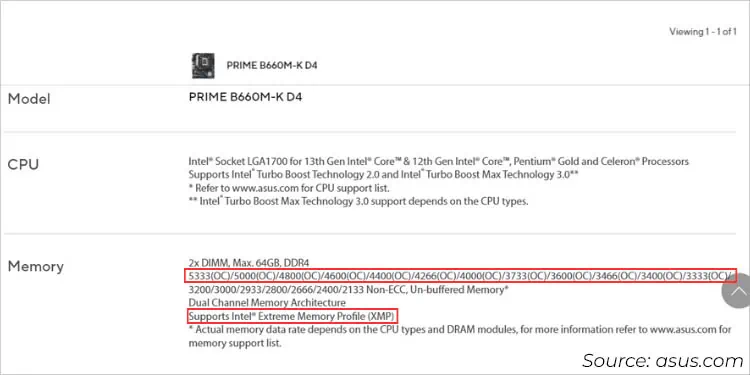
- The next thing to check is your motherboard’s specifications page. Confirm whether it supports XMP and also note the OC speeds it can handle.

- Amongst all, the most important one is your processor. While unlocked Intel processors (those having suffixes K and X) are XMP-ready, even some non-K series support it. So, take a peek at its specifications to ensure your processor is compatible as well.
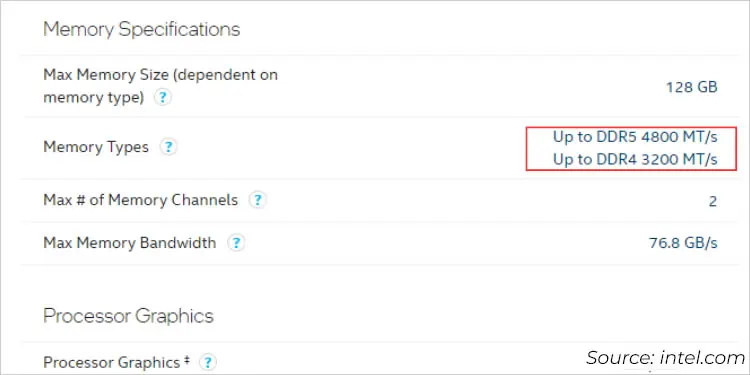
- While you’re at it, inspect your CPU’s maximum supported frequency to confirm whether it can handle the rated RAM frequency. If it doesn’t, you may be limited to the memory speed supported by your processor or even experience booting issues.

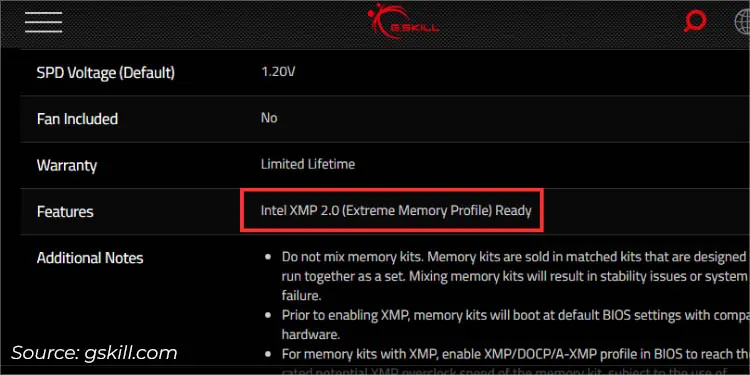
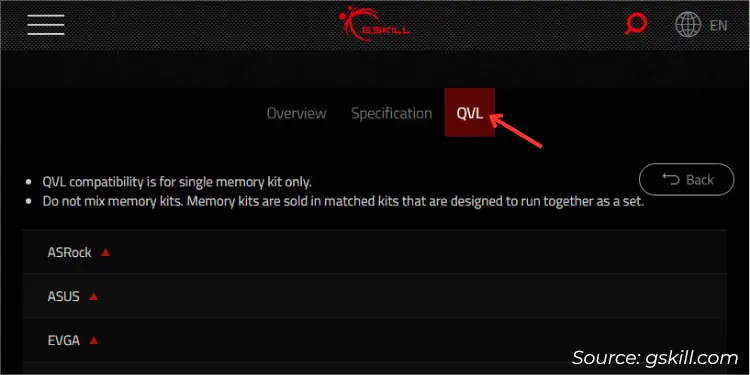
- Also, note that ASUS offers a dedicated Memory QVL for each model on their Download Center. It’s always a good idea to use DRAMs that are pre-tested by the manufacturers as they are guaranteed to support XMP.

Some trusted RAM manufacturers, like G.Skill, also include the Motherboard QVL list (as demonstrated below).
- However, the above point doesn’t mean memory modules not listed in the QVL won’t work on your system. But to be on the safe side, it’s best to follow what the manufacturer recommends.
Even when we tested multiple DDR4 sticks (Trident Z Royal 3600, VENGEANCE LPX 3200, and Crucial Ballistix 3200) that weren’t in the PRIME B660M-K D4’s QVL list, it worked out pretty smoothly.
While we were hesitant about the first module, it also worked without any issues even though the installed i3-12100 processor supports a maximum frequency of 3200.
However, this might not be the case for everyone. The same setup did lead to system crashes when our computer hardware experts, Anup and Abhishek performed XMP tests on their Gigabyte and ASRock boards.
From here, you can understand that memory overclocking isn’t the same on every system even if you’re using the same RAM models.
Get to ASUS BIOS

You can easily manage the XMP settings from your ASUS UEFI Utility. To get here, press F2 or Del key (as mentioned on the first logo screen) during the system startup.
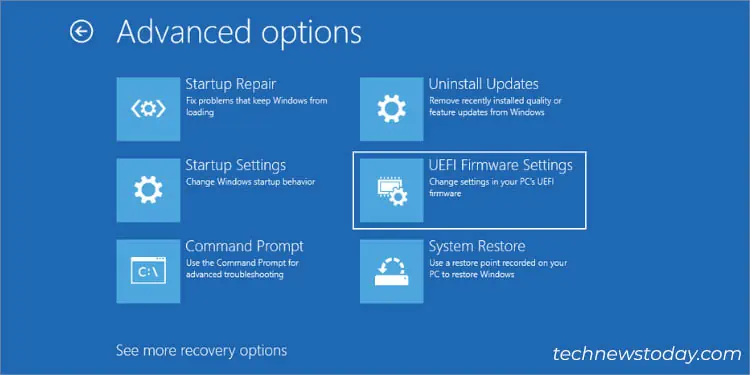
Often, we miss pressing the dedicated key or instead use an inaccurate one that boots up Windows. It’s completely fine–you do not have to reboot. Just get to the Advanced Startup Options, where you can select Troubleshoot > Advanced options > UEFI Firmware Settings.
Look for XMP Option
After entering ASUS BIOS, you’ll get to either of these startup modes–EZ or Advanced. No matter where you are, you can tweak the XMP settings from either of them.
Since XMP is an Intel technology, you might not find this feature on most ASUS AMD boards. Instead, they integrate an alternative feature called DOCP (Direct OverClock Profile). Even my PRIME B-450 PLUS and ROG STRIX B-450F GAMING mobos include the same option.
On some newer models, you might even find EXPO (EXtended Profiles for Overclocking). Despite different terminologies on Intel and AMD motherboards, the steps remain identical.
On EZ Mode
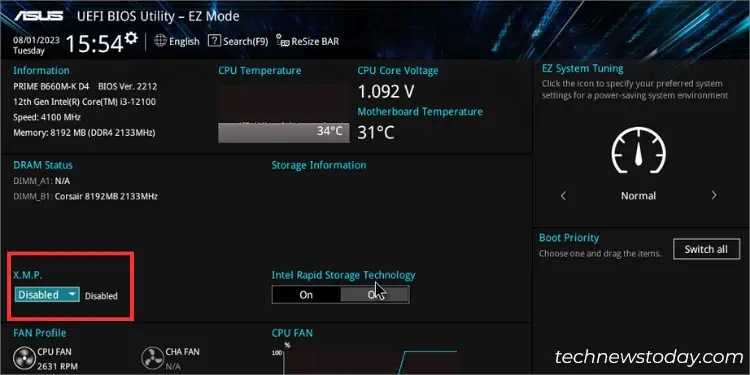
In most ASUS systems, like my PRIME B660M-K D4 motherboard, you’ll enter the EZ mode. While it’s possible to switch to Advanced (using F7), you don’t necessarily have to.
As demonstrated in the above snap (inside the red rectangle), that’s exactly where the related settings lie. But if you have an AMD board, you’ll get the DOCP or EXPO option in the same spot, instead of XMP.
On Advanced Mode
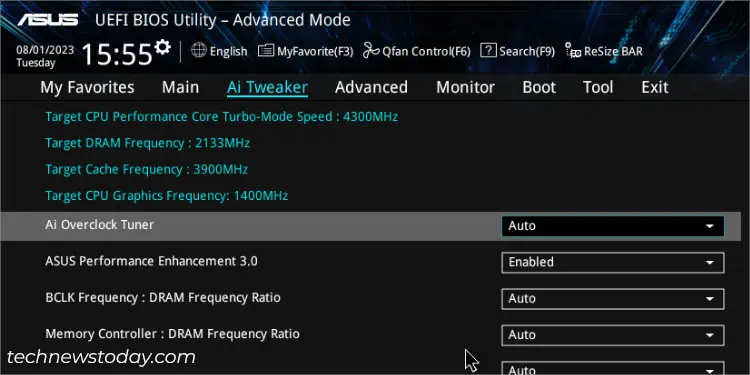
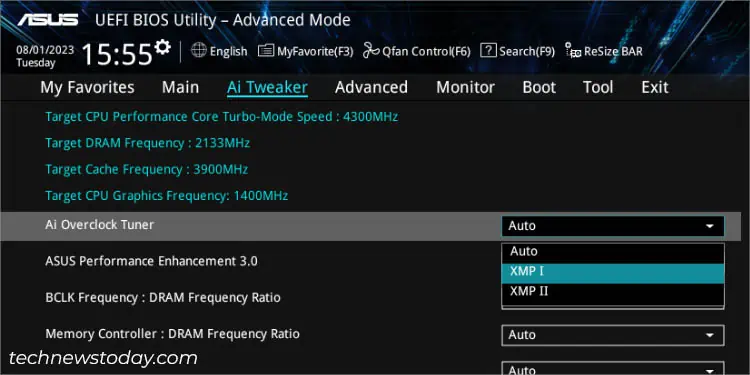
If your BIOS booted up in Advanced Mode after POSTing, you might have a hard time locating the exact option. Until and unless you don’t select the XMP profile on Ai Overclock Tuner, you won’t find it.
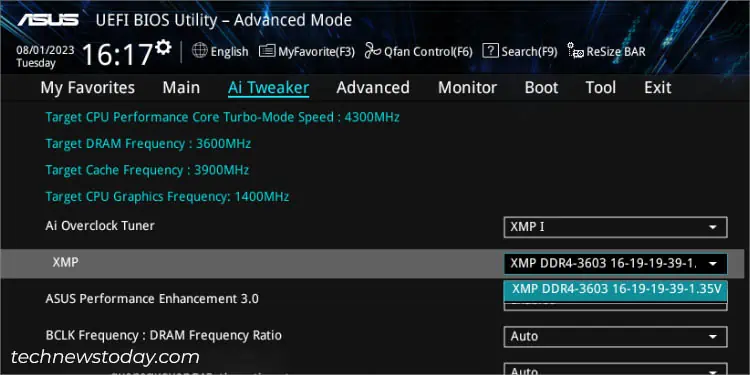
From the ‘Main’ tab, switch to Ai Tweaker. Right below the Target CPU, Graphics, DRAM, and Cache frequencies, you should find Ai Overclock Tuner.
Enable XMP Profile
Caution: Since you’re pushing your RAM’s clock frequency and voltage beyond the JEDEC specifications, your product’s warranties might get void. This case especially applies to processors that may run above their specified memory limit.
Most RAM sticks that we have used here in our TNT office offer just one XMP profile. Despite my PRIME B660M-K D4 BIOS integrating two, all the parameters (voltage, frequency, and timings) are identical. Even after testing with different DDR4 models, the case remained the same.
What I can confirm is that only a few high-end RAM sticks support two profiles. Even if there’s a second one on yours, it doesn’t have a guard band and is meant for maximum/extreme performance (which might not be supported on every ASUS system).
Since you’re already trying to avoid manual overclocking, my suggestion would be to opt for the first one. This one comes from the Intel Extreme Memory Certification program and should work without any hitch.
On EZ Mode
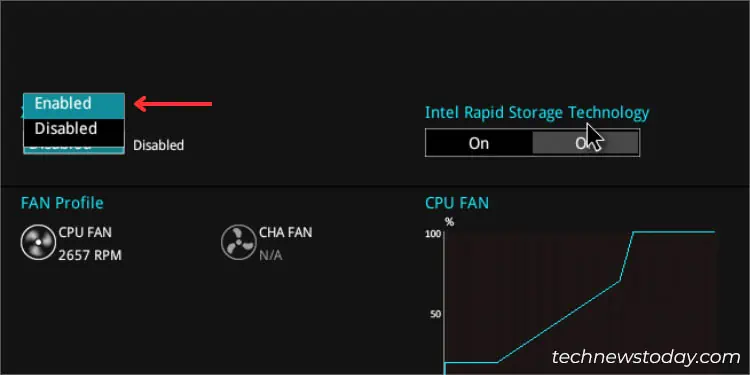
- Expand the X.M.P. drop-down as shown below.

- Select Enabled.
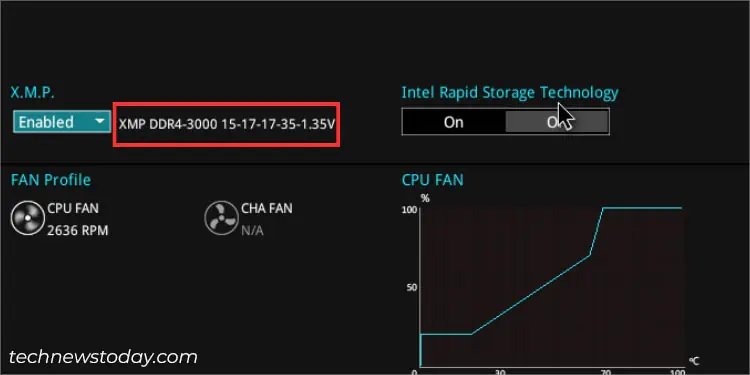
- Now, the targeted parameters should appear on your right. Here’s what I got after enabling XMP on the CORSAIR VENGEANCE DDR4 stick:

On Advanced Mode
- Expand the Ai Overclock Tuner as explained earlier.

- Choose XMP I and the dedicated XMP section should pop up.
- Normally, there’s only one profile and it should be set automatically. To verify, you can expand the drop-down to see if there’s another configuration available.

Save Changes and Exit
Your RAM’s clock speed, timings, and voltage won’t kick in immediately. So, the next step is to save the changes and reboot your system.
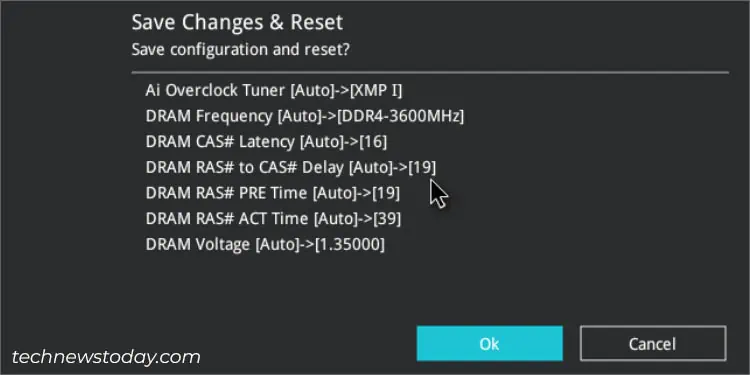
I do this by pressing the F10 key, whether it be on EZ or Advanced mode. After that, a confirmation prompt should pop up where you can check the settings that are going to be applied once you restart your ASUS PC. Press Ok to save the changes and exit the BIOS mode.
Verify XMP Settings
Everything is not done and dusted just yet. Your final task is to check whether the ASUS system runs smoothly with the newly applied XMP settings.
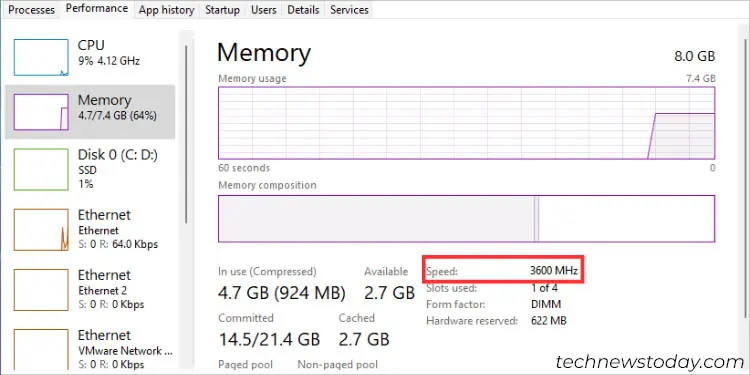
First, verify whether you’re getting the advertised speed. You can do this from BIOS, Windows Task Manager, or even using third-party tools like CPU-Z, HWiNFO, AIDA64, etc.
In fact, it’s even a good idea to perform a memory stress test to check how the XMP profile performs under heavy load. In case your system fails or you face instabilities, it would be better if you switch back to the factory settings and recheck the compatibility specifications that I discussed in the first step.
Don’t forget that you can even opt for manual memory overclocking. This involves finding the right balance between voltage, frequency, latencies, and timings. Follow my comprehensive guide on how to overclock RAM on any system.

