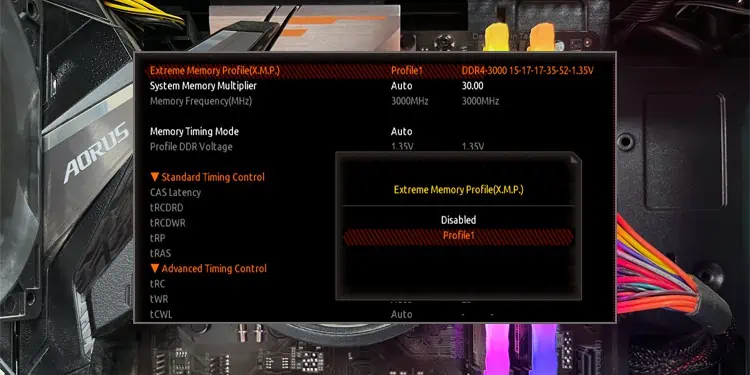
If you feel like you’re not getting the full performance out of your Gigabyte system, one of the first things you should check is the XMP setting in your BIOS. Think of it as a one-click overclocking tool for running your RAM at higher speeds.
You can enable an Extreme Memory Profile (XMP) from the Advanced Memory Settings section, or from the Tweaker tab in the BIOS. On some Gigabyte boards, this setting might also be labeled as EOCP (Extended Over Clock Profiles). On newer AM5 socket based Gigabyte boards, this setting might also be labeled as EXPO(Extended Profiles for Overclocking).
As XMP is preconfigured with tested values, you can generally use the profiles without a hitch. But on a couple of systems that I tested, the profiles set the RAM frequency higher than what was supported by the CPU. This ultimately meant that the config reset and XMP didn’t work.
Check XMP Compatibility
To ensure you don’t encounter any compatibility problems like the one I mentioned above, you could verify that your components support XMP from the product’s specifications page.
The motherboard and RAM obviously need to be XMP-capable. Additionally, your CPU must also support the RAM frequency defined in the profile.
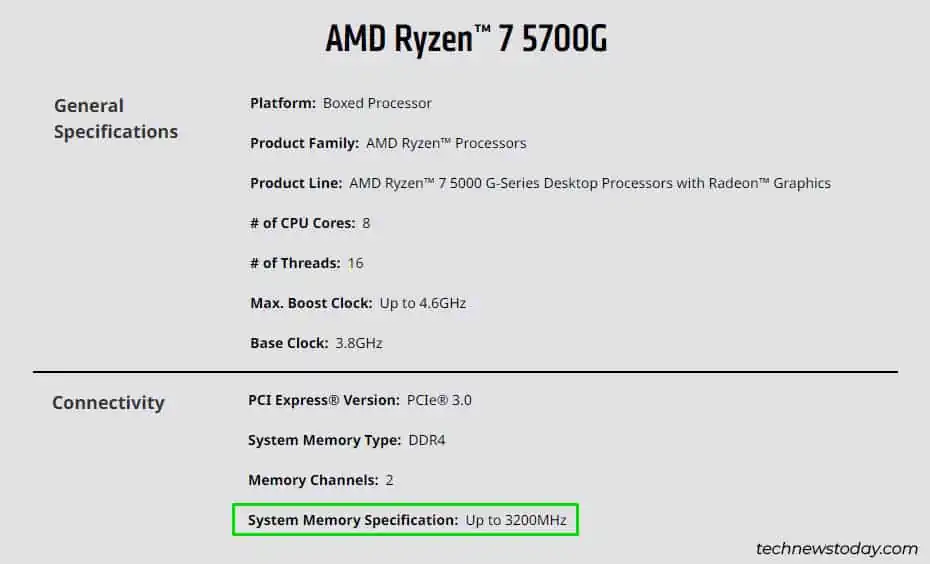
That last part is a bit tricky. For instance, my Ryzen 7 5700G is rated to support RAM speeds up to 3200MHz. High-performance DDR4 modules are commonly rated to speeds like 3600MHz or 4133MHz.
After testing XMP on multiple systems, I found that some CPUs (including my own) would work smoothly with higher frequencies like 4133MHz. Others would only support the officially supported frequencies or lower.
The takeaway here is that if XMP sets the RAM frequency to a value supported by your CPU, you can enable it without worrying. But if it sets the frequency to a high value, your CPU may or may not support it.
If the XMP config is not supported, it may revert back after restarting. If that doesn’t happen automatically and your PC fails to boot, you can reset the BIOS manually to set everything back to default.
Boot to BIOS/UEFI
While there are various ways to configure XMP, doing so via the BIOS is the standard method. On Gigabyte boards, press Del/F2 when booting to access the BIOS/UEFI Setup utility.
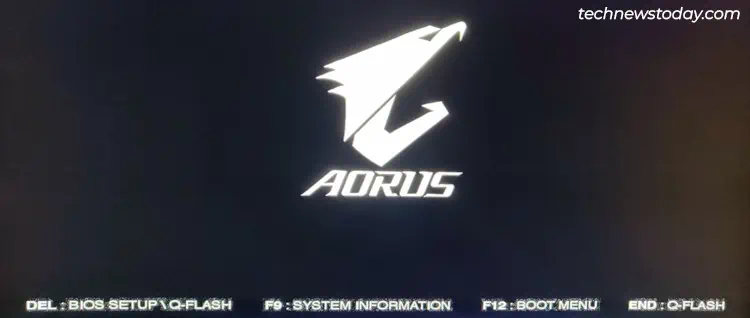
Alternatively, you can also restart your PC 3 times consecutively to boot to the recovery environment. There, you can select Troubleshoot > Advanced Options > UEFI Firmware Settings.
Locate XMP Option
The Gigabyte BIOS has two UIs that you can switch between with the F2 key – Easy Mode and Advanced/Classic Mode.
In Easy Mode, you can configure XMP from the DRAM Status section.
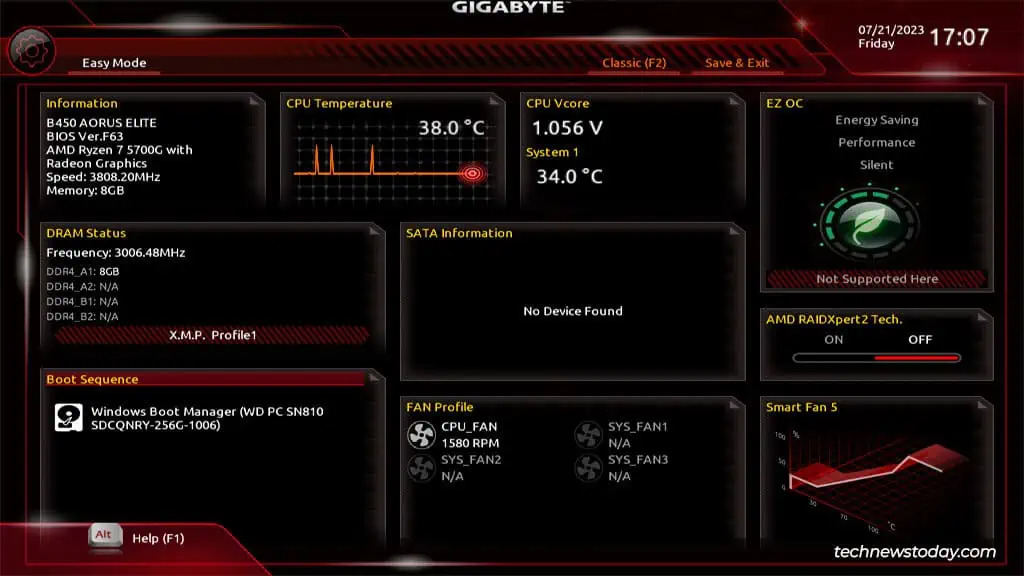
While this is convenient, most users should configure XMP from Advanced Mode instead as that gives you a much better idea of what you’re doing. In Advanced Mode, go to the M.I.T. tab and open Advanced Memory Settings.
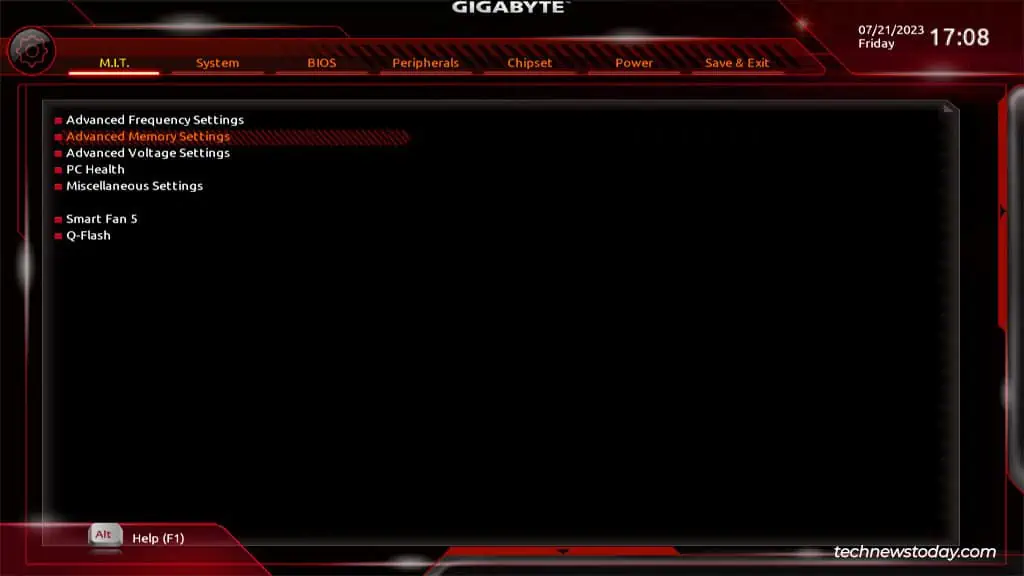
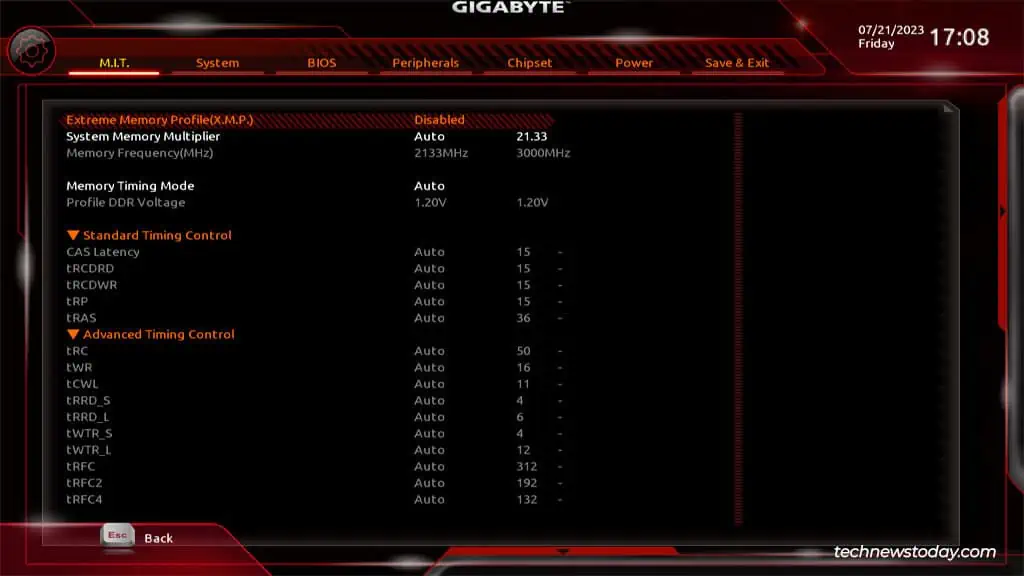
You’ll find the Extreme Memory Profile (X.M.P.) option here.
The BIOS UI is slightly different on higher-end Gigabyte boards like the AORUS Z690. On such boards, you can configure XMP from the Tweaker tab.
Enable XMP in BIOS
Depending on the RAM module, you may be able to choose from multiple profiles (different preset configs) or just one.
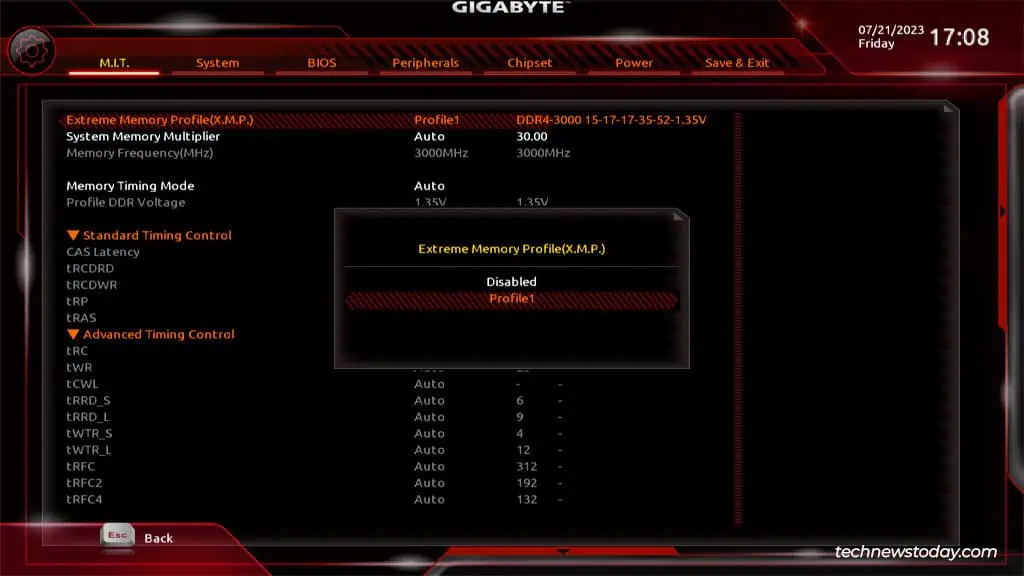
You can scroll down and check the frequency, voltage, and timings set by the profile you just enabled.
Afterward, press F10 to save the changes and exit.
Test Performance and Stability
Last but not least, you must make sure that the new config is stable. The first test will happen right after you exit the BIOS and restart.
If the XMP profile is at least supported, your PC will boot as usual. If it’s not supported, the config should reset automatically. In case that doesn’t happen and your PC doesn’t boot, you can reset the BIOS manually as mentioned earlier.
There are two ways to proceed at this point.
- If XMP worked, you can use your system as usual and observe the performance improvements. You can even stress test the RAM to ensure the system is stable.
- If XMP didn’t work, you can try a different profile that’s set to a lower overclock. If additional profiles aren’t available, you can look into manual overclocking. We have a detailed guide on overclocking the RAM with step-by-step instructions if you decide to go this route.

