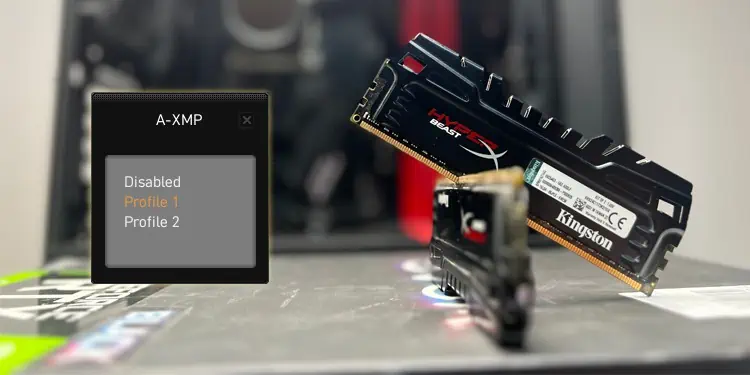
Extreme Memory Profile (XMP) is an auto-overclocking feature that lets you use pre-tested memory timings and frequencies (stored as profiles) to improve RAM performance.
By default, RAM modules run at much lower speeds than they’re capable of. So, it’s crucial to enable an XMP profile after you install new RAM modules.
In MSI Motherboards, you’ve got the standard XMP profiles from Intel. Most AMD boards call it A-XMP, while newer AM5 boards also support EXPO profiles. Additionally, MSI also provides extra memory profiles through their proprietary feature called Memory Try It.
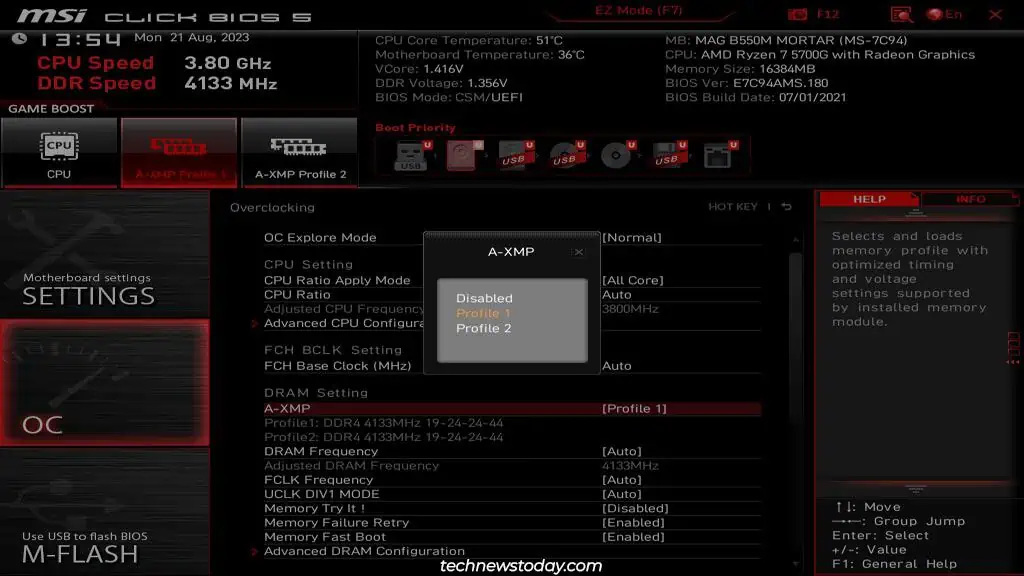
You can enable all of these XMP variations from the Overclocking (OC) tab of the MSI BIOS. I’ll cover the full steps to do this and include all the important details regarding XMP in this article.
Access MSI BIOS Interface
You’ll need to enter the MSI BIOS to configure settings like XMP. The easiest way to do this is by pressing the BIOS key (Del/F2) when booting.

If you’ve enabled certain features like Fast Boot, this key may not work. In that case, you can use the restart button to reboot your PC 3 times in a row.
This’ll boot the system to the recovery environment. There, select See advanced repair options > Troubleshoot > Advanced Options > UEFI Firmware Settings.
Enable XMP in the BIOS
XMP/A-XMP EZ Mode
In EZ Mode, open the Memory tab to see the values each profile will set.
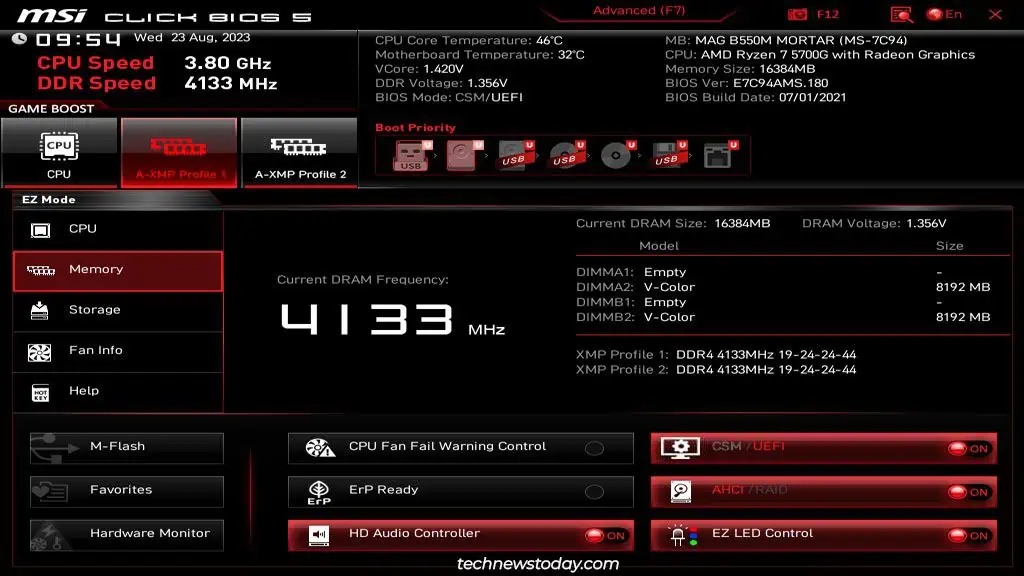
XMP Profile 1 usually provides the advertised speeds and that’s the one you should go for. But if the system is unstable or you’re uncomfortable with the voltage levels, you can always downgrade to XMP Profile 2 instead.
In either case, select the XMP profile to use from the top left. Then, press F10 to save the changes and exit the BIOS.
XMP/A-XMP Advanced Mode
A lot of RAM modules only support one XMP profile, and the second will just be a duplicate. This was the case with my B550M Mortar system running dual SK Hynix V-Color 4132MHz sticks.
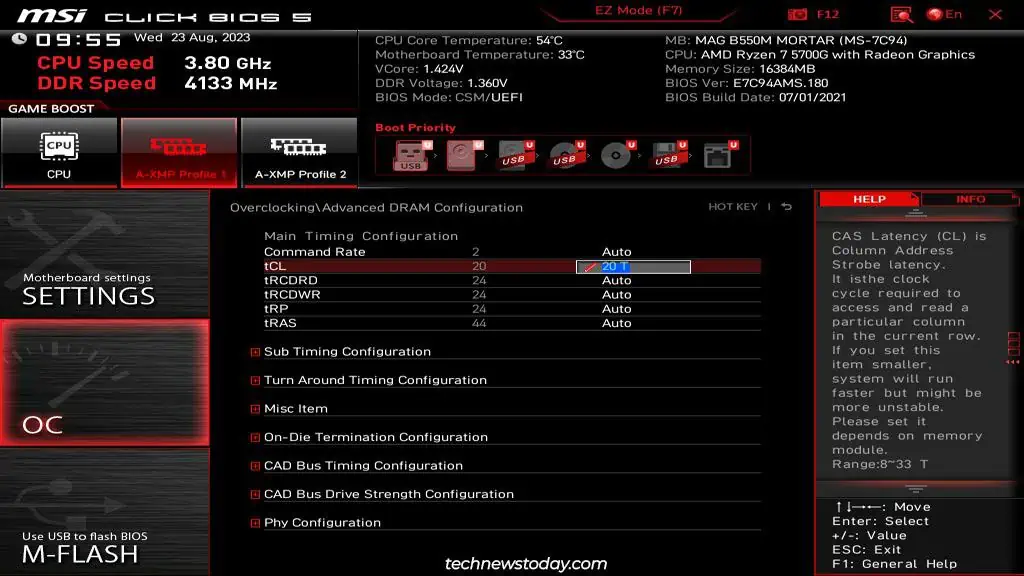
After enabling the XMP profile and getting 5 different BSODs in a row, I must admit I was a bit bummed out. But it wasn’t a big deal. I adjusted the RAM timings slightly in Advanced Mode, and my system was stable at 4133MHz.
- If you’re in a similar spot, press F7 in the MSI BIOS to switch to Advanced Mode.
- In the Overclocking (OC) tab, click on XMP/A-XMP and select the profile to use.

- This won’t be necessary for most people, but if the default values are unstable, go to Advanced DRAM Configuration and tweak the RAM frequency or timings slightly.

- Finally, press F10 to save the changes and exit.
EXPO
MSI’s latest AM5 boards like the MEG X670E GODLIKE support additional profiles called EXPO. The mileage with these varies a lot. Some users get the same results as XMP with EXPO profiles, while others can use higher frequencies, better timings, or lower voltages with EXPO.
If your components support EXPO profiles, I recommend giving them a try along with XMP. Then, you can choose whichever is better while also being stable.
The actual steps to activate EXPO profiles are the same. You can enable them from the same location as XMP both in EZ Mode and Advanced Mode.
Memory Try It!
Memory Try It is just more of the same. The upside to this feature is that you have a ton of profiles to choose from. The downside is that it’s not as reliable as XMP/EXPO (the voltages sometimes get too high leading to instability).
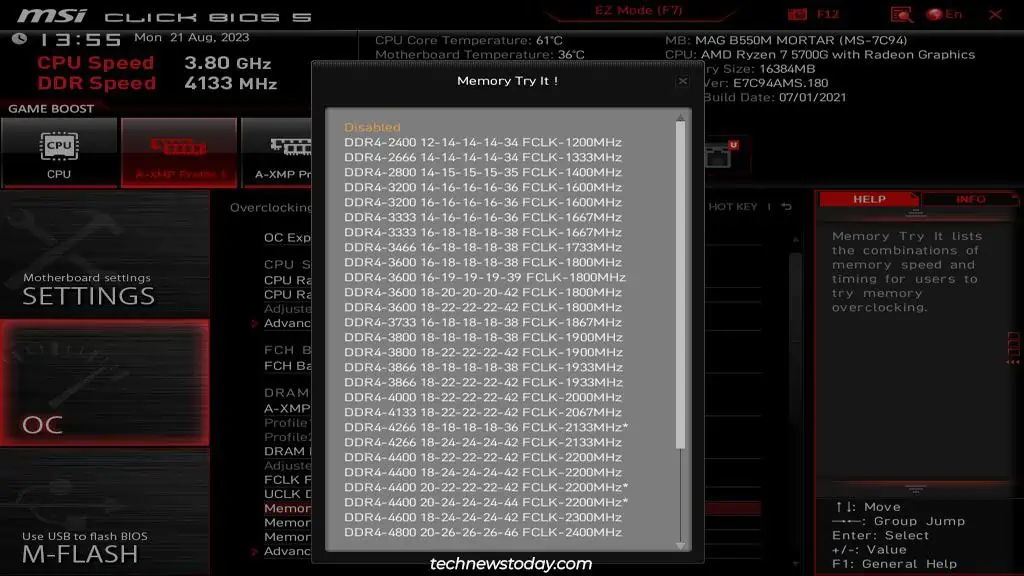
If the XMP profiles didn’t work on your MSI system and you want to check out Memory Try It, the steps are the same. Go to the OC tab in Advanced Mode, select a Memory Try It profile, and save the changes with F10.
After Enabling XMP
After activating XMP or any of its variants, it’s important to verify that your system is stable.
First, confirm that you’re using the XMP profile by checking the RAM speed and timings. You can do this by going back to the BIOS, using the Windows Task Manager, or system monitoring tools like CPU-Z.
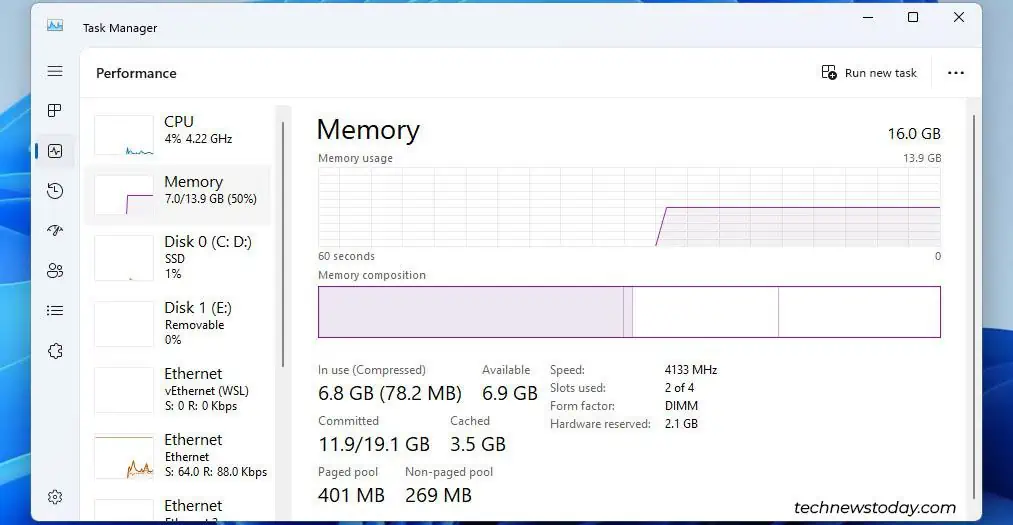
The first test is that your system boots with the XMP profile and runs fine during normal usage (no BSODs like in my case). The second test is to stress test the RAM to verify stability under heavy loads.
The values in the XMP profile need to be supported by your motherboard and CPU as well. If one of the components isn’t compatible with the XMP profile, the system will be unstable.
The official values (e.g., max 3200MHz for my Ryzen 7 5700G) are lowball numbers that are not reliable. So, the only way to figure out whether your system will work with XMP is to actually try it out.
If the system ends up being incompatible with XMP, you can look into manual overclocking instead. By finetuning the frequency, timing, and voltage, you’ll be able to run your RAM modules at much higher speeds compared to the default JEDEC memory standards.

