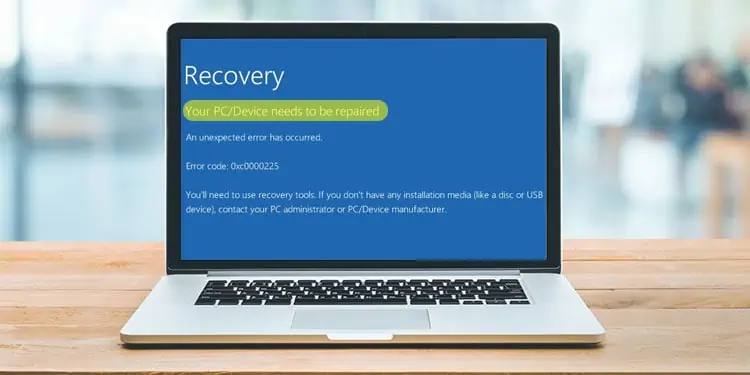
The “your pc device needs to be repaired” error occurs when your system files are corrupt. It will not let you boot into the system even if you force-restart your computer.
The BSOD suggests you to completely reset your computer or use a recovery drive. This might seem like you have no other choice but to reset. But, we’ve got your back. There are a lot of other ways to fix this issue, even without booting into Windows.
Why Does This Error Appear?
The main cause for this error is corrupt boot files. These boot files may get corrupt due to viruses, interrupted updates, or damaged boot sectors. Sometimes the blue screen also shows you the error codes. These error codes can help you recognize or narrow down the culprit for the issue.
How to Recover Data From Corrupt Drive?
When you hear about a corrupt system, you immediately think about your data and personal files saved in that drive. You may wonder if your data is lost forever. Regardless of your issue, you will be able to recover your data even with a corrupted system.
Here we will talk about how to recover your drive from an unbootable drive. If you only have a single disk partition, you may need another storage device to backup those files. After the preparations are complete, follow this step-by-step guide to learn how to recover the data.
- Turn on your PC.
- When the manufacturer’s logo appears, press and hold the Power button to force a shutdown.
- Repeat this step twice. On the third attempt, the pc will boot into the Windows Recovery environment.
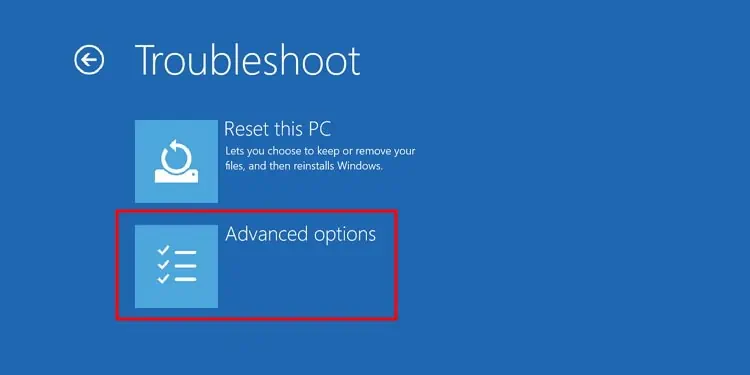
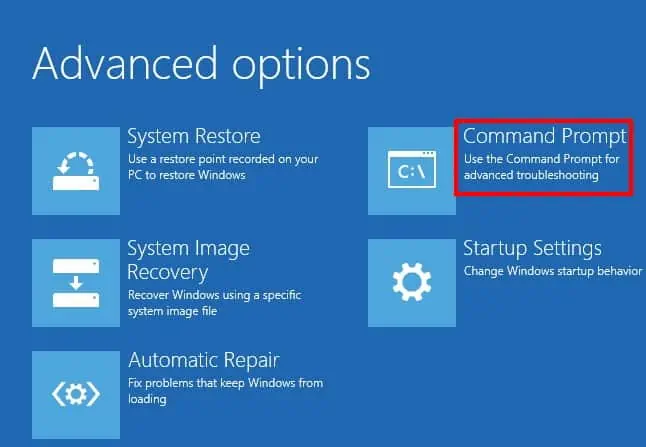
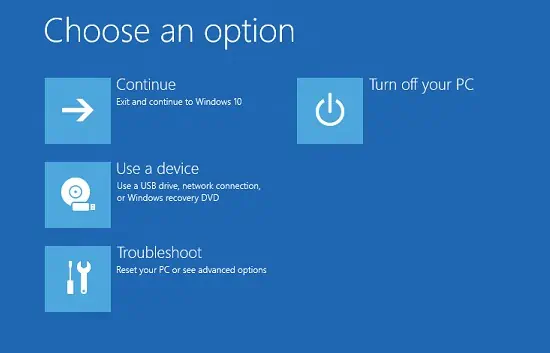
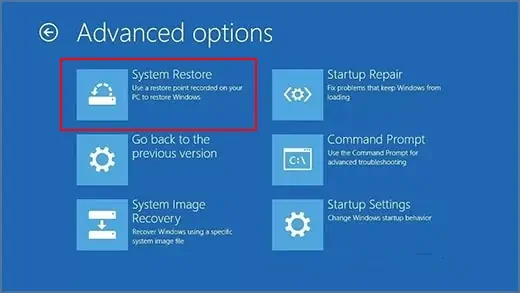
- Click on Advanced options.
- Then go to Troubleshoot > Advanced options.

- Click and open the command prompt. Your PC might reboot after this and ask you to input your administrator account password.
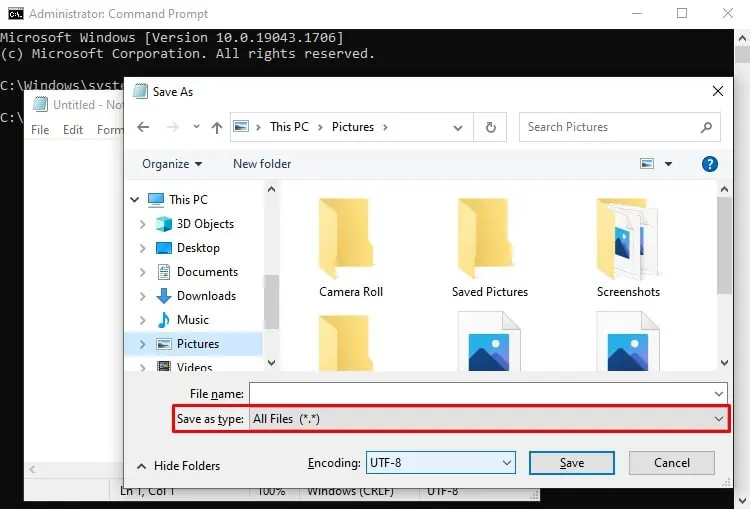
- Type ‘notepad’ and press Enter.
- Go to Files and click on ‘Save as.’
- Click on the dropdown menu under ‘Save as type’ and choose all files.

- Navigate to the location of your personal files. Right-click, press copy and paste it into your desired location.
How to Fix “Your PC Device Needs to Be Repaired”?
Since you cannot load your operating system because of corrupt boot files, generic fixes are not applicable here. However, it is not completely hopeless. There are a few ways to try and fix this issue.
Run Startup Repair
The startup repair is a recovery environment utility that tries to solve the issue that’s preventing the Windows from loading up correctly.
- Boot into the Windows recovery environment by following the above steps to 4.
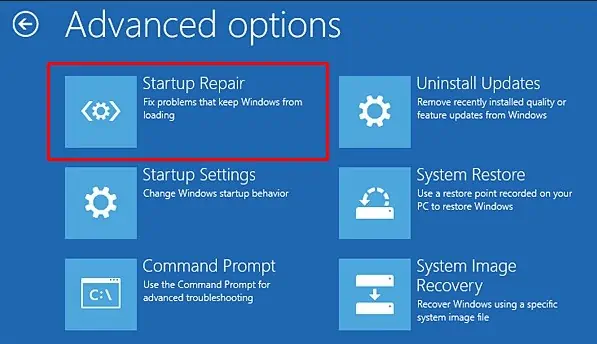
- Go to Troubleshoot > Advanced options.

- Click on Startup Repair

- Choose the administrator account and input the user account password to continue.
Fixing the BCD Boot Sector
Before you try to reset your computer directly from a drive, you can try forcing your computer into the recovery environment. Try these steps to know how:
- Boot into the recovery environment by following the above steps till step 5.
- Click and open the Command prompt.

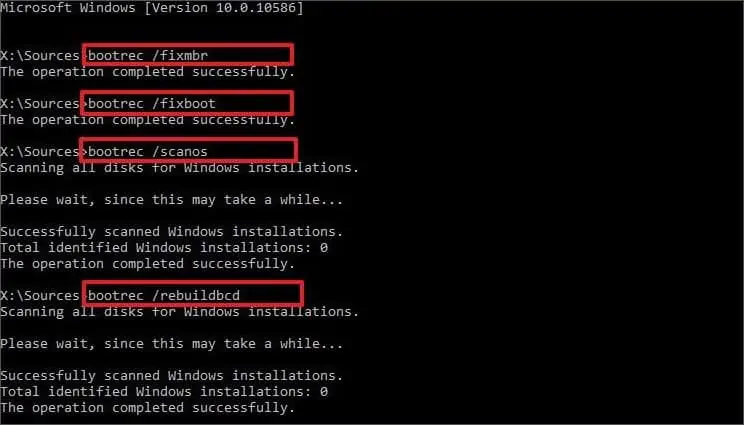
- Type these commands into the command line:
bootrec /fixMbrbootrec /fixBootbootrec /scanosbootrec /rebuildBcd
These commands will try to fix your corrupt boot sector.
- Type Exit after the process completes.
- It will redirect you back to the Recovery Environment, and choose ‘Continue’ to boot into your operating system.
If this solution does not work, you might have to reset your operating system.
Running the SFC/DISM
The Sfc/DISM tool is a repair tool that repairs corrupt system files. The SFC command checks and repairs based on your computer’s available resources. Whereas the DISM tool downloads files from an external source like the internet. It can check your computer’s system files and repair them for you if necessary.
- Boot into the recovery environment by following the above steps till step 5 and open the Command prompt.

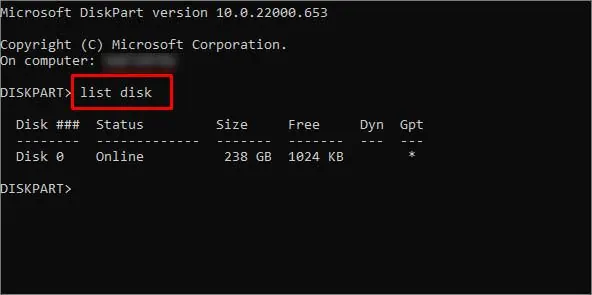
- Use the following commands to check what driver letter is currently assigned to your boot drive:
diskpartlist disksfc /scannow /offbootdir=C:\ /offwindir=D:\Windows
Replace C: with the Boot drive letter and D: \Windows with the path of the Windows folder.
This command will check for any corrupted system files and replace them. After the system is 100% complete, it will show you the results of the scan.- Then run the following command to run repair system image.
DISM /Online /Cleanup-Image /Restorehealth
System Restore / System Image Recovery
System Restore is a feature in Windows that basically lets your computer travel back in time. Windows automatically saves a ‘restore point’ when major updates are installed, or any changes occur in your computer. You can restore your computer back to that point.
- Open Recovery Environment like earlier and click on Troubleshoot.

- Go to Advanced options > System Restore.

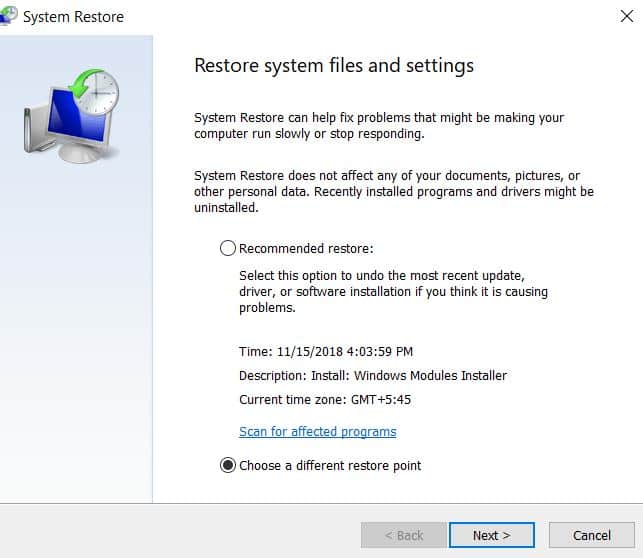
- The system restore wizard will pop up asking you to choose between the Recommended restore point or a different restore point. Generally, you can just move forward with the recommended point. But if you have a different restore point in mind, you can choose the ‘Choose a different restore point’ option and click Next.

- Click on Finish.
- It will then ask you to confirm starting the restoration process. Click on ‘Yes’ .
The restoration process might take some time to complete. Do not interrupt the power supply while this process is running.
You can also click on the system image recovery to restore the system to an older image of the computer system.
Using System Reset
If the above-mentioned steps don’t work, you might have to reset your pc as a last resort. Since we’ve already taught you how to recover your files, resetting the PC should be a no-brainer. However, you might have to reinstall all your programs.
- Boot into the Windows Recovery Environment by following the steps above up to step 4.
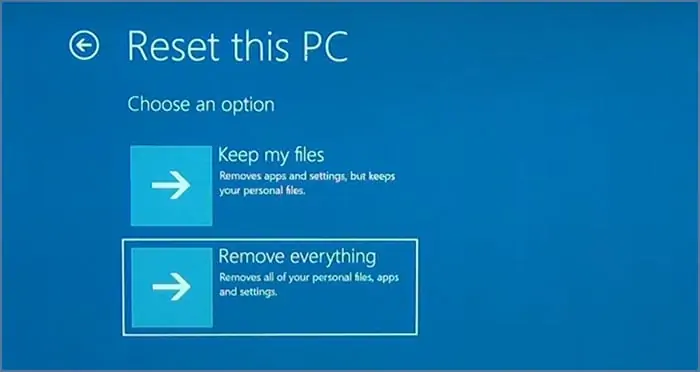
- Click on Troubleshoot > Reset this PC.
- Choosing the options here won’t matter much if you’ve already backed up your data. Choose ‘Remove everything.’

- It will then ask you if you want to clean the drives as well. Click on Just remove my files and continue with the reset process.
Alternatively, you can also use an installation media to install a fresh new copy of Windows. These steps will guide you on how to do it:
- Insert the installation media on your computer.
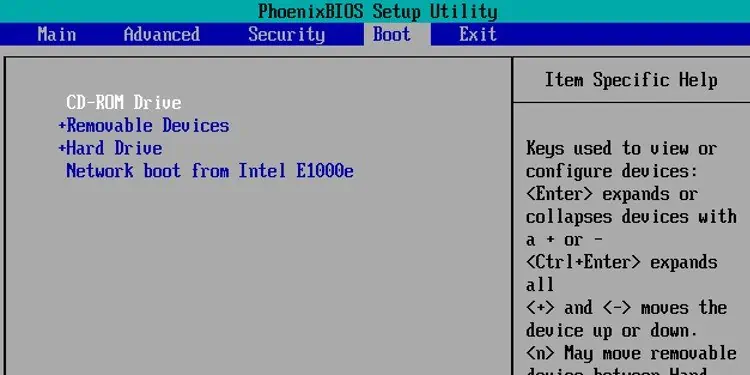
- Open system BIOS at startup by repeatedly pressing the BIOS Key (Fn keys or Del).
- Go to Boot options.

- Change the boot priority to put the installation disk as the first priority. This will cause the pc to boot into the Windows installation wizard.
- Follow the instructions on the wizard to complete the installation process.

