Are you facing multiple crashes or freezes on your Zoom application? This issue can become a nuisance when you are supposed to deliver an important work presentation. Sometimes, reasons like system overload, and even weak internet can cause unexpected crashes.
So, if you’re struggling to get your Zoom app up and running, you have come to the right place. Let us take a look at the causes and fixes for this issue.
Why Is My Zoom App Crashing?
Here are some of the reasons why the Zoom application can suddenly crash:
- Zoom and Computer Settings: Zoom and computer settings can be set in the wrong configuration, resulting in multiple crashes.
- Hardware: Zoom requires a certain amount of storage and updates on the computer operating systems to function.
- System Overload: If you use multiple background apps that require the same components as Zoom.
- Outdated App: Bug and system errors might prevail in the older versions of the app.
- Internet Connection: An unstable internet connection may be the main reason for your app to crash.
How to Fix Zoom Crashing?
Before we move on to the fixes for the issue, make sure you restart your device. Sometimes, a quick restart can help solve your crashes. Also, make sure that you close all background applications that use the same features as Zoom.
If the issue is still recurring, here are some of the listed troubleshooting methods to stop your Zoom app from crashing.
Configure Zoom Settings
Although the Hardware acceleration feature is beneficial for your device, this feature may cause issues if there’s low hardware storage. Therefore, we recommend you disable this feature.
You can follow these simple steps to do so.
- Open the Zoom app and Log in.
- Click on the gear icon in the upper right corner.

- On the left-hand side panel, click on Video.
- Click on Advanced in the bottom section.
- Disable Hardware Acceleration by unticking the box.

- Restart your computer to make changes effectively.
Erase Zoom Cache and Data
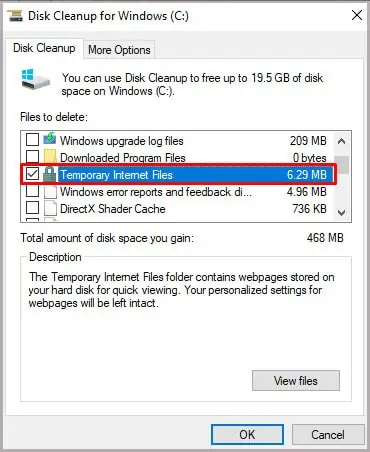
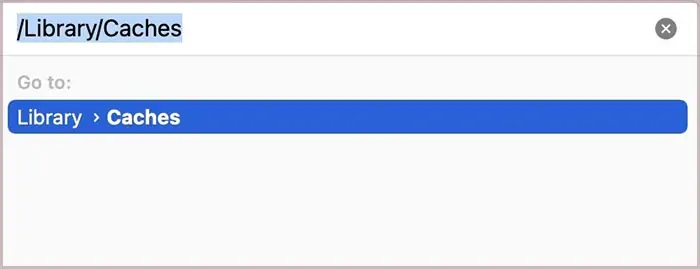
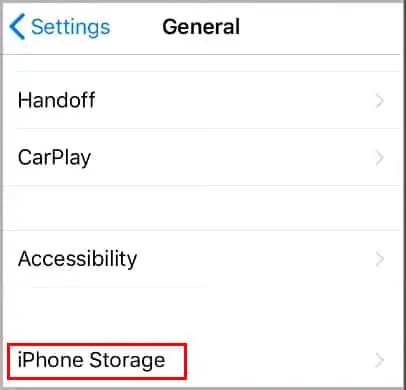
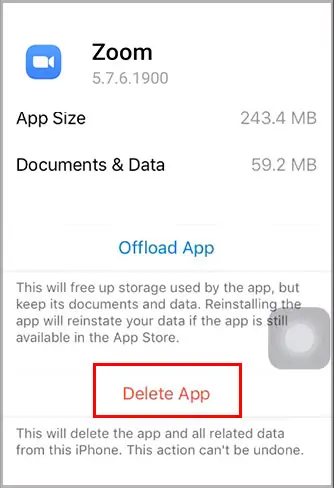
All your accumulated cache and data can get corrupted over time. These corrupted files can cause Zoom to crash. So, we recommend that you remove these junk files. Here is a simple step-by-step process on how to do it.
On Windows
- To the left of the taskbar, go to search and type Disk Clean Up.
- Select the operating drive which for most users is the C drive.
- Make sure you tick the checkboxes of Temporary Internet files and Temporary files.

- Click on OK.
On Mac
- Click on the shortcut command + shift + G to navigate to the Go to Folder.
- Type in ~/library/caches and hit enter to proceed.

- Make sure you remove the contents of the folder.
On iPhone
- Go to your Settings.
- Navigate to General and Tap on iPhone Storage.

- Choose the Zoom app from the list of options.
- Select on Delete App.

- Reinstall the app back from the App store.
On Android
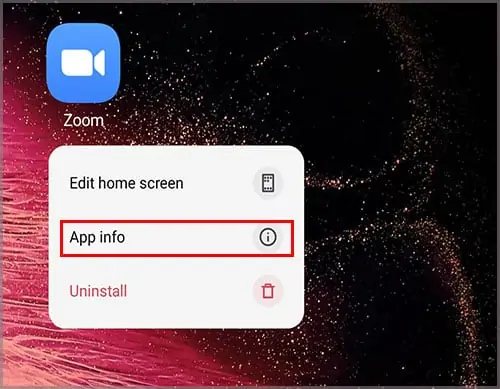
- Locate the Zoom app.
- Tap and Hold on the icon until you can see the options.

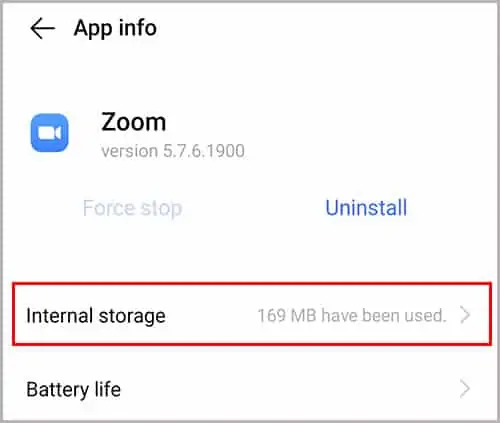
- Click on App info and tap on Storage.

- Tap on Clear Caches.

- Click on clear data and hit OK to confirm.
Once the app reset is finished, open up the app again and see if the problem is fixed.
Adjust Visual Effects
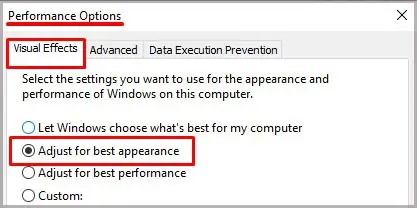
In the Windows 10 operating system, the visual effects allow you to add animation and other effects to your videos. But, this might cause your system to slow down. Follow these steps to disable this function.
- Go to the windows search box and type in adjust performance.
- Navigate to the Visual Effects tab.
- Make sure you only tick the Adjust for the best performance checkbox.

Rollback Camera Driver
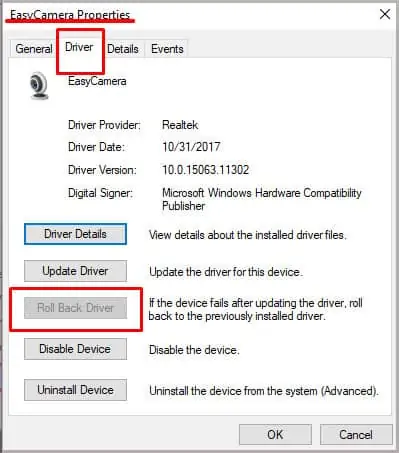
Rolling back the camera driver is another effective method to stop it from crashing. Here are some steps you can follow:
- Use the Windows key + R shortcut to open the “Run” command.
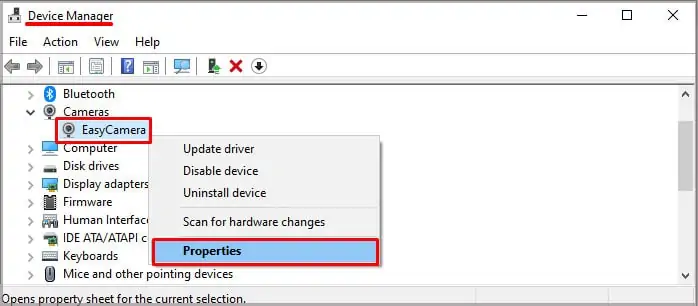
- Type in devmgmt.msc and click on OK.
- Scroll down and click on Cameras.
- Right-click on your camera and choose Properties.

- Navigate to the Driver Tab and click on Roll Back Driver.

- Choose your reason for rolling back and click on OK.
Run Zoom on a Dedicated Graphics Card
If you have two Graphic Processor units in your device, it’s best to use the dedicated one to use for Zoom. Sometimes, your default built-in graphics card is not strong to handle large applications like Zoom.
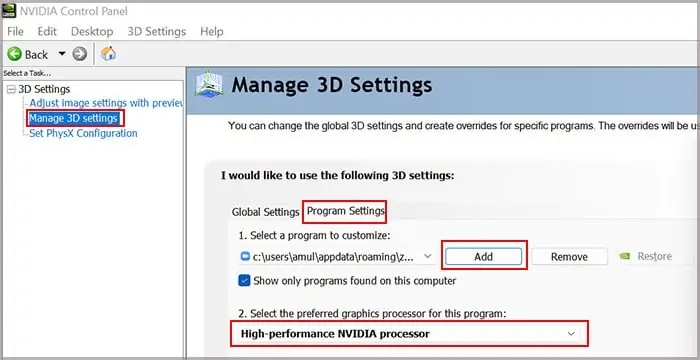
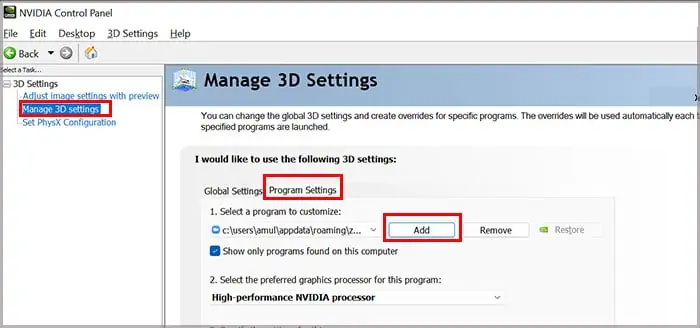
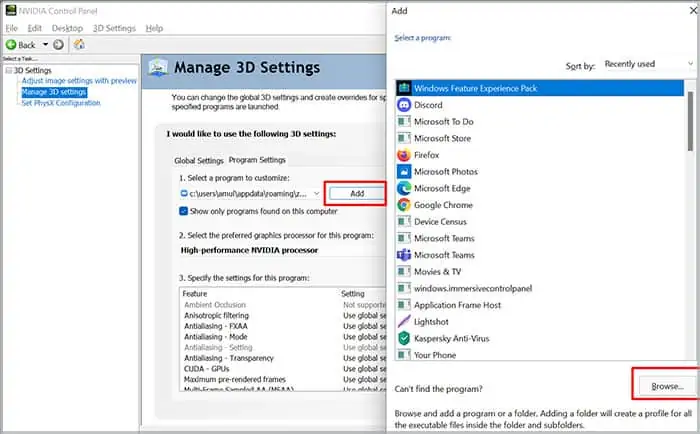
Here is how you can do it through the NVIDIA control panel.
- From your desktop, right-click on your home screen and select the Nvidia Control Panel.
- On the left panel, choose Manage 3D Settings.
- Click on Program Settings and choose the Add button.
- Chose Zoom Meetings from the list of options, and click on Add Selected Program.
- Choose the High-performance NVIDIA processor as your preferred graphics processor.

- Click Apply at the bottom right corner to make changes to your settings.
Update Your Windows and MacOS
Due to the lack of updates on your operating software in your computer devices, Zoom might not deem it compatible with its application. Make sure you always regularly update your computer operating software.
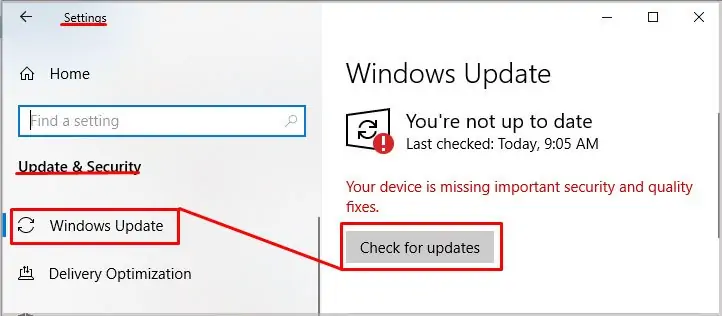
Here is a short guide on how you can do it through Windows and macOS operating systems.
On Windows
- Open up the start menu located in the bottom-left corner.
- Type in or search for Settings.
- Choose the Update & Security option.
- Click on the Check for Updates.

On Mac
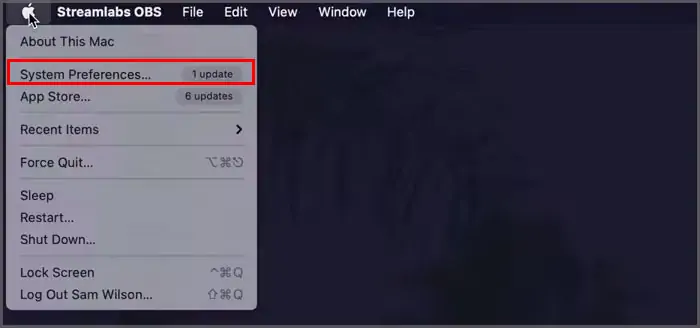
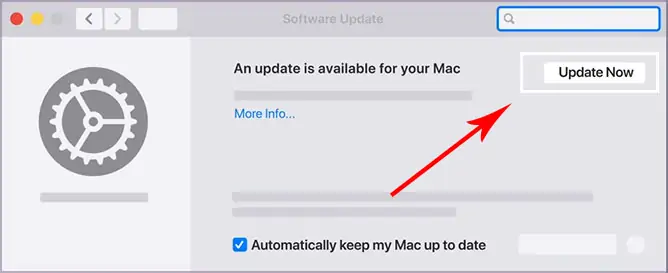
- Go to the Apple logo and click on System Preferences.

- Click on the Software Update Icon.

- Your computer will detect any software updates.
You can also automatically enable software updates by checking the “Automatically keep my Mac up to date” option.
Reinstall Zoom
If none of the above fixes work, you can also revert to reinstalling your Zoom application. Sometimes, default settings or bugs and errors in your current version can result in app crashes.
Here is an easy step-by-step guide to uninstalling Zoom on your devices.
On Windows
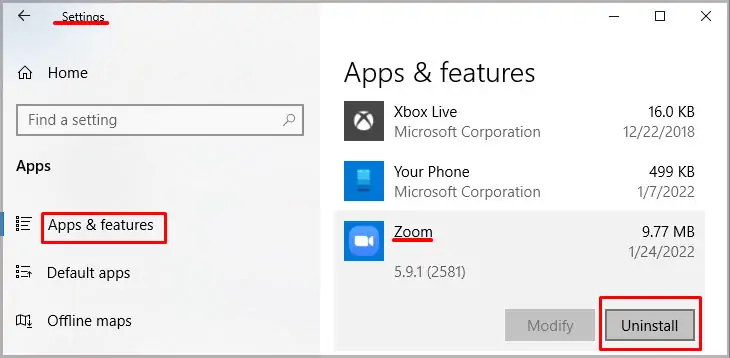
- Navigate to the Start icon and click on the Gear icon.
- Select on Apps.
- From the left-hand side panel, choose Apps and Features.
- Scroll down and find the Zoom App from the list of options.
- Right-click on the app and select the Uninstall option.

On Mac
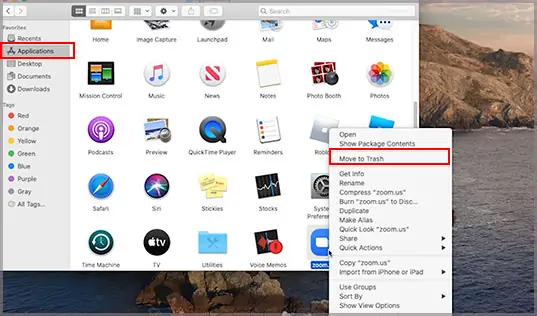
- Open Finder.
- From the left-side panel, click on Applications.
- Right-click the application and select Move to Trash Bin.

- Empty out your Bin.
After you have uninstalled the application, you can head on over to the official Zoom website and download the application according to your system software.
Frequently Asked Questions
How to Fix Zoom Quit Unexpectedly Error When Screen Sharing?
If you face a similar type of issue in your Zoom app, the best solution is to update your app to the latest version. Bugs and system errors in the older version might cause incompatibility issues. Make sure you also restart your computer devices.
Why Is My Zoom Video Showing a Black Screen?
If your Zoom video is showing a black screen, it is because of the automatic switching of the graphics card in your computer device.
Here is a step-by-step guide on fixing this issue on your Windows devices.
- Right-click on your desktop and select the Nvidia Control Panel.
- Select the Manage 3D Settings option.
- Click on the Program Settings.
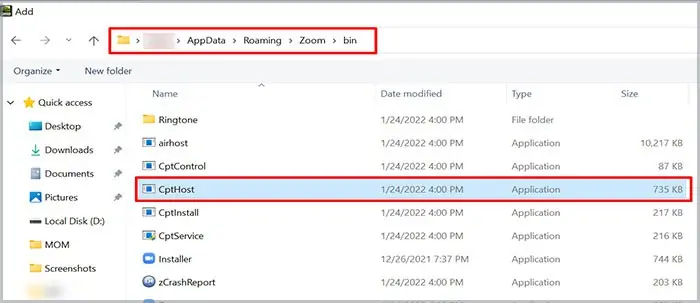
- Under Select a program to customize section, add the Cpthost.exe from the Zoom bin directory.

- Click on the Add button.
- On new window Click on Browse.

- Find Cpthost.exe from the Zoom bin directory (located at
C:/>Users>YOURUSERNAME>AppData>Roaming>Zoom>bin). - Tap on Add Selected Program.

- Underneath the Preferred Graphics Processor section, select Integrated graphics.
- Click on the Apply button and you are done!
How to Fix the Zoom App Video Crashing?
Before you make changes on your app or computer devices, make sure that no background apps have access to your microphone and camera. You can also give it a quick reboot. If the issue is still recurring quickly uninstall and reinstall your devices.

